Exporting Oracle Unity segments to Oracle DMP
To export segments to Oracle DMP, you will have to do the following:
After successfully creating, publishing, and running the DMP campaign, you can Access exported Oracle Unity segment data.
Create a DMP destination
The first thing you will to do is create a DMP destination.
To create the DMP destination:
-
Click the Oracle icon
 in the bottom-right corner to open the navigation menu.
- Select Destinations.
- In the top-right corner, click Create destination.
Step 1: Define destination details
The job details section allows you to define the type of destination and how it will display in Oracle Unity.
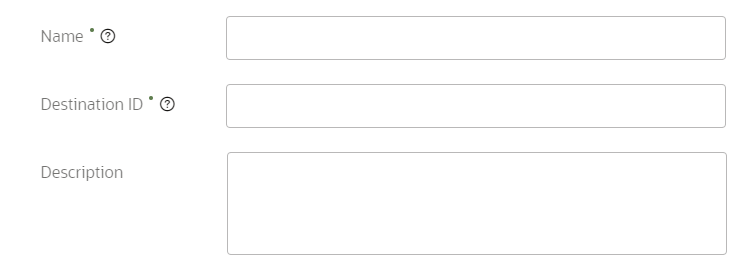
Enter the information for the destination.
- Type: Use the drop-down list to select DMP.
- Name: Enter a name. The name must be 1 or more characters, up to a maximum of 50. Use only letters (a–z and A–Z), numbers (0–9), underscores (_), hyphens (-), and spaces. The first character cannot be a space.
-
Destination ID: The unique system identifier that is auto-populated from the destination name you enter. You can't change this value after you create the destination.
- Description: Enter a description. This field is optional, but it is highly recommended to add descriptions for any entity created. This helps all other users get additional context when using and navigating Oracle Unity. The description can have a maximum of 512 characters with no restrictions on characters used. You can use characters from all languages supported in the language settings.
Step 2: Configure server settings
Important: When defining the authentication settings, make sure that one of the approved algorithms below is used to access the destination. If one of these algorithms is not used, Oracle Unity will not be able to successfully connect to the destination.
| Algorithm type | Algorithm |
|---|---|
| Cipher | aes256-ctr |
| Cipher | aes192-ctr |
| Cipher | aes128-ctr |
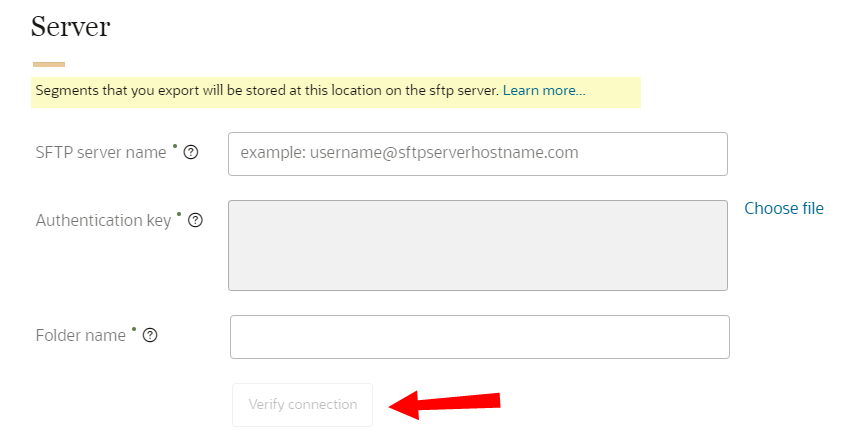
Configure the server settings for the campaign.
- SFTP server name: Enter the hostname for your organization's SFTP server. This field requires a user name and host name, formatted as username@sftp.bluekai.com.
- You will need a separate Oracle DMP account. The username you receive for this account should be used in the SFTP server name.
- The SFTP server will need to be accessible to Oracle DMP.
- Authentication key: Select the file that has the authentication key needed to access the SFTP server. Oracle Unity will process the file and display the authentication key.
- Oracle Unity only supports private authentication keys in RSA format. You can't upload a public authentication keys.
- To create an RSA authentication key, learn how to Generate SSH Keys in PEM Format to Connect to a Public or On-Premises sFTP Server from the Using the FTP Adapter with Oracle Integration Help Center.
- Folder name: Enter the path name to the folder on the SFTP server where Oracle Unity should export files to. You will receive the required folder name from the DMP onboarding team.
To enable the data transfer with Oracle DMP, keep the following in mind.
Once you enter all the details, click Verify connection to ensure that Oracle Unity can access the server.
If there are connection issues, it could be for one of the following reasons:
- An incorrect SFTP server name.
- An incorrect authentication key.
- An incorrect Folder name.
If you still encounter connection issues, contact your IT administrator for further investigation.
Step 3: Configure file settings
The files details section defines the format of the destination files.
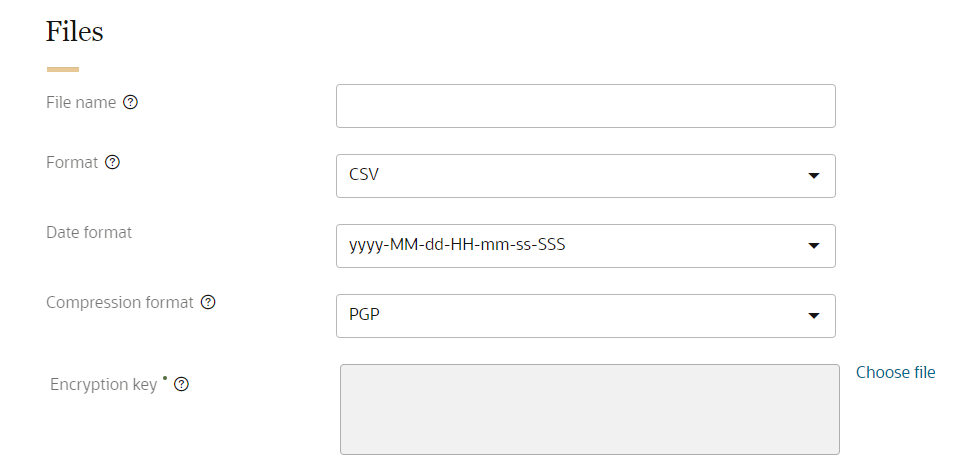
- File name: Enter the file name and extension to use for the exported files. A timestamp and file number will be added as a suffix identifying when the file was created. The timestamp will be in the format yyyy-MM-dd-HH-mm-ss-SSS. You can use characters from all languages supported in the language settings.
- Format: The format of the exported file must be in CSV format. Fields in the exported file will be separated by commas.
- Date format: The date format of the exported file must be yyyy-MM-dd-hh-mm-ss-SSS. A timestamp with this format will be added as a suffix to the exported file.
- Compression format: Select the compression format g-zip.
Example: If you enter the file name as Export_file_01, a timestamp will be added as a suffix and the file will be named Export_file_01_2021-05-12-12-56-12-926_0.csv. The timestamp is 2021-05-12-12-56-12-926. The "0" indicates it is the first exported file with the same timestamp.
Step 4: Save and publish the new destination
When finished defining the destination, scroll to the top of the page and click Save or Save and close.
Once you create the destination, you will need to publish the changes.
Create a DMP campaign
After creating and publishing the destination, you can create the DMP campaign.
To create the DMP campaign:
-
Click the Oracle icon in the bottom-right corner to open the navigation menu.
- Select Campaigns.
- In the top-right corner, click Create campaign.
The Create campaign page is displayed.
Step 1: Define campaign details
The campaign details section allows you to define how the campaign will display in Oracle Unity.
To define the campaign details:
- Enter the details for the campaign.
- Name: Enter a name. The name must be 1 or more characters, up to a maximum of 30. Use only letters (a–z and A–Z), numbers (0–9), underscores (_), hyphens (-), and spaces. The first character cannot be a space.
-
Campaign ID: The unique system identifier for your campaign. You can't change this value after you create the campaign.
- If the campaign name uses English characters, the Campaign ID field is auto-populated from the campaign name you enter. You can change this value before the campaign is created.
- If the campaign name uses characters from another language supported in the language settings, the Campaign ID field will be left blank. You will need to enter a name using English characters.
- Description: Enter a description. This field is optional, but it is highly recommended to add descriptions for any entity created. This helps all other users get additional context when using and navigating Oracle Unity. The description can have a maximum of 512 characters with no restrictions on characters used. You can use characters from all languages supported in the language settings.
- Click Continue.

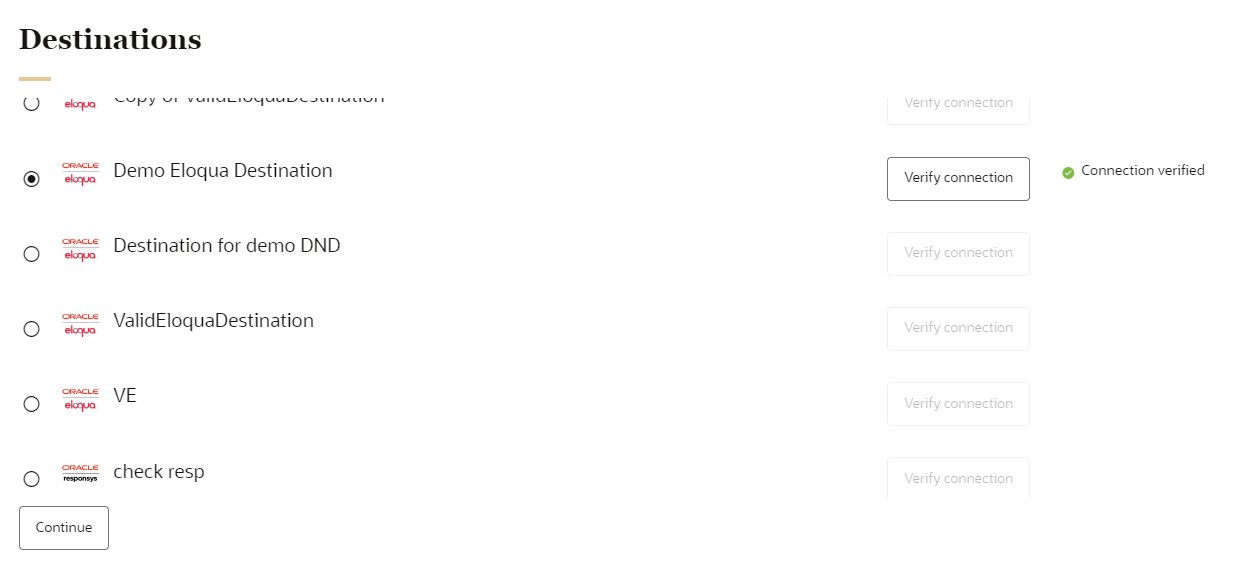
Step 2: Select destination
You will select the DMP destination you created earlier.
To select the destination:
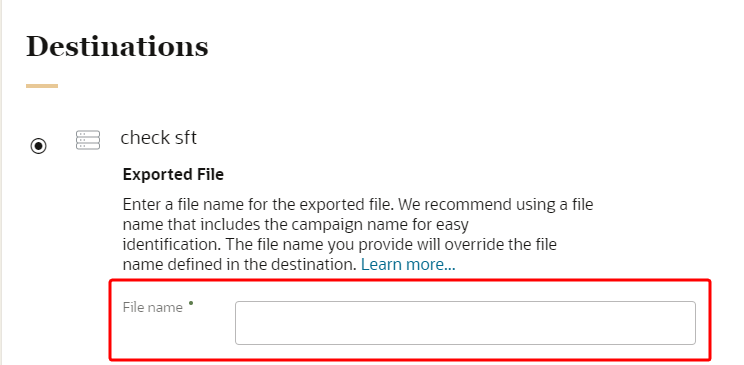
- Select the DMP destination.
- Enter a custom file name for the exported file.
- We recommend using a file name that includes the campaign name for easy identification.
- The file name you provide will override the file name defined in the destination.
- A timestamp will be added to the custom file name you provide in the following format: yyyy-MM-dd-HH-mm-ss-SSS. For example, entering the file name campaign_job_sale will generate the following file name in the destination when it runs: campaign_job_sale_2020-05-13-08-04-13-354_0.csv.
- Once you enter all the details for the destination, click Verify connection to ensure that Oracle Unity can access it.
- When you have confirmed all the destination details, click Continue.
Example: You create a destination with the file name sftpfile.csv and use it for the following campaigns: Repeat shopper segment, Summer sale segment, and Homeowner segment. When setting up the campaign jobs, you can create the following unique file names for each one: sftpfile_repeat_shopper, sftpfile_summer_sale, and sftpfile_homeowner. This allows you to quickly determine which segment was exported in each file.
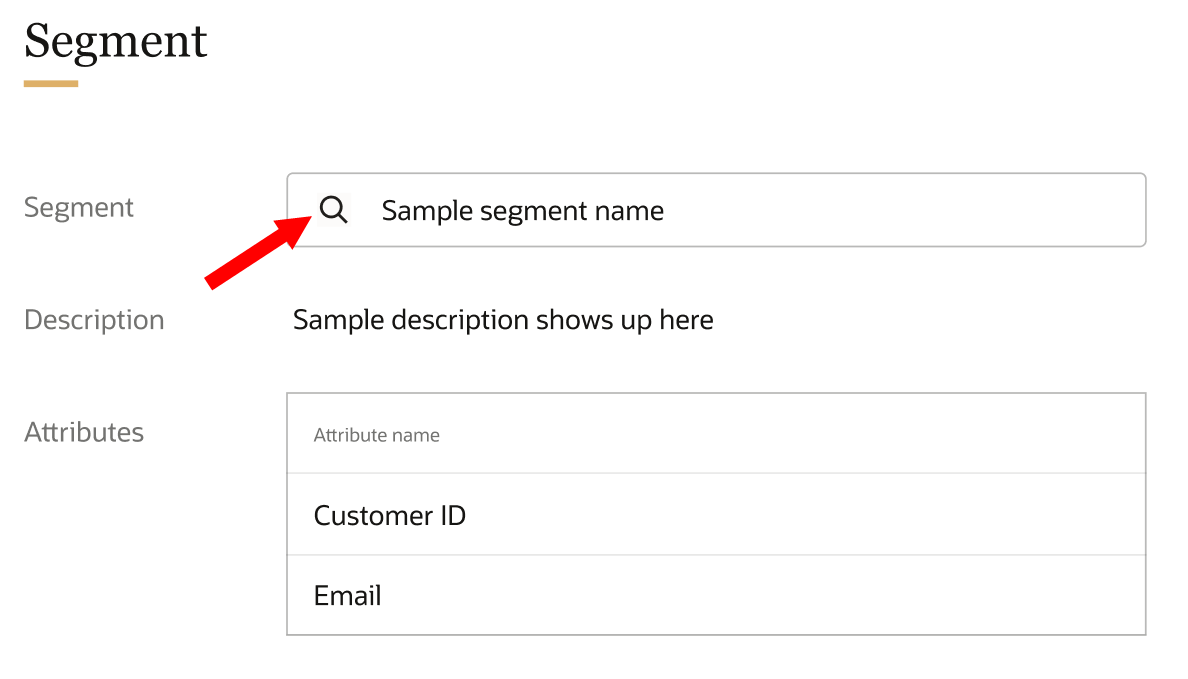
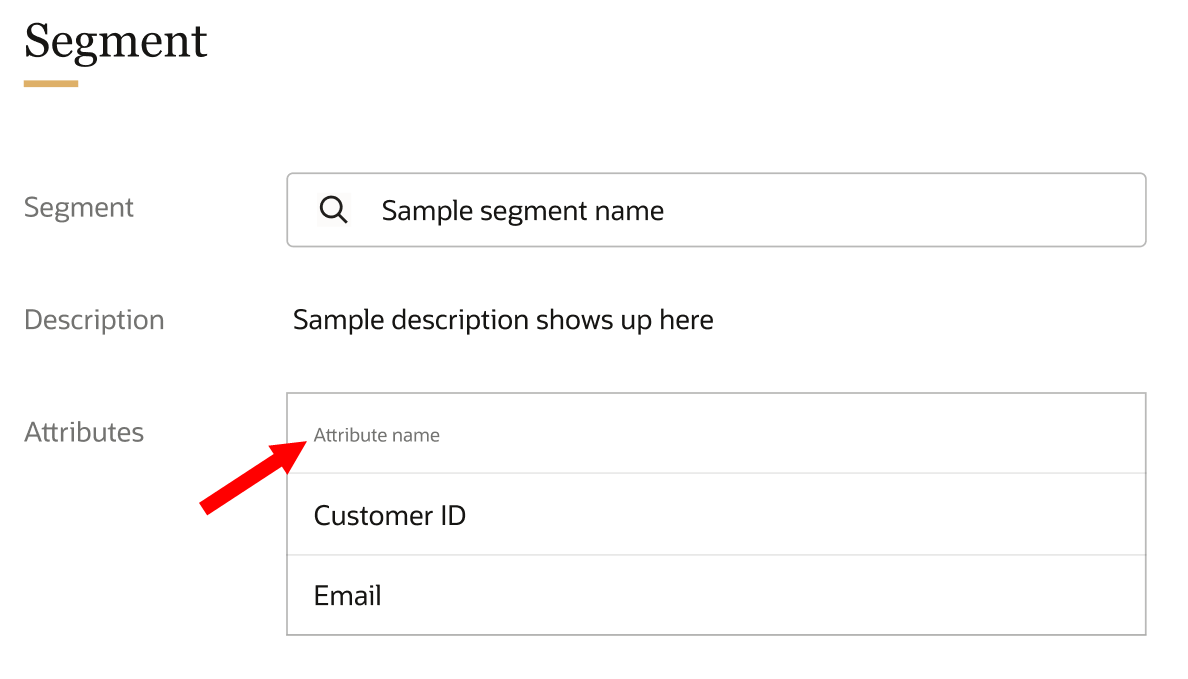
Step 3: Select segment
You will select the segment you want to export to DMP.
Warning: Make sure that the segment you select uses the HashedEmail attribute as a personalization attribute. If needed follow the steps for Managing segments and add HashedEmail as a personalization attribute. If HashedEmail is not a personalization attribute, the campaign will not be exported successfully.
To select a segment:
- Search for segments that have been created by entering the segment name and clicking
 .
. - Review the list of personalization attributes for the segment. To edit the list of personalization attributes, you will need to update the personalization attributes selected for the segment before creating the campaign. Learn more about Managing segments.
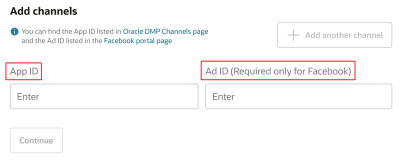
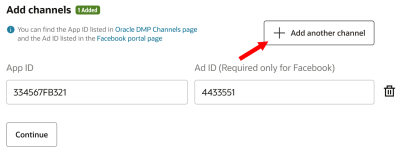
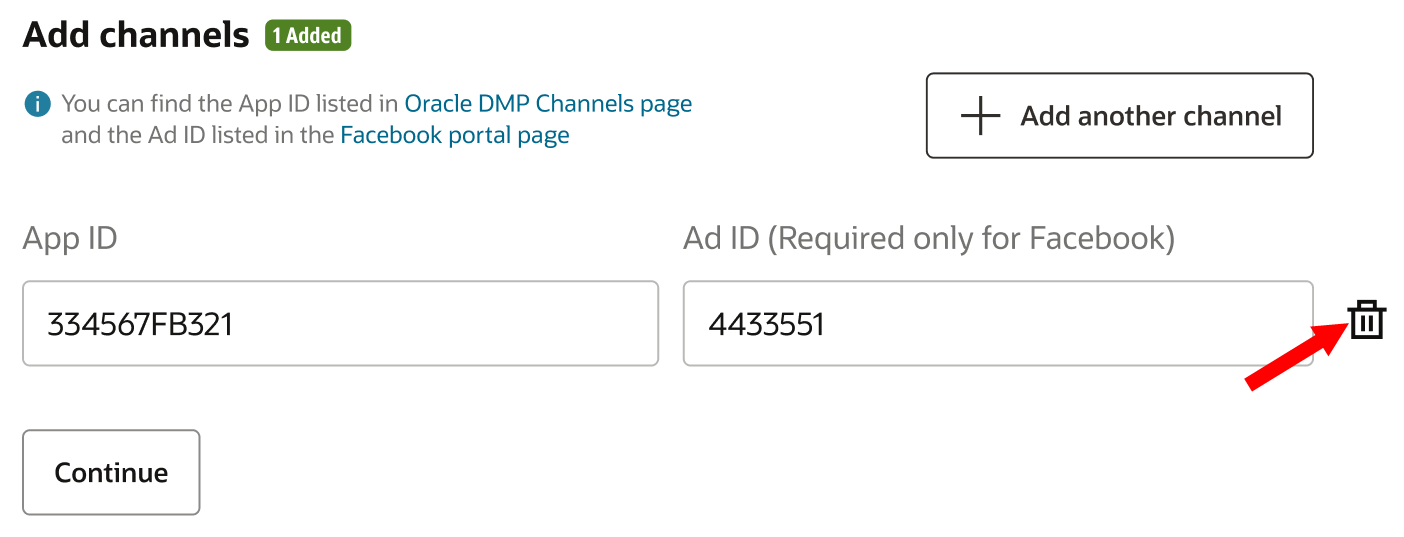
- Add the channels you want to include with the data export.
- Enter the App ID for the channel. If adding the Facebook channel, enter the additional Ad ID.
- To enter additional channels, click Add another channel.
- To remove a channel, click Delete
 .
.

- Review the details for the segment and included channels. Then, click Continue.


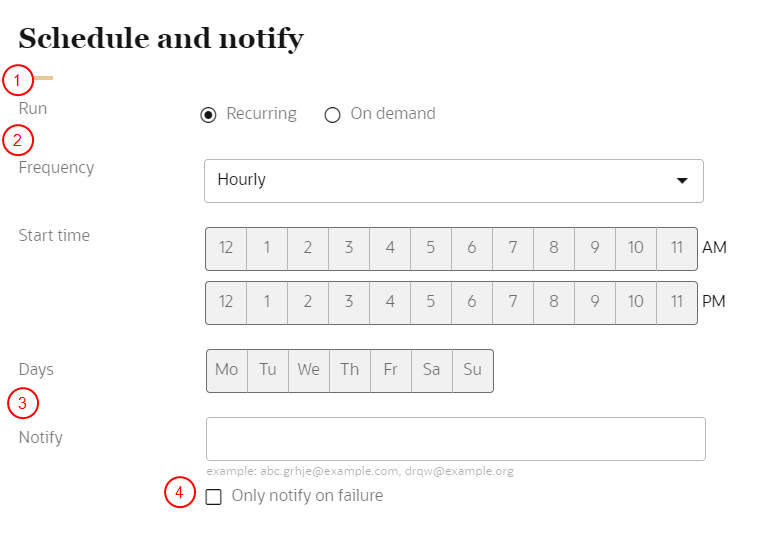
Step 4: Schedule and notify
You will need to configure the schedule and notification settings for the campaign.
To schedule the campaign and define the notification settings:
- Configure the schedule for the campaign:
- Click Recurring to automatically run the campaign job on a regular schedule.
- Click On demand to run the campaign job as needed.
- If the campaign job is recurring, select the Frequency, Start time, and Days it will run.
- In the field for Notify, enter the email addresses of people to be notified when the campaign job runs. Separate multiple emails with a comma.
- If you only want a notification if the campaign job fails, click the checkbox Only notify on failure.
Step 5: Save and publish the campaign
After saving the campaign you will need to publish the changes before it can run.
To save and publish the campaign:
- Scroll to the top of the page and click Save or Save and close.
- Follow the steps for Publishing changes.
When the publishing task successfully completes, the campaign can run.
Access exported Oracle Unity segment data
After the campaign in Oracle Unity successfully runs, you can access the segment data by logging in to your respective channel account, such as Google or Facebook, where you can then set up your advertising campaign.