Creating a Funnel Analysis Report
You can use the funnel analysis report to target converters and extend your campaign to leverage new opportunities. The funnel analysis report lets you define report query parameters to show how an audience moves through the sales funnel from segment A to B (for example, from audience to creative, from audience to a site, from a creative to a site, and from site to site). From your report query, the funnel analysis report generates a matrix view of the conversion funnel that shows you how to optimize your campaign and audience targeting, enabling you to move one step further down the sales funnel.
To create a funnel analysis report:
- Select Analyze > Funnel Analysis. The funnel analysis report opens.

- Click the Selector icon (
 ). The Funnel Report Query dialog opens.
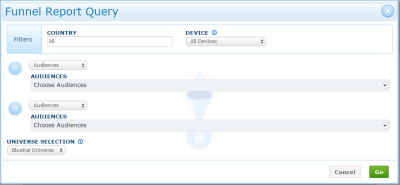
- In the Country box, select specific countries or keep the default of All.
- From the Device list, select desktop or mobile only or keep the default of All Devices.
- For A and B, select Audiences, Containers, or Media depending on what data you want to view in funnel analysis report. Then select the specific items you want to analyze.
- Select the scope of your funnel analysis report to focus your query on the users in one or more of your audiences or containers. Select one of the following options:
- BlueKai Universe: By default, your report query considers the entire population of users.
- Audience: Your audience query considers one or more specified audiences. Select the check boxes for the audiences to be included in the query scope, and then click Update. Click Select All to include all of your available audiences in the scope. Click None to remove all of the selected audiences from the scope. Click Show All to display all the available audiences (clear the filter). Click Show Selected to display only the audiences you have selected.
- Container: Your report query considers one or more specified sites. Select the check boxes for the sites to be included in the query scope, and then click Update. Click Select All to include all of your available sites in the query scope. Click None to remove all of the selected sites from the scope. To search for a specific site, enter the name of the site in the text box. The sites are filtered as you type. To clear the filter, click Show All or delete the entered text. Click Show All to display all the available sites. Click Show Selected to display only the sites you have selected.
- Click Go.

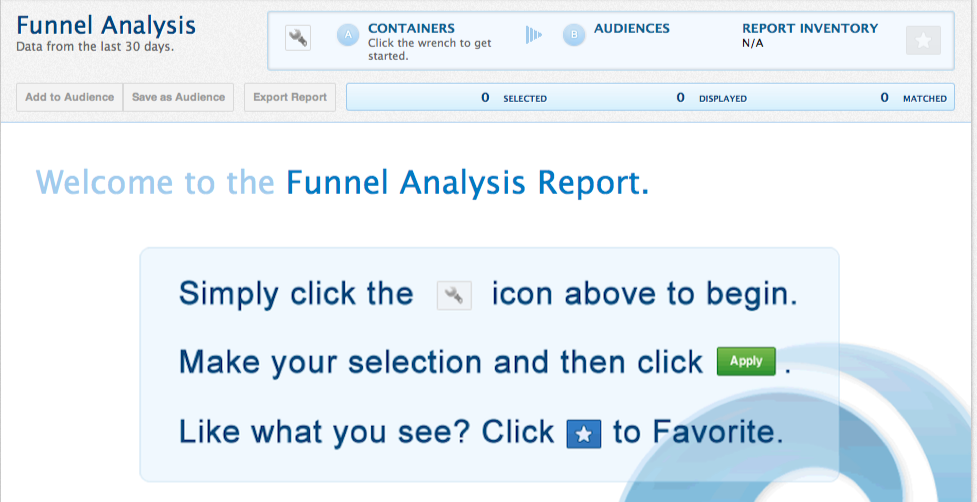


The funnel analysis report is generated and shows:
- y axis: The likelihood that your audience converts
- x axis: The likeness to your targeted audiences
- Categories in order from highest to lowest action rates (if you cleared the Hide Audience composition check box, the categories from your queried audience are included with an asterisk * appearing next to the category name).
The report lists the following information:
| Property | Description |
|---|---|
| ID | The unique ID assigned to the category |
| Category | The name (and taxonomy path) of the category. You can use the list of high and low-performing categories to do the following:
|
| From (A) | The number of users in segment A |
| To (B) | The number of users from segment A [ AND ] segment B |
| Volume | The number of unique users the Oracle Data Cloud platform has seen in this category over the last 30 days, which forecasts how many users are potentially available to target. The volume is always an integer. |
|
Index |
The index states that a person in Segment A is n times more likely to be in the category than another user in the selected universe (the entire BlueKai population, a set of one or more audiences, or a set of one or more containers). You should add users with a high action rate and a low index to your audiences because they are performing but you aren't currently targeting them. Formula:The index is devised from the following: # of users from Segment A in the category / # of users in Segment A) |
| Action Rate | Shows the response rate of users moving from Segment A to Segment B. This is calculated based on users having been in both segments (for example, users that see an impression AND click, or users that hit the landing page AND convert). The calculation is as follows: (Segment A [ AND ] Segment B) / Segment A |
To further filter and sort the report:
- Include or exclude certain categories or verticals from the queried audiences by clicking the green filter icon to the right of the Category column and then click Apply. Optionally, select the Hide Audience Composition check box to hide the categories in the queried audience, which are marked with an asterisk (*). to update the report based on the selected filters.
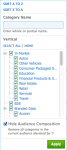
You can use the Category Name search box to find certain categories. To exclude categories from the audience you are using as a basis for discovery, click the Hide Audience Composition check box.
- To filter or sort the report results:
- Click the filter icon in any column to filter or sort the results. The Visitors, Volume, and Index columns have sliders to adjust the value.
- To specify another value, click on the value at either end of the filter and type your own value. For example, if you want the visitor range to be above 50,000,000 in the following example, click the 6,000 and type 50,000.
- Click Apply to filter the data.
- To save the sorting and filtering, click the mark as favorite icon (
 ) to bookmark your report as a favorite. When you re-open the report, it will still use the same sorting and filtering. If you update the sorting and filtering in a saved report, click the Mark as Favorite icon (
 ) to save your changes.
- To add categories to an existing saved audience or create a new audience, see creating an audience profile report.
- To save the funnel analysis report as a favorite and generate sampled and unsampled reports from it, click the mark as favorite icon (). In the Save New Favorite dialog, select whether to use sampled or unsampled data, enable and configure the Email Settings to email your report to one or more recipients, and then click Save.
- Further optimize your audience by removing poorly performing categories from your audience.
- Click Export Report to export the funnel analysis report to a CSV file.

When you save a report as a favorite, you can include it and up to three other reports in a comparison report, which enables you to analyze your audiences across product lines, media events, and media execution platforms in a single consolidated view.


