Creating and Managing Users
If you are an Administrator User and your partner seat has read and write capabilities enabled for User Management, you can create new users, add exiting users to your seat, and edit, and remove users.
In this topic
Creating a user
To create a user:
-
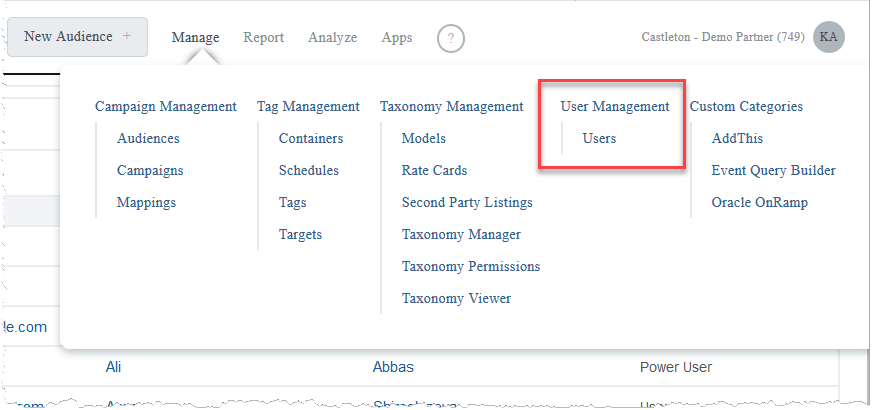
Log in to the Oracle Data Cloud platform UI and select Manage > Users. (If you do not see this command, you do not have Administrator privileges.)
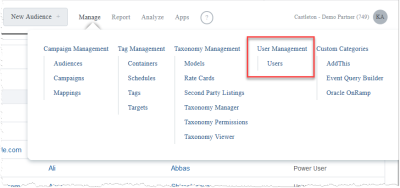
- The Users page is displayed.

- Click Add.
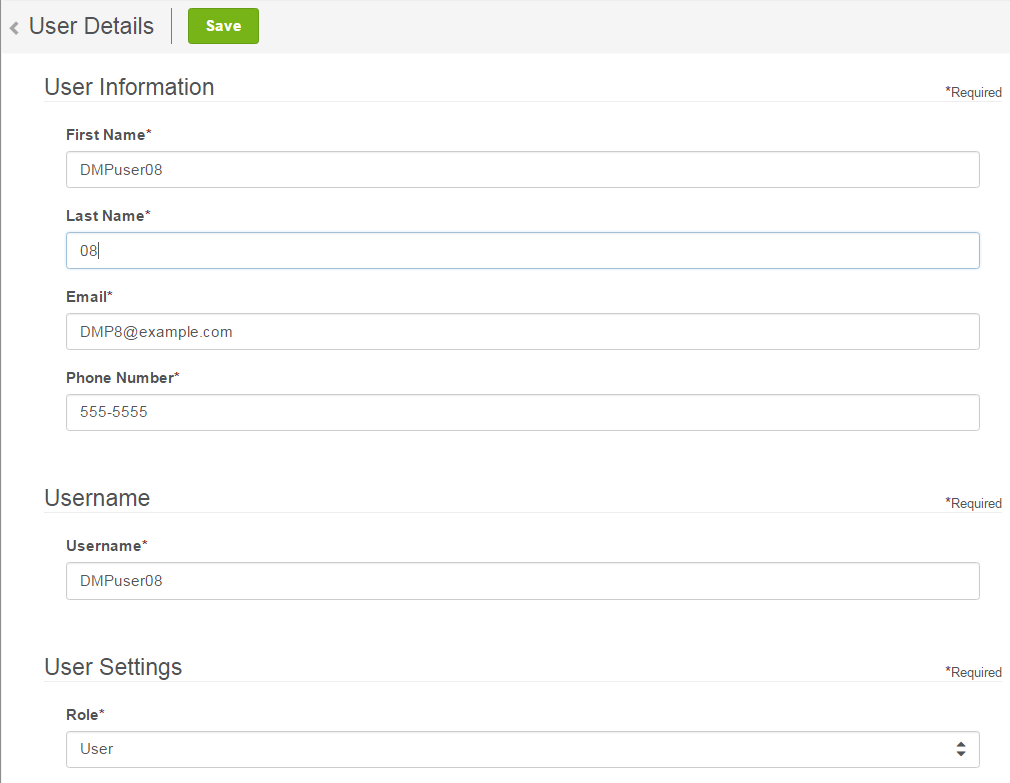
- Enter the following required information for the new user:
- First Name
- Last Name
- Email
Important: The email address you enter becomes the user name. User names are case sensitive.
- Phone Number
- Password (The password requirements are displayed in the UI.)
- Role
- Click Save.

Adding an existing user
To add users to your seat who already have a user account:
- Select Manage > Users. The Users page is displayed.
- Click Add.
- Enter the email address of the user. A notification that the user already exists in the system is displayed.
- Select the role for the user in your seat.
- Click Save.
Editing a user
You can change most of a user's details, but you cannot edit the email address of an existing user. User accounts are based on email addresses. Changing a user's email address therefore means that the system treats them as a new user. The best practice in this situation is to create a new user with the new email address and to delete the old one.
To edit a user:
- Select Manage > Users. The Users page is displayed.
- Select the check box of the user and click Edit. The User Details page is displayed in edit mode.

-
Edit the fields for the new user.
Do not change the email address.
- Click Save.
Removing a user
To remove a user:
- Select Manage > Users. The Users page is displayed.
- Select the check boxes for one or more users and click Remove. The Confirm Remove dialog is displayed.
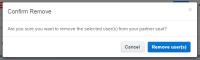
- Click Remove user(s). The users are removed and you are returned to the Users page.

Downloading user details in bulk
To download your users' details in bulk
- Either click on Export All or click on the individual users you want to download details for and click on Export Selected.


- Accept the browser pop-up asking you to confirm that you want to download the file. The file will be called "users.csv".

- Navigate to your local folder where the browser downloaded the file, and open it with an application like Microsoft Excel that can correctly display Comma Separated Value (csv) file types in a grid format.


