Resolving Validation Issues
You can browse validation results, navigate to invalid nodes, and fix issues. As you fix validation issues, the validation result window is automatically updated to show only the remaining issues for the viewpoint. For more information on validations, see Understanding Validations and Constraints.
To resolve validation issues:
- After you run a viewpoint validation, if there are validation errors to fix, click
Requests
 , and then click
 to create a new request or open an existing request.
- Click Validate
 from the left side of the page to display the validation results.
Note:
If a node exists in multiple locations in a hierarchy viewpoint that allows shared nodes, the node may be listed multiple times in the validation results. The node may have the same or different issues for each location.
- Perform an action:
- Correct the validations issues on-screen:
-
Select a node in the validation results to navigate to that node in the viewpoint.
Validation messages for an invalid node are displayed for a selected node in the validation results. Invalid properties are outlined in red in the property pane. Click on an invalid property to view its validation messages.
-
Perform request actions, such as update properties, change parent, or delete node in the viewpoint to resolve validation issues. For more information on changing a node's parent, see Changing Parent Nodes.
When you have resolved all issues for a node, the node is removed from the validation results list.
-
- Click Download Validation Results
 to download the validation errors to a file so that you can review
and correct them offline. The validation errors are sorted by validation
severity. You can then load the corrected file as request items. See Making Changes Using a Load File.
- Correct the validations issues on-screen:
Note:
To clear validation results from the validation tab, click the X in the top right corner of the pane.Changing Parent Nodes
For request items that have a missing or invalid parent, use one of these methods to change the parent.
-
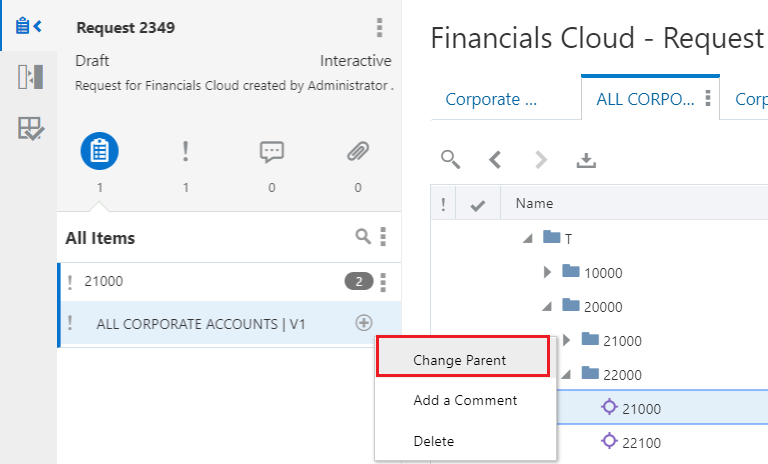
From the context menu for the request item instance that has the invalid parent, select Change Parent, select a valid parent, and then click OK.

-
Select the request item with the invalid parent and drag and drop it from the Request Details pane to a parent node in the viewpoint.