Step 1: Refreshing and Preparing the Test Environment for Application Development
Caution:
This scenario includes steps to be performed in both the production and test environments. Make sure that you are performing the steps in the correct environment before proceeding. The names of the environments are capitalized in each step to help you determine the correct environment for that step.-
Before you refresh your test environment with a snapshot of your production environment, it is a best practice to take a backup snapshot of the test environment to preserve existing test data.
To back up your TEST environment:
-
Click Tools, and then Migration.

- From Categories, click Backup
to create a backup snapshot of your current test environment.
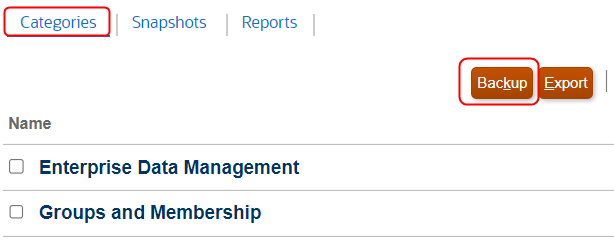
- Enter a name for your backup and click OK.

- Click Refresh to update the status of the backup, and
then click Close to close the window when the backup
is completed.

-
- Take a migration snapshot of your PRODUCTION environment.
-
Click Tools, and then Migration.

- From Categories, click Backup
to create a migration snapshot of your current production environment.

- Enter a name for the snapshot, and then click
OK.

- Click Refresh to update the status of the backup, and
then click Close to close the window when the backup
is complete.

- From Snapshots, locate the backup, and then in the
Actions column click
 and then click Download.
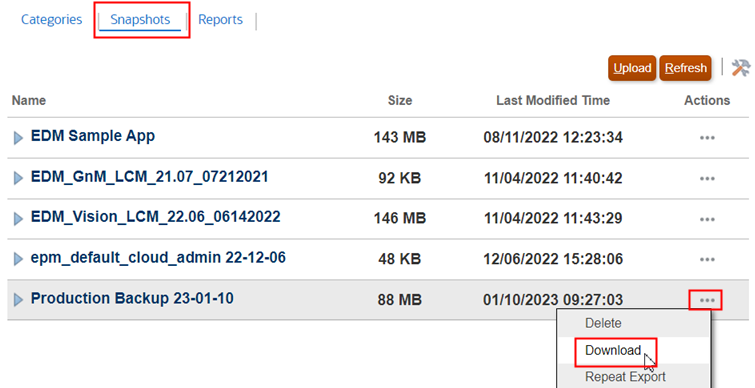
The migration snapshot is downloaded to your local machine.
-
- In your TEST environment, recreate the service. This is an optional step, but
recreating the environment will establish a baseline starting point for the
environment and will resynchronize the latest users and group assignments from the
Identity Cloud Service (IDCS) for your test environment.
Caution:
Recreating the service will remove all existing applications and artifacts, including test users and groups, in your test environment. If you want to preserve your test data, ensure that you follow the procedure in Step 1 to back up your existing test environment first.- From the TEST environment, click the drop down menu next to your user name,
and then select Recreate Service.
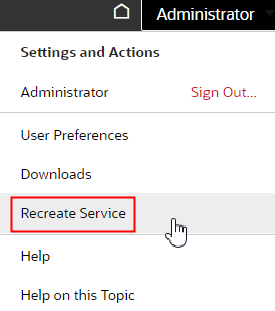
- On the confirmation screen, select the check boxes indicating that you
understand the consequences of recreating your service, and then click
Recreate Service.
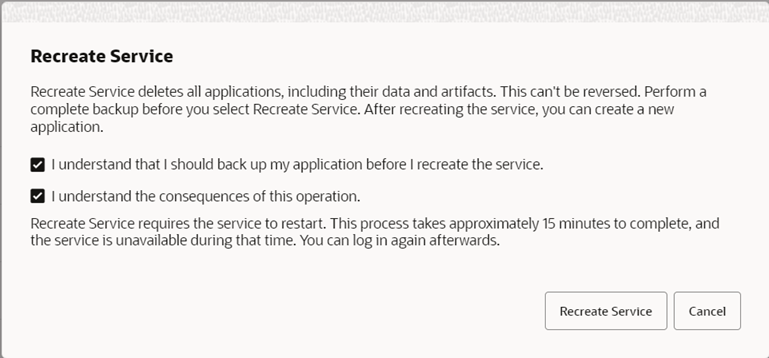
The recreate process takes approximately 15 minutes to complete.
- From the TEST environment, click the drop down menu next to your user name,
and then select Recreate Service.
- When the recreate process has completed, upload your migration snapshot from your
local file system.
-
Choose the Migration option, or from the Home page click Tools, and then Migration.

- From Snapshots, click Upload.

- Select the backup file, and click Upload.
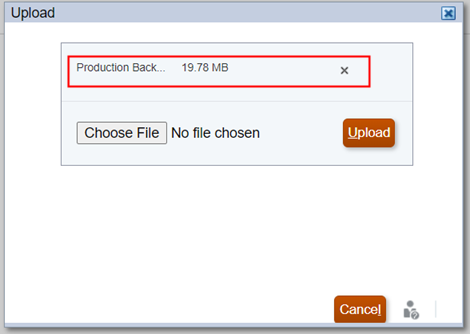
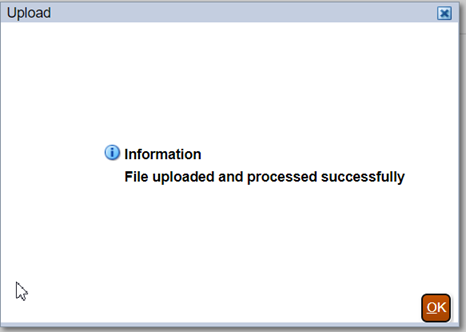
- When the file has completed uploading, click
OK.
-
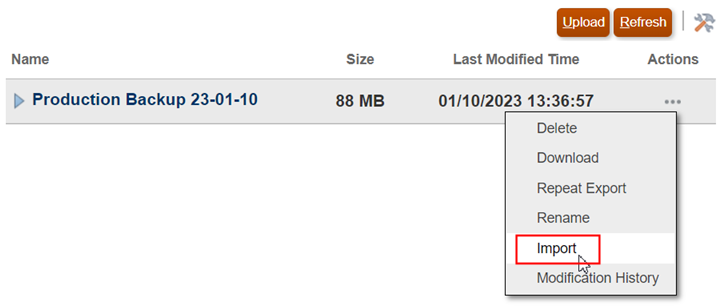
- On the Snapshots tab, locate the uploaded snapshot and in the
Actions column, click
 and then click Import.
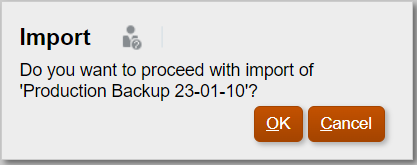
- Click OK on the confirmation message.
- On the Migration Status screen, click Refresh until the
import is completed, and then click Close.

- Verify that your TEST environment contains the applications from your PRODUCTION
environment.
