Steps to Complete in Microsoft Entra ID
To configure Microsoft Entra ID as an identity provider (IdP), complete these actions:
- Add Oracle Cloud Infrastructure Console as an enterprise application in Azure AD.
- Assign Azure AD users to the Oracle IDCS enterprise application.
- Setup SSO for the Oracle Cloud Infrastructure Console Enterprise Application.
Refer to Microsoft Entra ID documentation for detailed steps and explanation related to completing these configuration steps.
Add Oracle Cloud Infrastructure Console as an Enterprise Application
- Access Microsoft Entra ID sign-in page and sign in.
- On the Home left-navigation pane, click Applications, and then click Enterprise applications.
- Click New application. Browse Microsoft Entra Gallery screen, which lists Oracle as a cloud platform.
- Click Oracle to display a list of available Oracle Cloud platforms.
- Click Oracle Cloud Infrastructure Console.
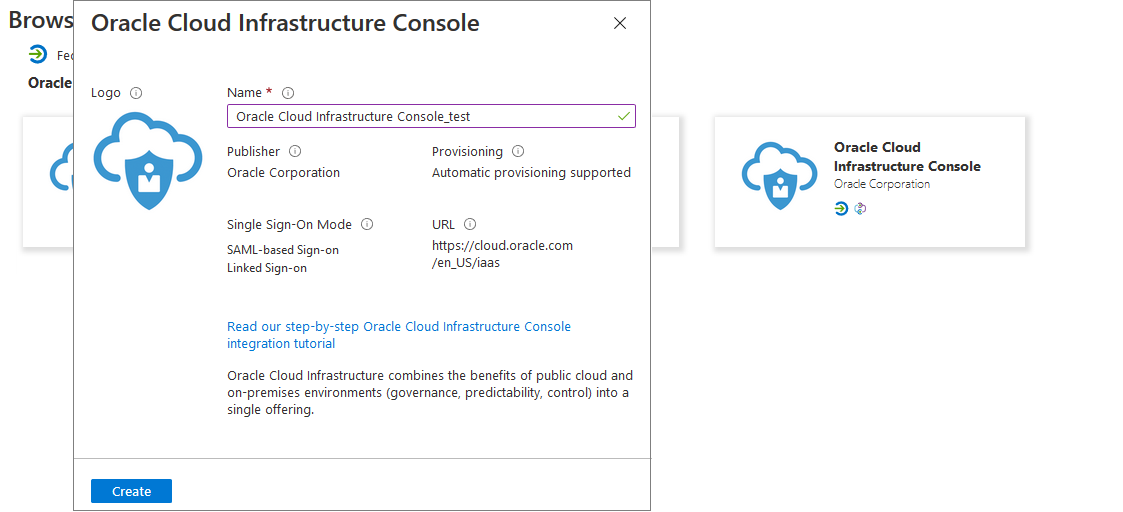
- Enter a Name, and then click Create to
add an instance of Oracle Cloud Infrastructure
enterprise application.
An overview of the enterprise application properties is displayed.
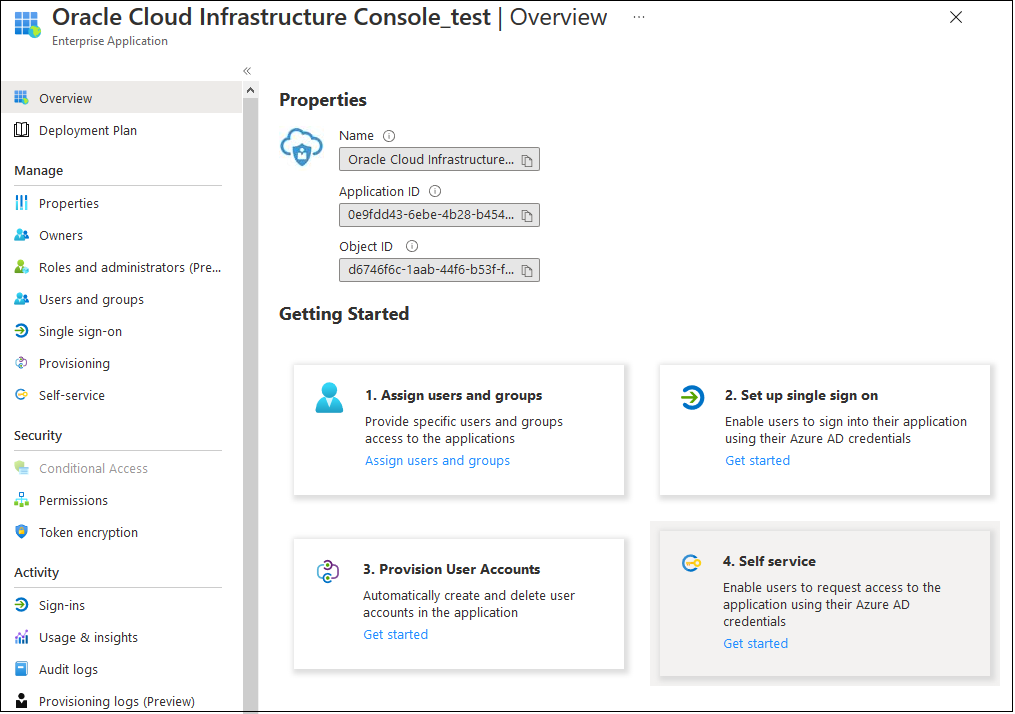
Assign Microsoft Entra ID Users to Oracle Cloud Infrastructure Console Enterprise Application
Only the specified users can log in to Microsoft Entra ID and be federated with Oracle Fusion Cloud Enterprise Performance Management and Oracle Fusion Cloud Enterprise Data Management . You can also assign user groups. Ensure that these users or groups are already present in Microsoft Entra ID.
- In the left navigation pane of your Oracle Cloud Infrastructure Console application, click Users and groups under Manage. Alternatively, in the Overview page of your enterprise application, click Assign users and groups.
- Click Add user/group.
- Under Users, click None Selected to open the Users screen. Select the users to assign to the application and click Select.
- Click Assign to assign the selected users to the application.
Setup SSO for the Oracle Cloud Infrastructure Console Enterprise Application
- In the left navigation pane, click Single sign-on
- In Select a single sign-on method, click
SAML.
The Set up Single Sign-on with SAML screen opens.
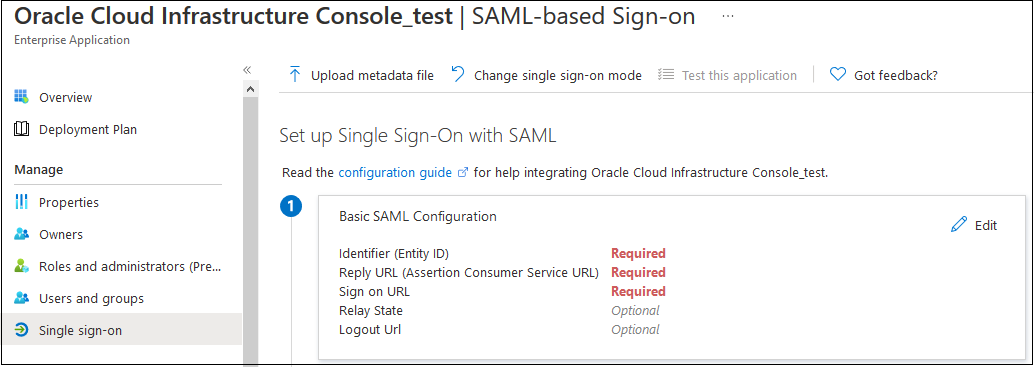
- Enter basic SAML configuration details.
The information that you should enter in this step is generated while configuring SAML in Oracle Identity Cloud Service.
- Click Edit in Basic SAML Configuration section.
- In Basic SAML Configuration page, enter settings
to SSO with your Oracle Identity Cloud Service.
Note:
The Oracle Identity Cloud Service settings that you need to enter as basic SAML settings follow this predictable pattern. https://idcs-CUSTOMER_IDENTIFIER.identity.oraclecloud.com:443/fedThe CUSTOMER_IDENTIFIER is a unique alphanumeric string specific to your tenancy. It is a part of the Oracle Identity Cloud Service URL. For example, if the sign in URL is https://idcs-01e711f676d2e4a3e456a112cf2f031a9.identity.oraclecloud.com/ui/v1/signin, the CUSTOMER_IDENTIFIER is 01e711f676d2e4a3e456a112cf2f031a9, which you use to derive the SAML configuration settings. In this example, the Identifier (Entity ID) would then be https://idcs-01e711f676d2e4a3e456a112cf2f031a9.identity.oraclecloud.com:443/fed.
To view all well known Oracle Identity Cloud Service configuration settings for your tenancy, enter your Oracle Identity Cloud Service URL appended with /.well-known/idcs-configuration. For example, https://idcs-01e711f676d2e4a3e456a112cf2f031a9.identity.oraclecloud.com/.well-known/idcs-configuration.- Identifier (Entity ID):
The Provider ID that was set
while provisioning Oracle Identity Cloud Service for your organization.
Example: https://idcs-CUSTOMER_IDENTIFIER.identity.oraclecloud.com:443/fed
Note:
Select the Default check box to indicate that this is the default identifier. - Reply URL: The endpoint in Oracle Identity Cloud Service that will
process incoming SAML
assertions from Microsoft Entra
ID. Also known as Assertion Consumer Service
URL, this value is set
while configuring Oracle Identity Cloud Service.
Example: https://idcs-CUSTOMER_IDENTIFIER.identity.oraclecloud.com:443/fed/v1/sp/sso
- Sign on URL: The URL of
the Cloud EPM
and Cloud EDM sign on page that performs the SSO initiated by Microsoft Entra ID.
Example: https://idcs-CUSTOMER_IDENTIFIER.identity.oraclecloud.com:443/fed/v1/sp/sso
- Logout URL: The logout service URL from Oracle Identity Cloud Service.
Example: https://idcs-CUSTOMER_IDENTIFIER.identity.oraclecloud.com:443/fed/v1/sp/slo
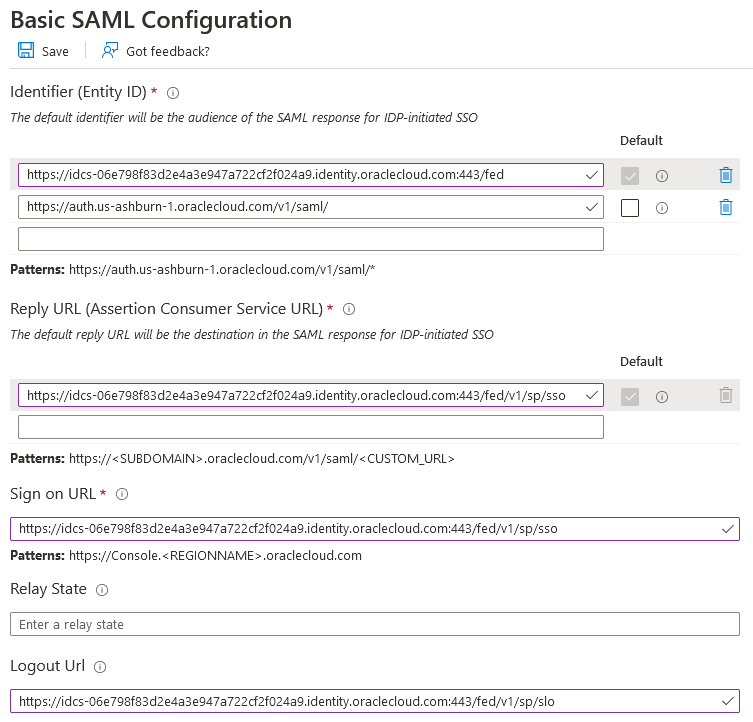
- Identifier (Entity ID):
The Provider ID that was set
while provisioning Oracle Identity Cloud Service for your organization.
- Click Save.
- Close the Basic SAML Configuration page
- In Set up Single Sign-On with SAML screen, enter user
attributes and claims:
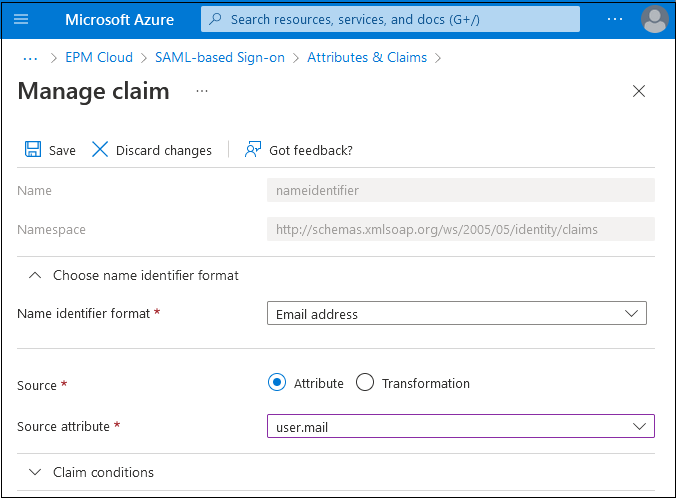
- Click Edit in Attributes & Claims.
- Under Claim name, click Unique User
Identifier (Name ID), select a source attribute value,
for example, user.mail. This value should match
the Requested NameID format specified in Oracle Identity Cloud Service.
- Click Save.
- Close the Manage claim and Attributes & Claims pages.
- Download the Microsoft Entra ID metadata
file.
- In the Set up Single Sign-On with SAML screen, in
the SAML Signing Certificate section, click
Download next to Federation
Metadata XML.

- Follow the on-screen prompts to save the metadata file to a local directory that is accessible from Oracle Identity Cloud Service.
- In the Set up Single Sign-On with SAML screen, in
the SAML Signing Certificate section, click
Download next to Federation
Metadata XML.