Steps to Complete in the Source Identity Domain in Oracle Cloud Identity Console
Download Oracle Identity Domain application from the App Catalog of the target domain to enable and configure connectivity for synchronization.
Before you begin, note the Client ID and Client Secret of the application in the target identity domain. You can see this information on the Configuration tab of this application detail. See Steps to Complete in the Target Identity Domain in Oracle Cloud Identity Console.
- Sign into the source identity domain as user assigned to Identity Domain Administrator role. See Accessing the Oracle Cloud Identity Console (IDCS).
- In the Navigation menu, click Applications.
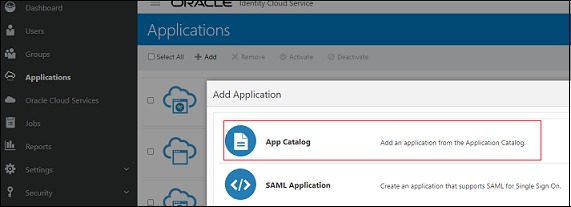
- On the Applications page, click Add.
- Select App Catalog.

- Search for Oracle Identity Domain in App Catalog, and click
Add next to Oracle Identity
Domain

. - On Add Oracle Identity Domain, add Details, and click Next.
- Select Enable Provisioning, and then click
Finish.

- Click OK to close the confirmation message.
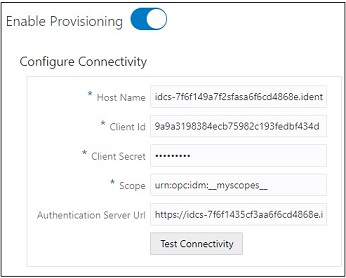
- In Configure Connectivity, enter the values for the following
parameters:
Parameter Description and Suggested Value Host Name If your SCIM interface's URL is https://idcs.example.com/abc, then the host name isidcs.example.com. This is the URL of the target identity domain.Client Id Client Id of the confidential application your created in the target identity domain. Client Secret Client Secret of the confidential application your created in the target identity domain. Scope Use
urn:opc:idm:__myscopes__as the scope of your application.Authentication Server Url The URL of your authentication server in the target domain.
Example:
https://idcs.example.com/oauth2/v1/token - Click Test Connectivity.

- In Select Provisioning Operations, select Authoritative Sync.
- Select Enable Synchronization, and then click
Finish.

- Click Activate, and then click OK to confirm.