Steps to Complete in the Target Identity Domain in Oracle Cloud Identity Console
Create and activate a confidential application in the target identity domain. Confidential applications run on a protected server and keep the OAuth client ID and client secret. The Oracle Identity Domain application in the source identity domain uses these protected client credentials and connects with your target domain. See Create and Activate a Confidential Application.
If needed, create a new group in the target domain so that you can assign users in the source domain to this group once the source and target domains are integrated. See Create an Identity Cloud Service Group.
Create and Activate a Confidential Application
- Sign into Oracle Cloud Identity Console as a user assigned to Identity Domain Administrator role in the target domain. See Accessing the Oracle Cloud Identity Console (IDCS).
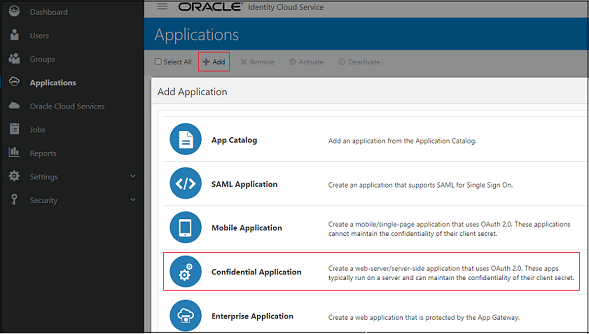
- In the Navigation menu, click Applications.
- On the Applications page, click Add.
- Click Confidential Application.
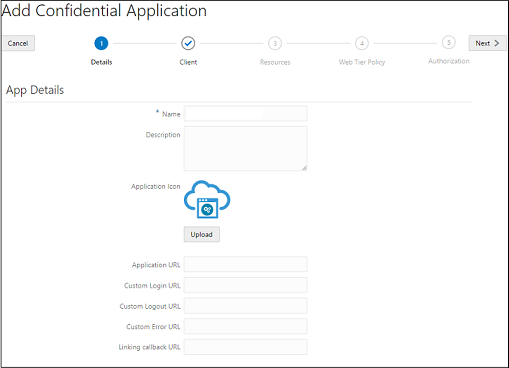
- On Details, enter application name and other optional
details, and then click Next.
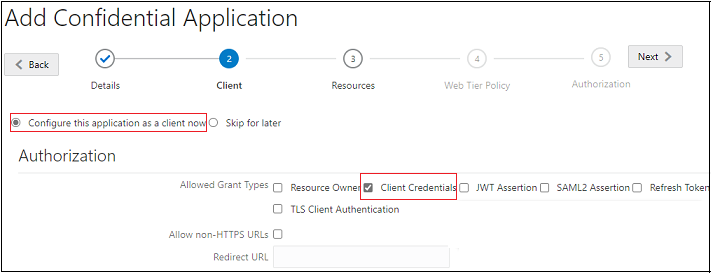
- On Client, select Configure this application as a client now.
- Select Client Credentials for Allowed Grant
Types.
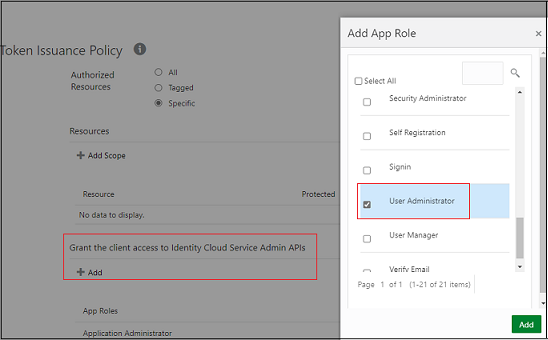
- Scroll-down to Token Issuance Policy.
- On Grant the client access to Identity Cloud Service Admin API, click Add.
- On Add App Role, select User
Administrator, and click Add .
- Click Next.
- (Optional) Add information on Resources, Web Policy, and Authorization.
- Click Finish.
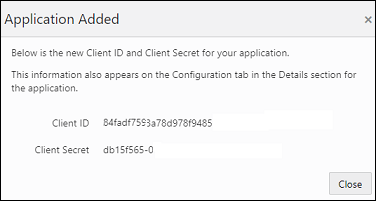
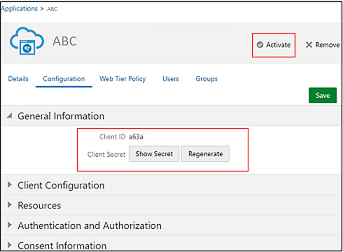
The application is added and you get this message. Note the Client ID and Client Secret. You can also see this information on the Configuration tab of this application detail.
- Click Activate.
Create an Identity Cloud Service Group
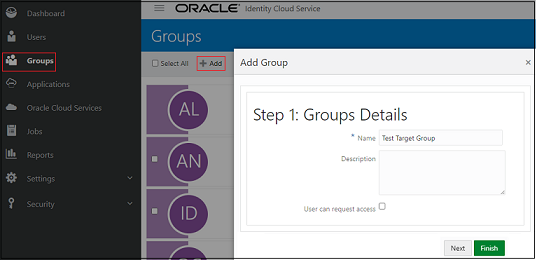
- In the Navigation menu, click Groups.
- On the Groups page, click Add.
- Enter Name and other optional details, and click
Next.
- If you plan to synchronize this group with users from the source domain, do not add users. Click Finish.