Using an Agent File Adapter
An Agent File adapter enables you to load very large files from an on-premises file data source to the Oracle Fusion Cloud Enterprise Performance Management. It extends the Quick Mode method where the Cloud EPM database is bypassed for staging and processing, eliminating any performance bottlenecks and improving the performance and scalability of the load process. The agent file adapter does not include any connection or query parameters. The only required parameter is the name of the file. A delimited file with a header record is required for the load.
To use the Quick Mode method with an agent file adapter:
-
Create the on-premises file adapter.
-
From the Data Integration home page, and then from the Actions menu, then from the Setup actions drop-down, select Applications
-
On the Applications page, click
 (Add icon).
-
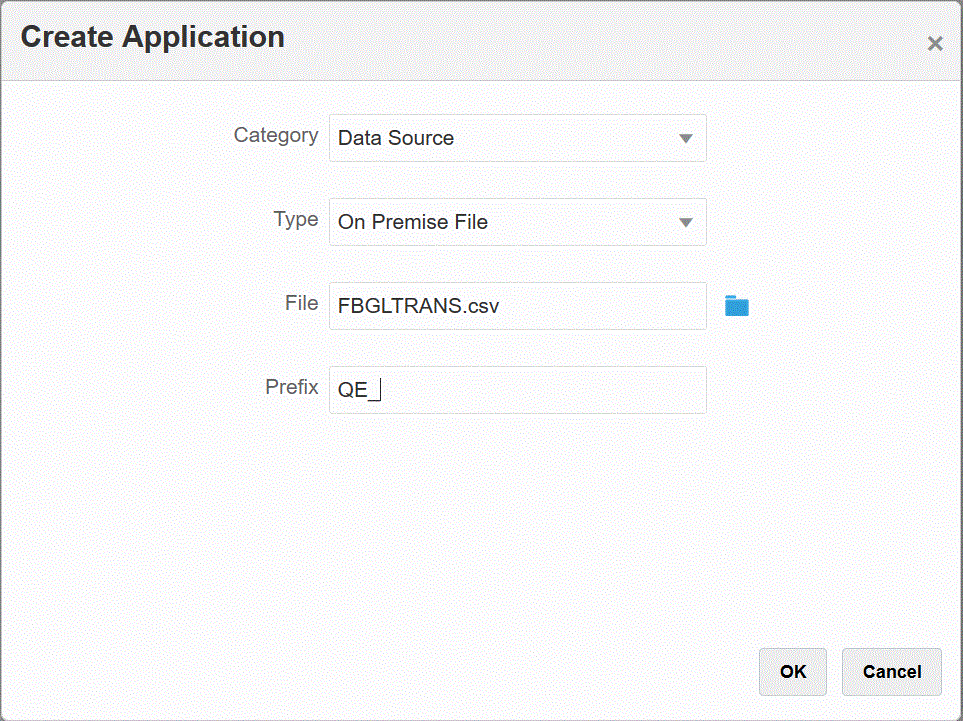
From Category, select Data Source.
-
From Type, select On Premise File.

-
From File, specify the source data file to use as the template.
Click
 to search for a file from the File
Browser page.
When selecting a file, note the following:
-
The source data file must be a delimited data file.
-
Data files used must contain a one-line header, which describes the delimited columns.
-
Both numeric and non-numeric data can be loaded.
-
-
Optional: In Prefix, specify a prefix to make the application name unique.
The prefix is concatenated with the application name to form a unique application name. For example, if you want to name an application with the same name as an existing one, you can assign your initials as the prefix. -
Click OK.
-
-
Create the integration job between the on-premises data source and Cloud EPM:
-
From the Data Integration home page, click
 (Add icon).
-
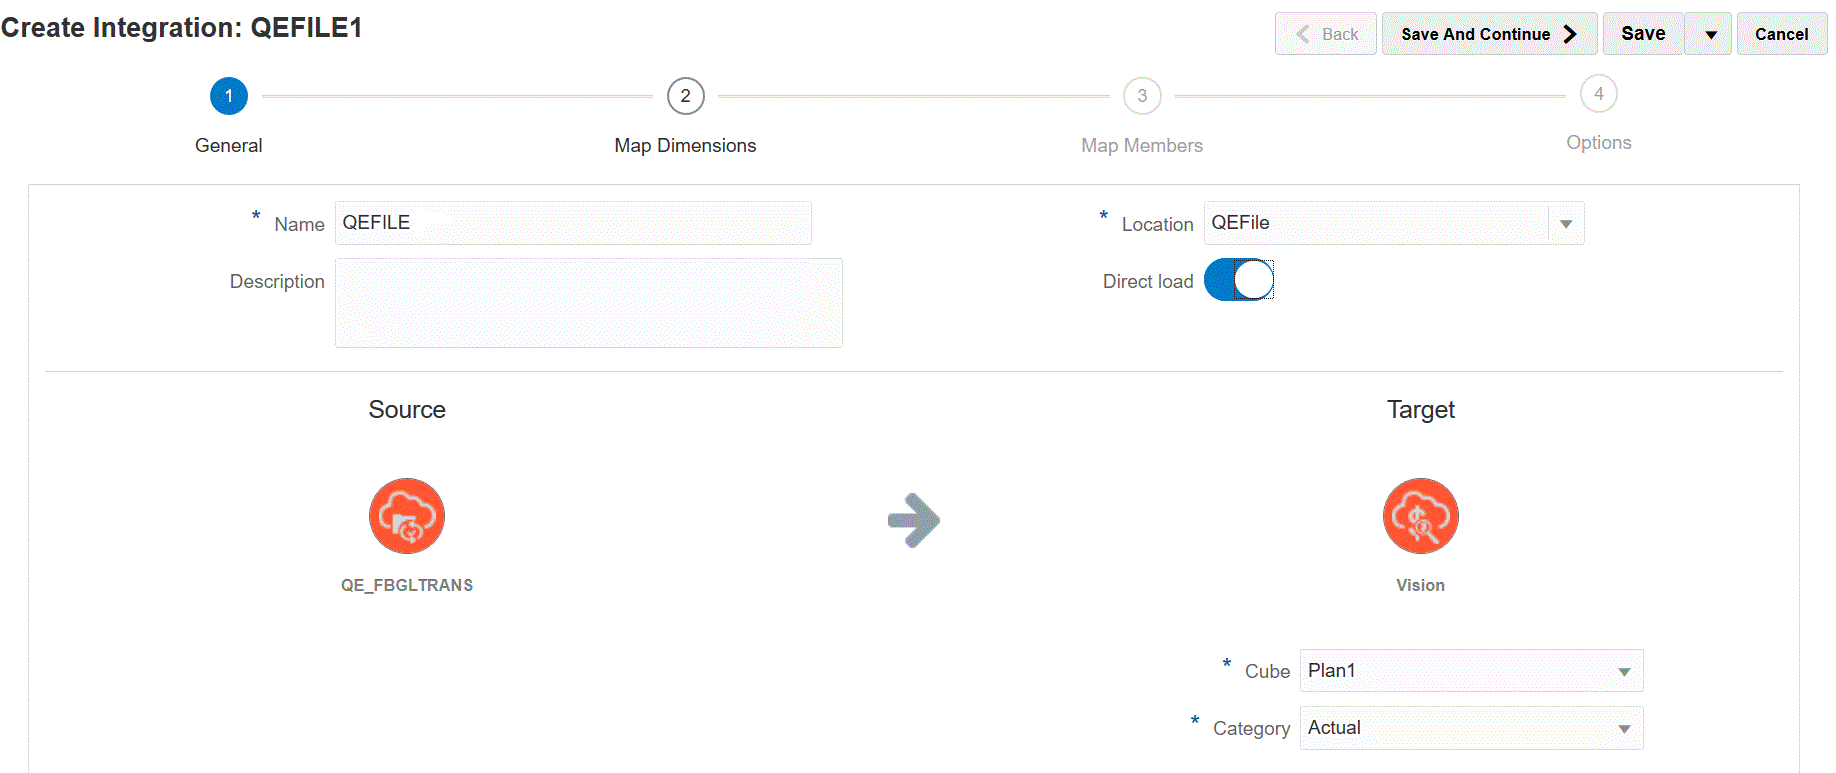
On the Create Integration page, and then in Name and Description, enter a name and description for the integration job.
-
In Location, enter a new location name, or pick an existing location to specify where to load data.
-
Tap the Quick Mode slider on.
When you associate an integration job with the Quick Mode method and then save the job, you cannot reverse the Quick Mode association. However; the integration job can be deleted.
-
Click
 (Select a Source).
-
From the Select a Source page, click
 next to the on-premises file data source application.
-
Click
 (Select a Target).
-
From the Select a Target page, select the target Cloud EPM application.
-
Click Save and Continue.

-
-
Map the dimensions between the on-premises file data source and the Cloud EPM application:
-
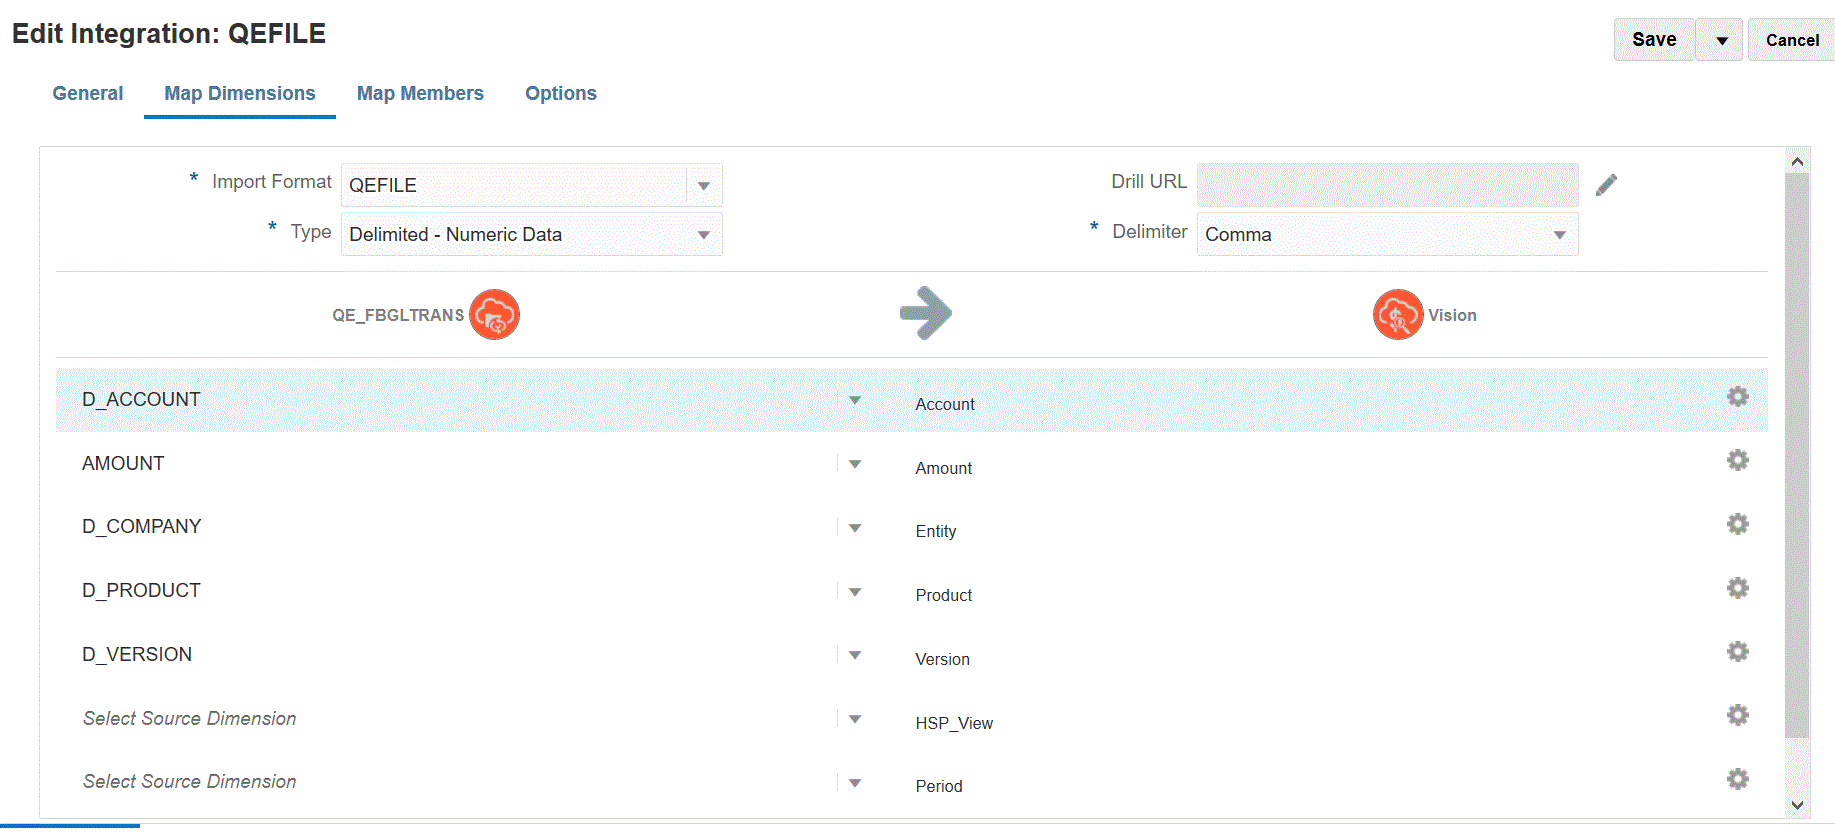
On the Mapping Dimensions page, from Type, select the type of data load method.
Available options:
-
Delimited - Numeric data: supports numeric data types only.
-
Delimited - All data types: supports the following data types to Planning
-
numbers
-
text
-
Smartlists
-
Data
-
-
-
In the mappings grid, map the source columns in the on-premises data source application to the dimensions in the Cloud EPM application by completing the following:
-
In Select Source Dimension, select the name of the source dimension to map to the Cloud EPM dimension.
-
Optional: Add a target expression for each of the Cloud EPM dimensions.
For information on using target expressions, see Using Target Expressions.
Note:
You cannot use a SQL target expression type with the Quick Mode method.
Source expression types are not available with the Quick Mode method.

-
- Click Save and Continue.
-
-
Run the Integration:
-
From the Data Integration home page, select the integration job associated with the Quick Mode method and then click
 .
.
-
From the Run Integration page, and then from Mode drop-down, select Replace as the export mode for the integration.
-
From the Period drop-down, select the single period from the source file from which to load data.
If you map a period dimension and specify a target expression for period on the Map Dimension page for the integration, then the Period drop-down is not available for selection because then the period is derived from the mapping.
-
Click Run.
-