Displaying a Numeric Type Filter Using In/Between Conditions in an SQL Query
The following steps describe how to display a numeric type filter using the In and Between Conditions in the SQL Query executed by the EPM Integration Agent.
To display a numeric type filter using In/Between condition:
-
In Data Integration, create the SQL query associated with the SQL data source.
The query name is used on the Application Details page to identify the data extract query when registering the SQL data source in the target application.
For more information, see Creating an SQL Query.
-
From the Data Integration home page, and then Actions, select Applications.
-
From the Application page, click
 to the right of the data target application, and then select
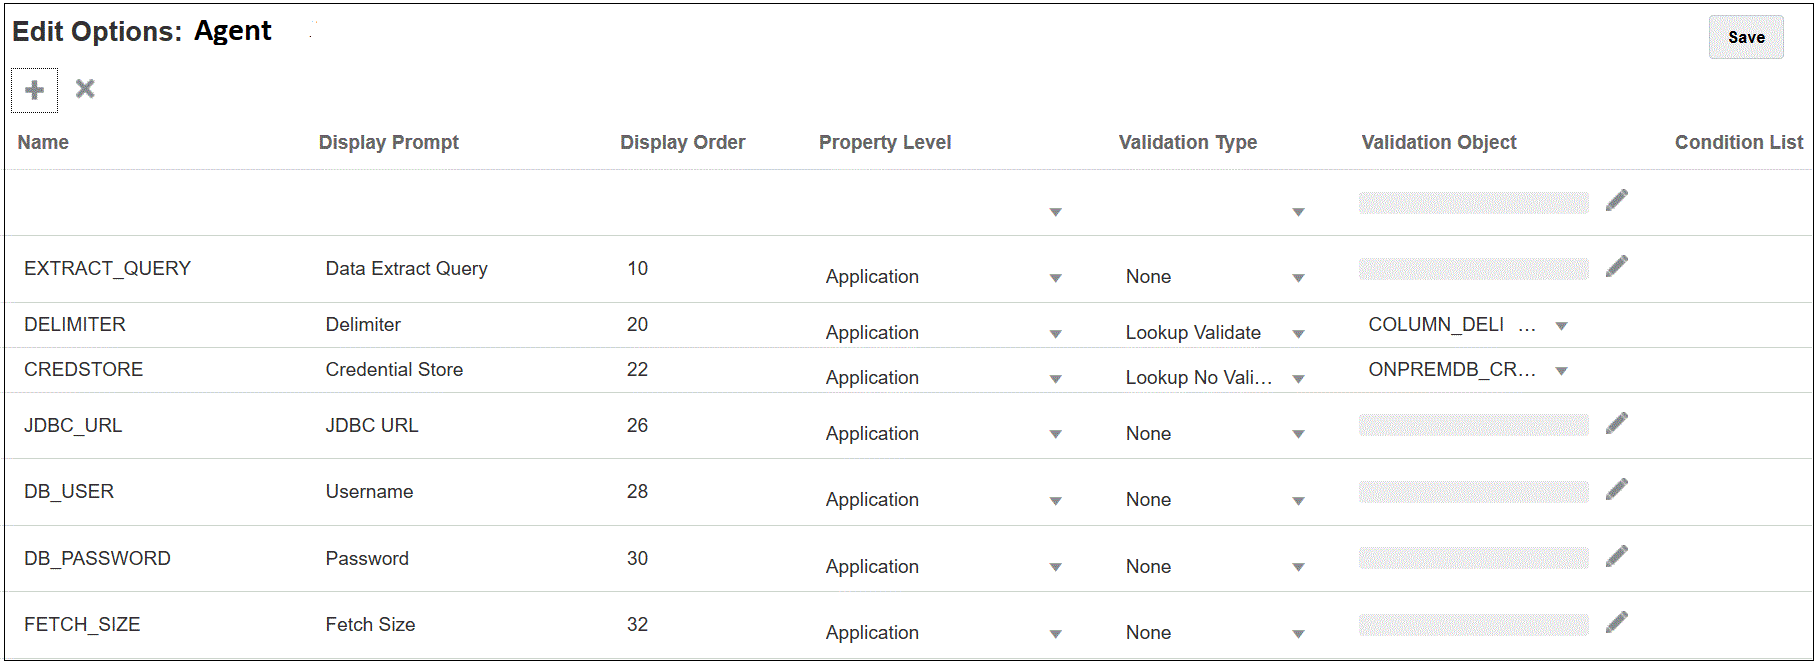
Edit Options.

-
Click
 (Add).
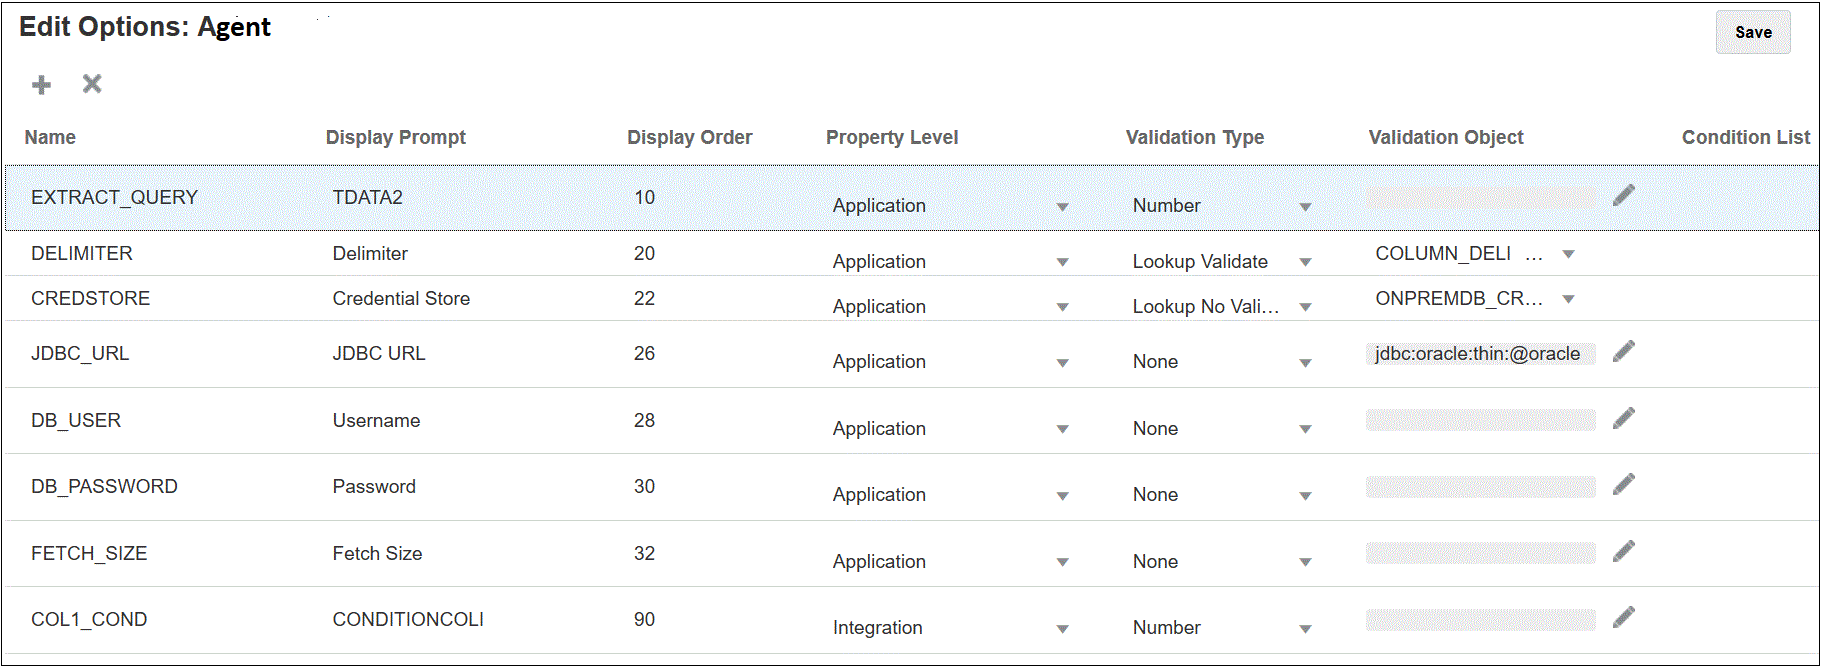
In this example, the name of the filter is COL1_COND and the name of the Display Prompt is CONDITIONCOLI. This name is shown on the Options page as a target option in Data Integration.

-
Click Add and add a filter for EXTRACT_QUERY, specify the value of the EXTRACT_QUERY parameter and click OK.
The results of adding the filters are shown below:

The value of the EXTRACT_QUERY is TDATA2 and the CONDITIONALCOLI uses a "Between" condition with a range of values between 1 - 1999.
-
In Data Integration, select the SQL query from step 1.
-
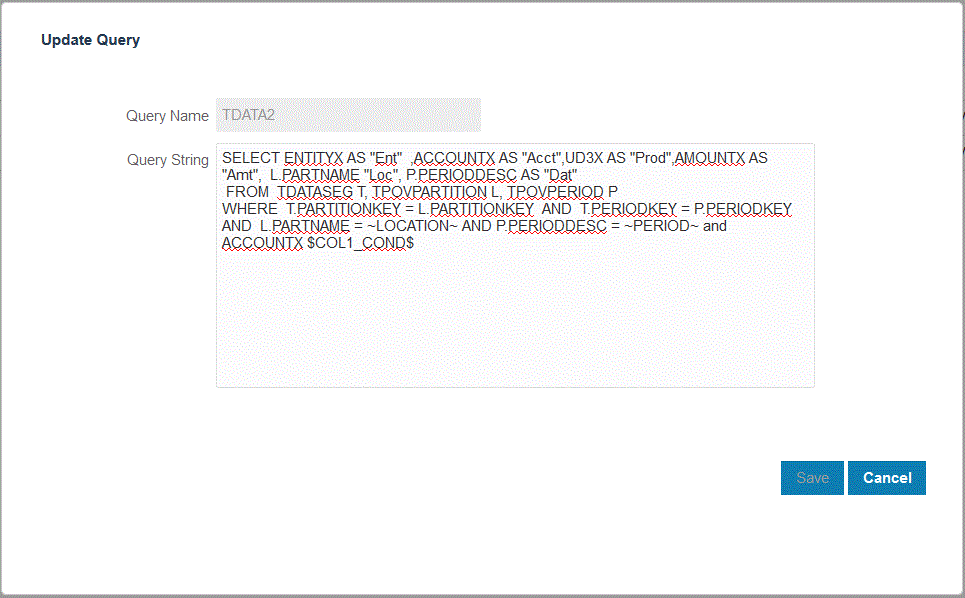
Specify the SQL statement used to extract the data based on the header row in the file and any filters.
The following SQL includes the syntax for the filter, which allows users to select from a flexible account values in a range using "Between". Note that there is no equal sign. This is provided by the Condition List in the application filter.

-
Data Management, update the data rule to add the filter.
Optionally, you can update the Filters tab with your selection on the Run integration page at runtime.
