Aggregating Transaction Matching Data
Data Integration enables users to aggregate transactions for Transaction Matching. For example, using this aggregation option, you can load transactions at a detail credit card swipe level and roll them up to a summary total per location per day total for matching.
To set the Aggregation option:
-
Add a new Transaction Matching target application.
For information on adding a Transaction Matching target application, see Adding a Transaction Matching Target Application.
-
Select the Dimension Detail tab.
When you select a Transaction Matching target application, the dimension details of the application are populated automatically on the Dimension Detail tab.
-
Select the Dimension Class or click
 to select the target dimension class.
The dimension class is a property that is defined by the dimension type.
Include only those dimensions that you want to aggregate when mappings dimensions. For example, if you want to roll up only the merchant number, bank reference, credit card type, or transaction date, include only these corresponding dimensions in your mappings.

-
Click Save.
-
From the Data Integration home page, click
 to the right of the integration with the Transaction Matching data to
aggregate, and then from the Edit Integration page, select the
Options tab.
-
From Aggregation, select Y to aggregate imported transactions.
To leave imported transaction unaggregated, select N.
The default aggregation setting is N.

You can also enable the aggregation option by selecting Application Detail, then from Options, then Aggregation and then from Property Value, select Y (for yes).
The Aggregate option chosen on the Options tab in step 6 overrides the option chosen in the Application Details.
-
Click Save.
-
In the Workbench, test and validate the data by executing the data load rule to ensure that the data load rule is running properly, and your data looks correct. Data Integration transforms the data and stages it for Account Reconciliation to use.
-
To view the Transaction Matching with the aggregated imported data, from the Accounts Reconciliation home page, click Matching.
-
Click the Account Id to which the source accounts were mapped.
-
Click the Unmatched Transactions icon (
 )
)
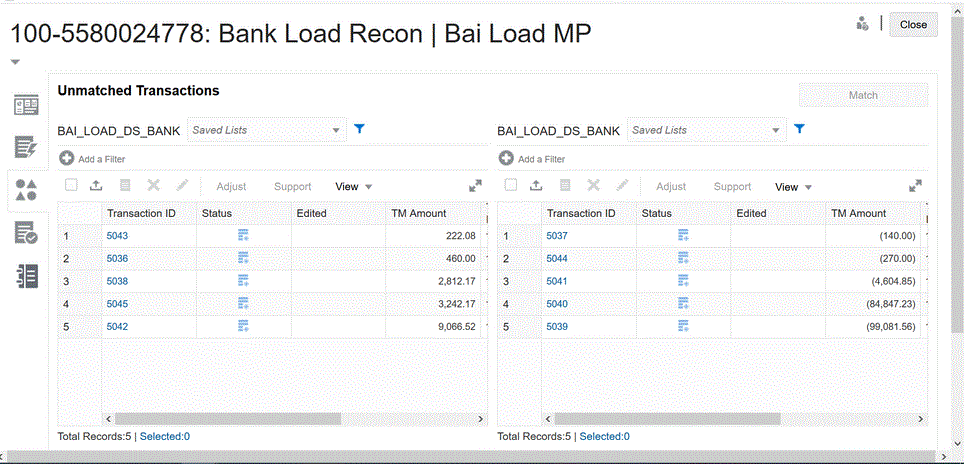
In the example, ten transactions are loaded here when aggregation is enabled:

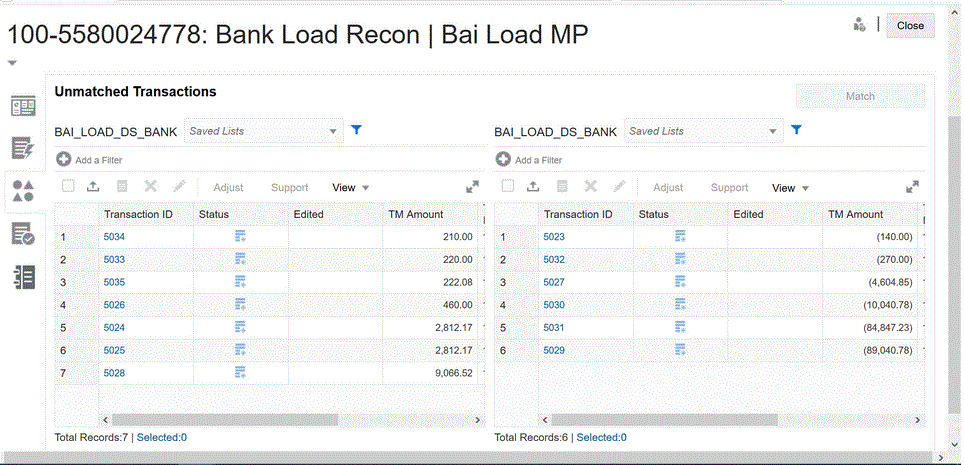
If the aggregation option is disabled, a total of thirteen transactions are loaded:
