Adding a Transaction Matching Target Application
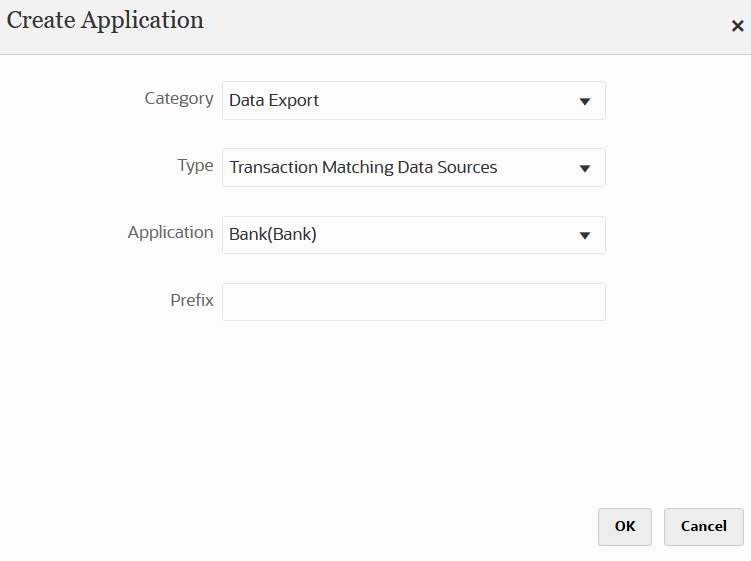
Any file, including a Bank file, can easily be exported to a Transaction Matching Target application. In this case, you create a data export application, which uses a Transaction Matching data source as the application type, and then you select the application name.
To add a Transaction Matching target application:
- From the Data Integration home page, and then from the Actions menu, then from the Setup actions drop-down, select Applications.
-
On the Applications page, click
 (Add icon).
- From Category, select Data Export.
- From Type, select Transaction Matching Data Sources.
- From Application, select the application name for the Transaction Matching data source.
-
Click OK.

-
To view dimensions in the Transaction Matching target application, select the
Dimension Details tab.
When you a Transaction Matching target application, the dimension details of the application are populated automatically on the Dimension Detail tab. Subsequently, when you update the data source in Account Reconciliation, the dimension details are updated automatically on the Dimension Details tab.
Note:
Data source attribute updates made by Service Administrators and users with the Match Types - Manage application role automatically update the dimension details of the Transaction Matching target application in Data Integration. Verify the integrations when making updates to the associated data source in Transaction Matching.Each dimension class (except Reconciliation ID) is assigned the Attribute Dimension class. Attribute dimensions are pass-through, therefore no mappings are required. If you need to apply transformation, switch the Dimension Classification to Generic and select a UD or User Defined from the Data Table Column Name.The dimension class is a property that is defined by the dimension type.

- Click Save.
-
Set up the source and target mapping between the source system and the
Transaction Matching target application by building an import format.
- On the Create Integration page, then Name and Description, enter a name and description for the new integration.
-
In Location, enter a new location name, or pick an existing location to specify where to load data.
-
From the Source (
 ) drop-down, select the source application.
-
From the Target (
 ) drop-down, select the Transaction Matching target
application.
-
From Category, select a currency bucket.
Note:
Category Mappings are not applicable while loading data into Transaction Matching Targets. However, as a best practice, choose a currency bucket that aligns with the lowest enabled currency bucket on your profiles.For information on Account Reconciliation currency buckets, see Defining Currency in the Setting Up and Configuring Account Reconciliation.
-
Optional: Select any applicable location attributes for the integration. For more information, see Selecting Location Attributes.
-
From the Data Integration home page, click
 to the right of the integration, and then select Map
Dimensions.
-
On the Map Dimensions page, complete the
following:
-
In Import Format, select the name of the import format to use for the integration.
You can also add a user-defined import format name.
-
In the mappings grid, map the source columns in the source to the dimensions in the target application.
Note:
All transaction matching files require the Reconciliation Id dimension to be mapped to the corresponding Transaction Matching Profile.The dimensions from the target application are populated automatically.
If the import format has already been defined for the integration, then the source and target columns are mapped automatically.
-
-
From the Data Integration home page, click
 to the right of the integration, and then select Map
Members.
-
On the Map Members page, define members mapping to map
the members from the source to target.
Note:
All transaction matching files require the Reconciliation Id dimension to be mapped to the corresponding Transaction Matching Profile. -
From the Data Integration home page, click
 to the right of the integration, and then select
Workbench.
- In the Workbench, test and validate the data by executing the integration to ensure that the load is running properly, and your data looks correct. Data Integration transforms the data and stages it for Account Reconciliation to use.