Defining a Custom View in the Workbench
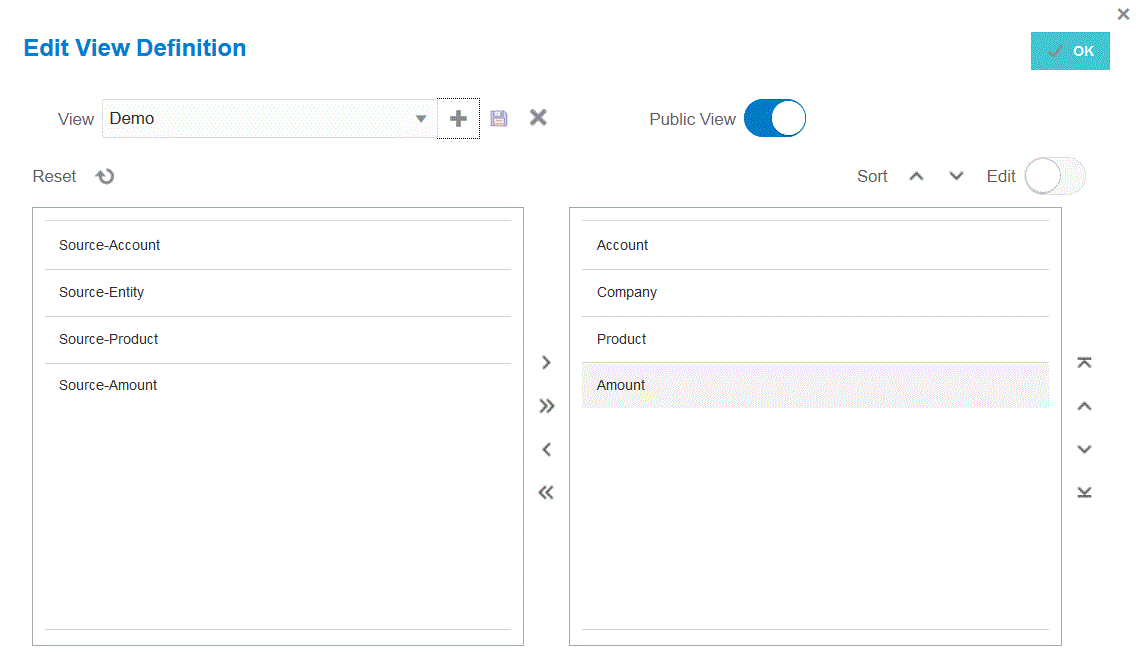
When working in the Workbench, you can create a view definition of the columns in the display. This feature enables you to apply a custom view of the data set that is active in the Workbench. Views provide you with different ways to look at the columns in the Workbench by allowing you to rearrange the representation of data. For example, you can create a view that enables you to focus on specific Account columns or hide Entity columns based on your requirement. Columns can be renamed, resorted, included, or excluded in a custom view definition.
Administrators can also associate a view definition as a public view, which makes it available to everyone or assign it as private, which makes is available only to the administrator.
Note:
When drilling into Oracle Smart View for Office, Data Integration uses the last used view on the Drill landing page. If no last used view is found, Data Integration uses the default view selection in this setting
To create a view definition:
-
From the Data Integration home page, click
 to the right of the data integration, and then select Workbench.
-
Click Period, and then from Period drop-down, select the POV of the period and click OK.
-
From the View drop-down, select the default view from which to build your custom view definition and click
 .
.
Note:
Workbench views displayed on any POV are only filtered by the target application and not by the target plan type selected for the integration. This may show views in the drop-down that may not work for the POV.
-
From the Edit View Definition page, click
 .
.

-
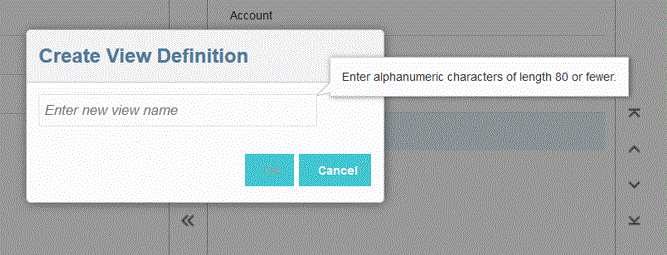
In the Create View Definition windows, enter the name of the custom view definition.
The view definition name can contain alphanumeric characters. The view definition name can have up to eighty characters or less.

-
From the Available Columns left pane, select the column(s) to add to the Show Columns pane and click
 .
.
You can add all available columns to the Show Columns pane by holding down Shift and clicking
 .
.
Additional move options include:
 —Move a selected column from the Show Columns pane to the Available Columns pane.
 —Move all selected columns from the Show Columns pane to the Available Columns pane.
To clear the populated values in the view, click
 (Reset icon).
-
Optional: To rename a column in the Show Columns pane, select the column, slide Edit on, and then type the new column name.
-
Optional: To associate a view definition as public, slide Public on.
A view definition associated with a public view is available to all users.
To associate a view definition as private, slide Public off.
A view definition associated with a private view is available to the administrator only.
-
Optional: To rearrange a column in the Show Columns pane, select the column and then select one of the following:
 —Move column to the top of the display.
 —Move column up one position of the display.
 —Move column down one position of the display.
 —Move column down to the bottom the display.
-
Optional: Click Sort to sort columns in the Shown Columns pane in
 or
or  order.
-
Click OK or
 to save and update the view definition.
-
Optional: To delete a view, click
 .
.