Collaborate on a Request
Since Alex only has permission to access the dimensions in the General Ledger viewpoint, he assigned the request to Anita, who now needs to add the two nodes to the dimensions in the Financial Consolidation and Planning viewpoints. Anita can add the nodes because she has permissions to the dimensions in all three viewpoints (General Ledger, Financial Consolidation, and Planning). Anita will receive an email notification asking her to update the request.
-
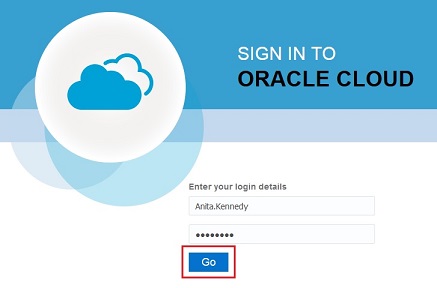
On the Oracle Cloud Sign In screen, sign in as Anita Kennedy.
-
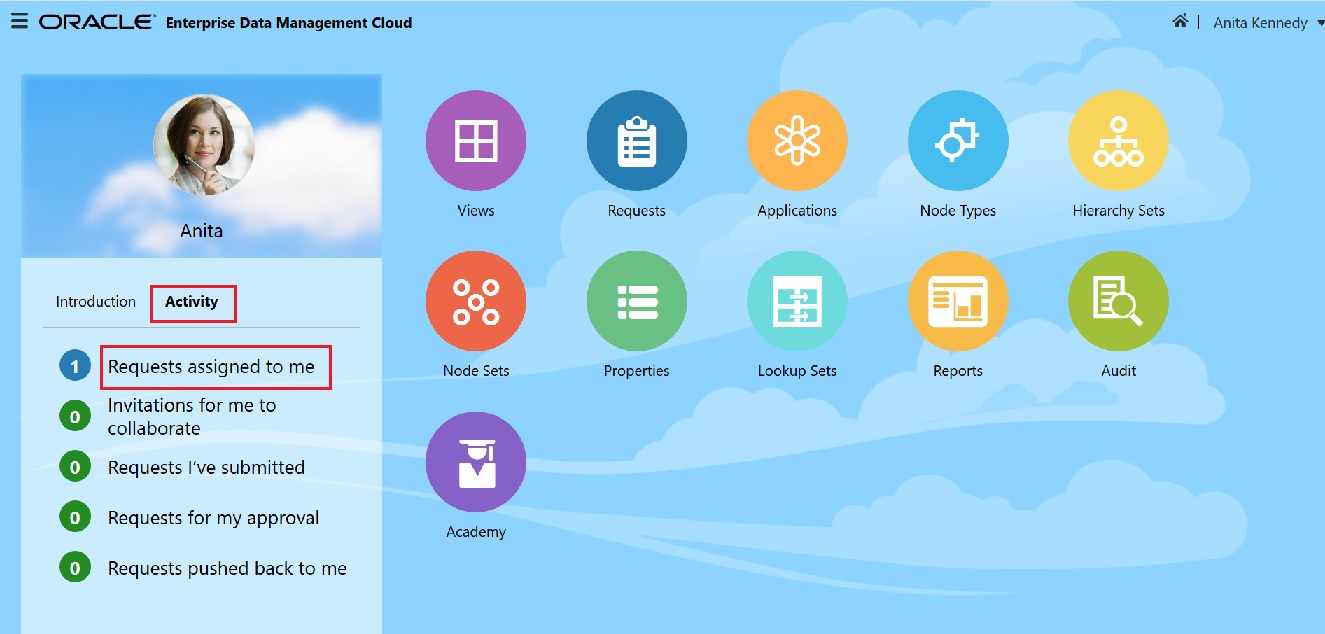
Select Activity. Notice that Anita has one request assigned to her. This is the request assigned by Alex. Click Requests assigned to me to view the request.
-
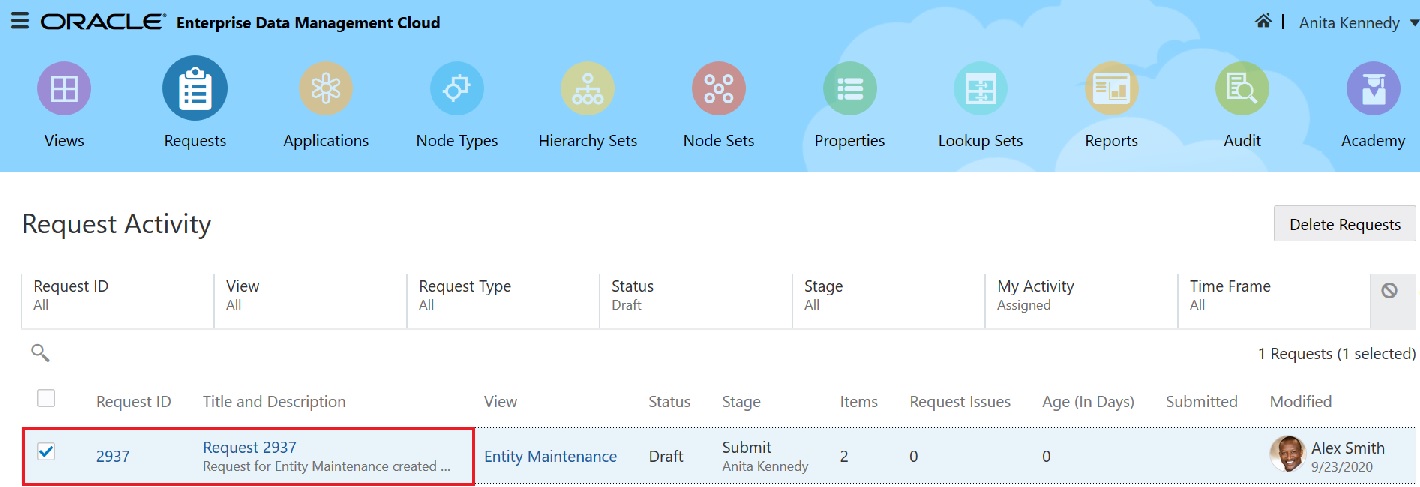
Select the request, and then click the request to open it.
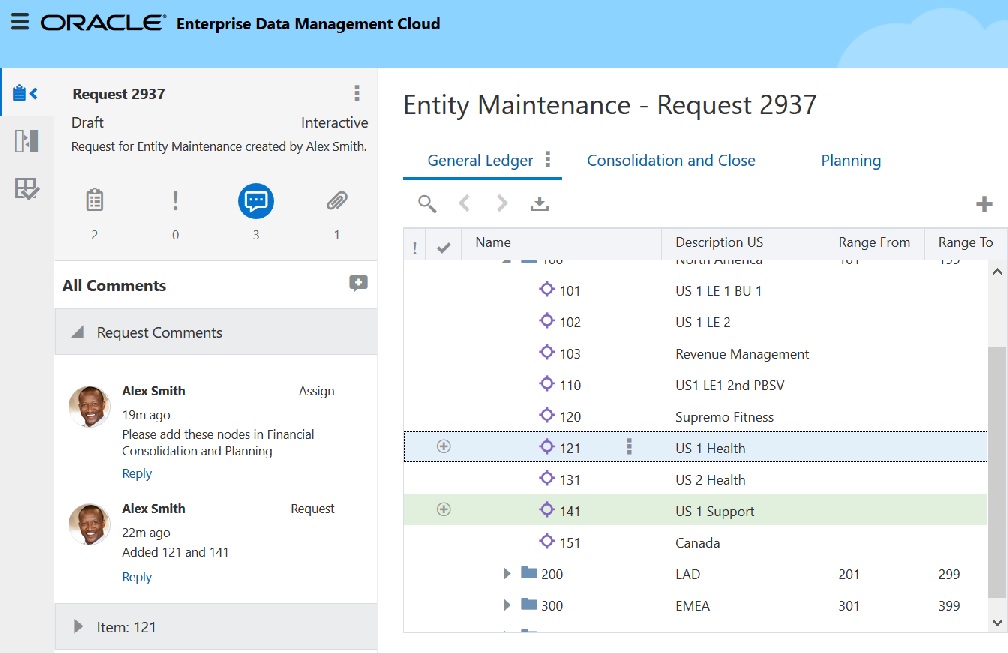
Notice that the additions that Alex made are highlighted in the General Ledger viewpoint. Anita can click
 to view the comments Alex made about the request, and she can click
  to view the attachment.
-
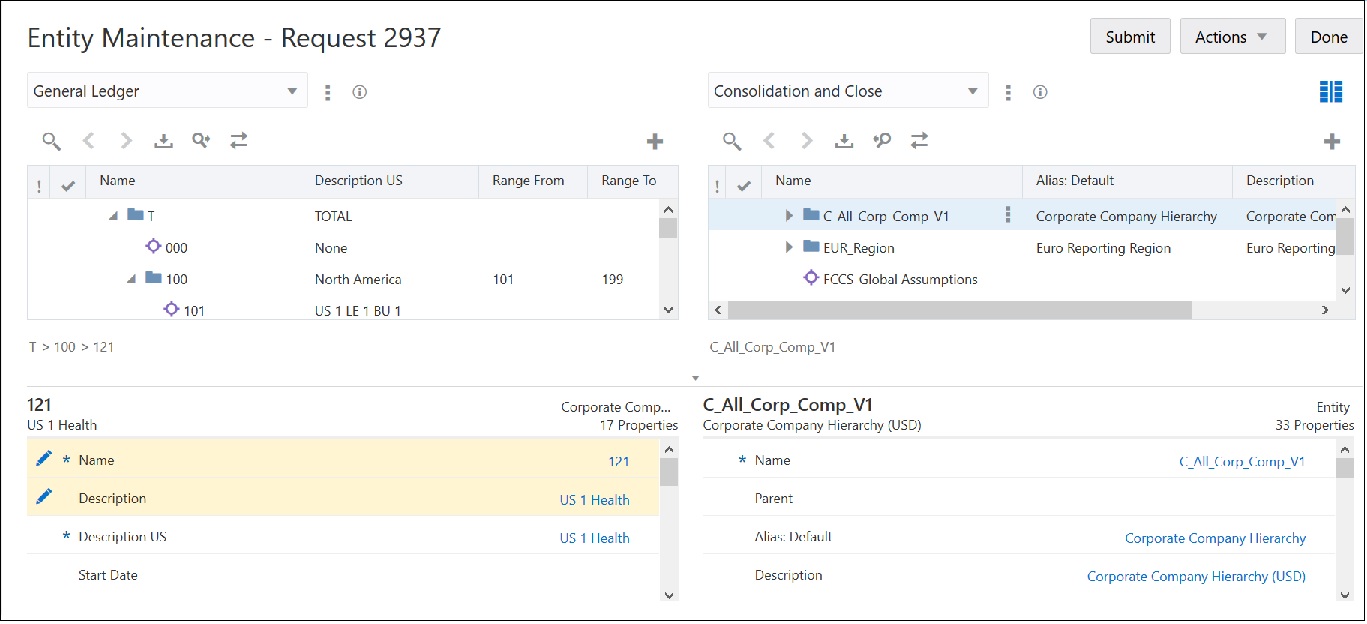
Anita now must add the two nodes that Alex added to the General Ledger viewpoint to the Consolidation and Close and Planning viewpoints. Begin by comparing the General Ledger viewpoint with the Consolidation and Close viewpoint. To do this, click the Compare
 icon at the top left of the screen. After you click
  , the viewpoints are displayed side-by-side.
-
In the Consolidation and Close viewpoint, expand the C_All_Corp_Comp_V1 hierarchy down to the C_100 North-America node.

-
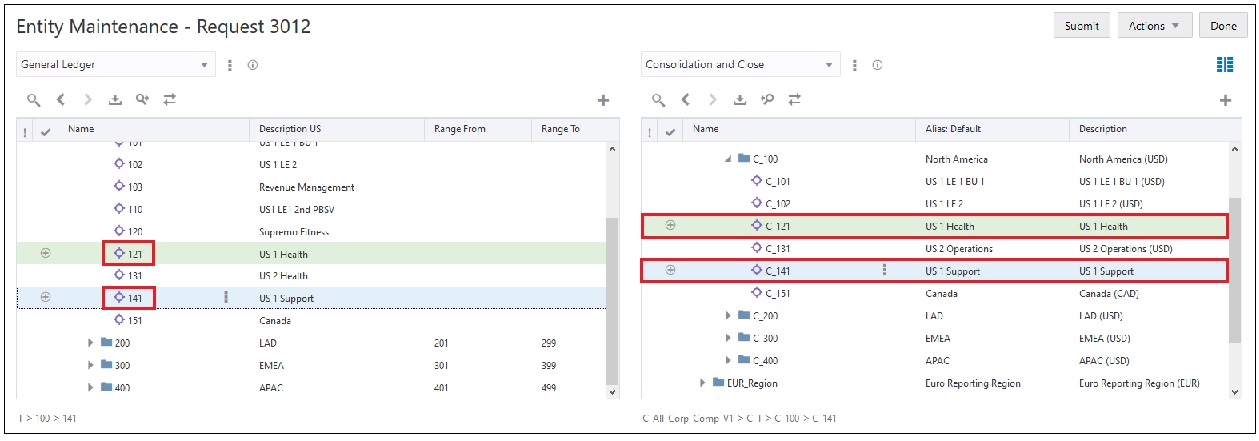
In the General Ledger viewpoint, click on 121 and drag it over to C_100 in the Financial Consolidation viewpoint. Make sure to drop the node on top of the C_100 parent node. Do the same thing for 141.
Note that you must place your cursor directly over the number in order to drag it to the new viewpoint.
-
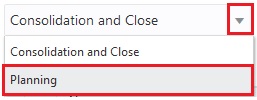
Click the arrow next to the Consolidation and Close viewpoint and select Planning.
-
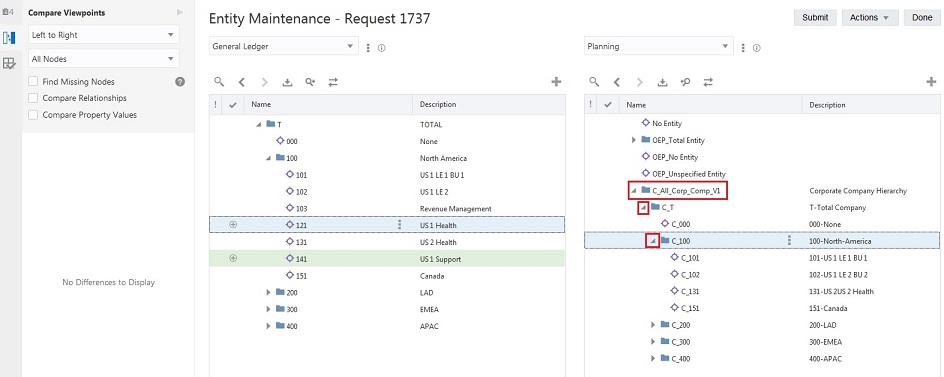
In the Planning viewpoint, expand the C_All_Corp_Comp_V1 hierarchy down to the C_100 North-America node.
-
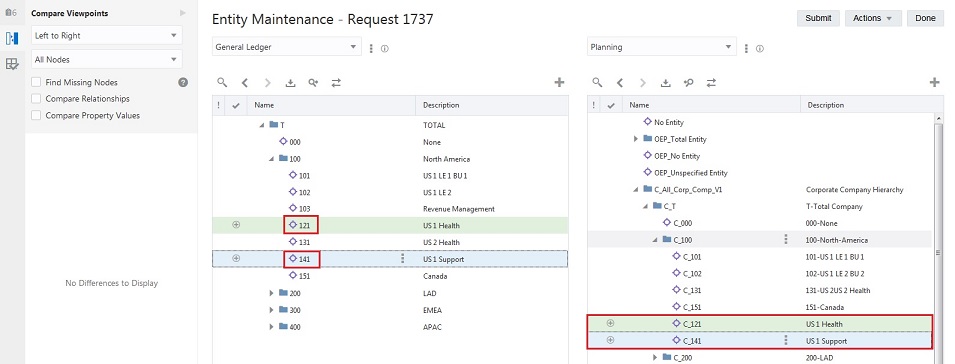
In the General Ledger viewpoint, click on 121 and drag it over to C_100 in the Planning viewpoint. Do the same thing for 141.
Note that you must place your cursor directly over the number in order to drag it to the new viewpoint.
-
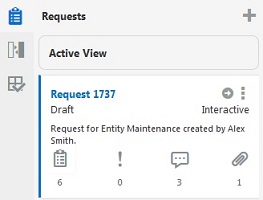
Click the Requests
 icon at the top left of the screen to review information about the request.
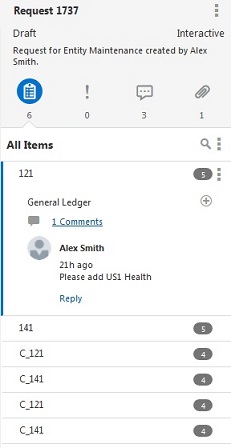
Notice that there are six request items, three comments, and one attachment.
-
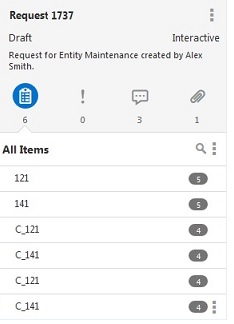
Click the Items
 icon to show request details.
-
Select each request item to see the details about the item. For example, if you select 121, you can see that the request was created by Alex Smith for the General Ledger viewpoint, and it has one comment.
-
Click the Comments
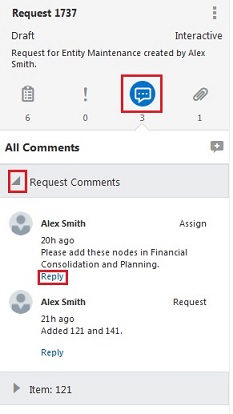
 icon, then click the arrow next to Request Comments, and then click Reply to reply to Alex Smith.
-
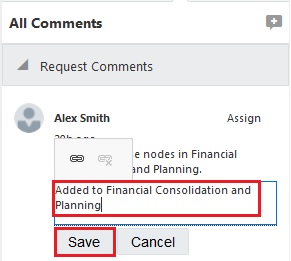
Enter "Added to Financial Consolidation and Planning", and then click Save.
-
Click Submit to submit the request.

-
Click Done and then Close to return to the Enterprise Data Management Cloud home page.
-
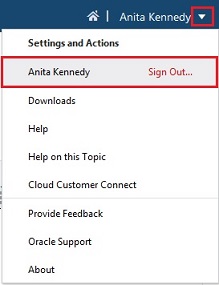
At this point, Anita is done, so she can sign out. Click the arrow next to Anita Kennedy at the top right of the screen, and then select Sign Out.
