Working with Journal Loads and Import Formats
- On the Setup tab, under Integration Setup, select Import Format.
- In the Import Format summary task bar, select an Financial Consolidation and Close consolidation application.
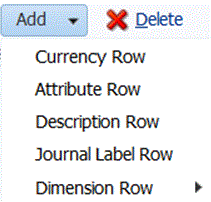
- From the Import Format Detail Mapping grid, select the source column and click the Add drop-down.

- Select the Journal Label Row, and enter the journal ID from the journal template used as the journal label when loading to the Financial Consolidation and Close in the Expression field.You cannot include the following characters in the journal label:
- period ( . )
- plus sign ( + )
- minus sign ( - )
- asterisk ( * )
- forward slash ( / )
- number sign ( # )
- comma ( , )
- semicolon ( ; )
- at symbol ( @ )
- double quotation mark ( " )
- curly brackets ( { } )
Additionally, you can specify the label; label and group; or no label or group in the Expression field.-
To specify a label and group, add values in the format
LABEL=<Label>#GROUP=<Group>in the Expression field. For example, you might enterLABEL=JE101#GROUP=CONSOLADJ. -
You cannot specify only a group (that is, without a label.)
-
If the journal ID field is null, Data Management creates the journal label as JL<loaded> automatically.
This is the process id. The journal name includes the process id, and you can tie it back to Data Management if needed.
-
For a multiple journal load, you can specify different journal labels in the file import.
- Click Add and insert the Description Row twice.
- In the Description 2 row, enter the journal description in the Expression field.
The journal description must be entered in the Description 2 row, so you must add the description row 2 times, and then you can delete the Description 1 row if not needed.

- Optional: Add other import format mappings as needed.
- Click Save.
After saving the import format, make sure that you associate it with a location. For more information about creating or working with locations, see Defining Locations.