Aggregating Transaction Matching Data
Data Management enables users to aggregate transactions for Transaction Matching. For example, using this aggregation option, you can load transactions at a detail credit card swipe level and roll them up to a summary total per location per day total for matching.
To set the Aggregation option:
-
From the Home page, click
 (Navigator icon) and then from the Integration category, select Data Management.
-
Select the Setup tab, and then under Register, select Target Application.
-
Add a new Transaction Matching target application or select an exiting one.
For information on adding a Transaction Matching target application, see Adding a Transaction Matching Target Application.
-
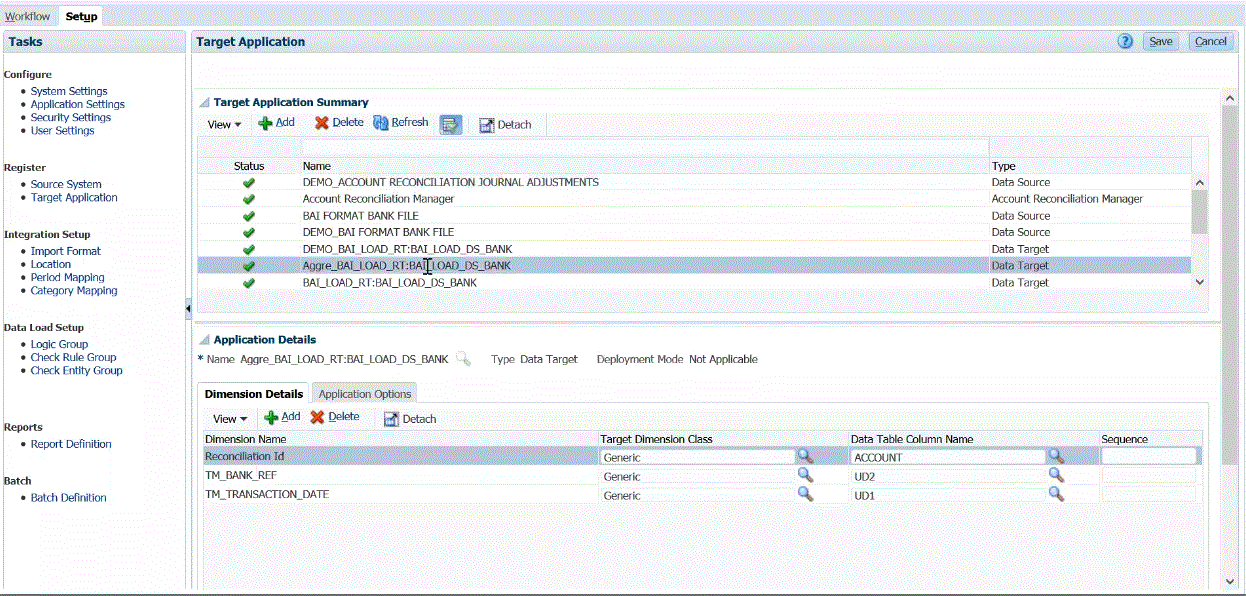
Select the Dimension Detail tab.
When you select a Transaction Matching target application, the dimension details of the application are populated automatically on the Dimension Detail tab.
Include only those dimensions that you want to aggregate when mappings dimensions. For example, if you want to roll up only the merchant number, bank reference, credit card type, or transaction date, include only these corresponding dimensions in your mappings.
-
Select the Target Dimension Class or click
 to select the target dimension class for each dimension that is not defined in the application.
The dimension class is a property that is defined by the dimension type.
-
Click Save.
-
Select the Application Options tab.
-
From Aggregation, click
 , and select Y to aggregate imported transactions.
To leave imported transaction unaggregated, select N.
The default aggregation setting is N.
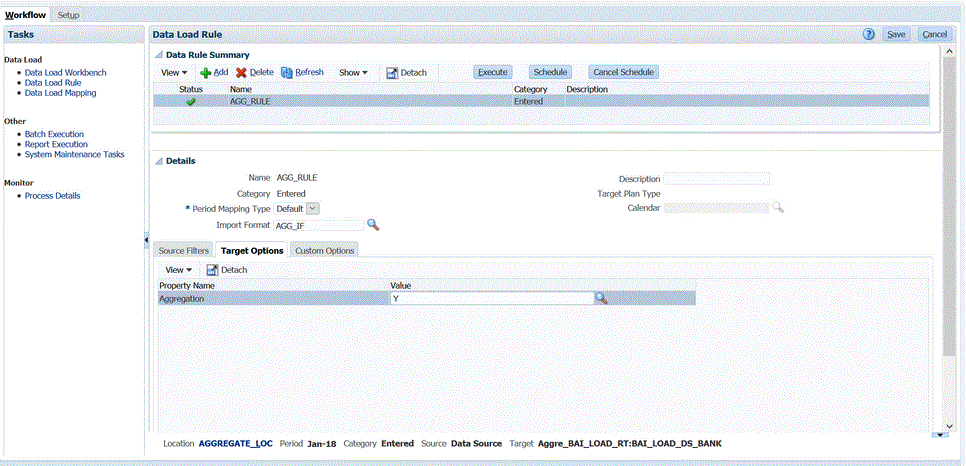
You can also enable the aggregation option by selecting Data Load Rule, then Target Options, then Aggregation and then Y (for yes).
The Aggregate option chosen on the Data Load Rule overrides the option chosen in the Application Options.
-
Click Save.
-
Set up the source and target mapping between the source system and the Transaction Matching target application by building an import format.
-
Define the location used to associate the import format.
See Defining Locations.
-
Create category mappings to map currency buckets.
For information on Account Reconciliation currency buckets, see Defining Currency in the Setting Up and Configuring Account Reconciliation.
-
Define the data load mapping to map the members from the source to target.
The SWIFT MT940 import format requires that you map the Reconciliation Id dimension to the corresponding Transaction Matching reconciliations. You can map other dimensions as needed.
-
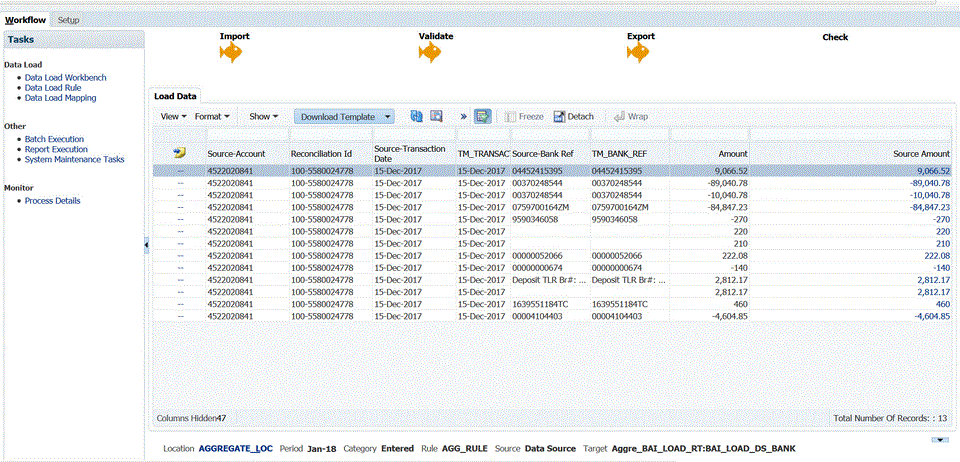
In the Data Load Workbench, test and validate the data by executing the data load rule to ensure that the data load rule is running properly, and your data looks correct. Data Management transforms the data and stages it for Account Reconciliation to use.
The following example shows how the data imported from source a Bank BAI file will be aggregated in Account Reconciliation. Here you can see that the second and third row, and sixth, seventh and eleventh rows are similar to each and will be aggregated. In this example, thirteen row are in the imported data.
-
To view the Transaction Matching with the aggregated imported data, from the Accounts Reconciliation home page, click Matching.
-
Click the Account Id to which the source accounts were mapped.
-
Click the Unmatched Transactions icon (
 )
)
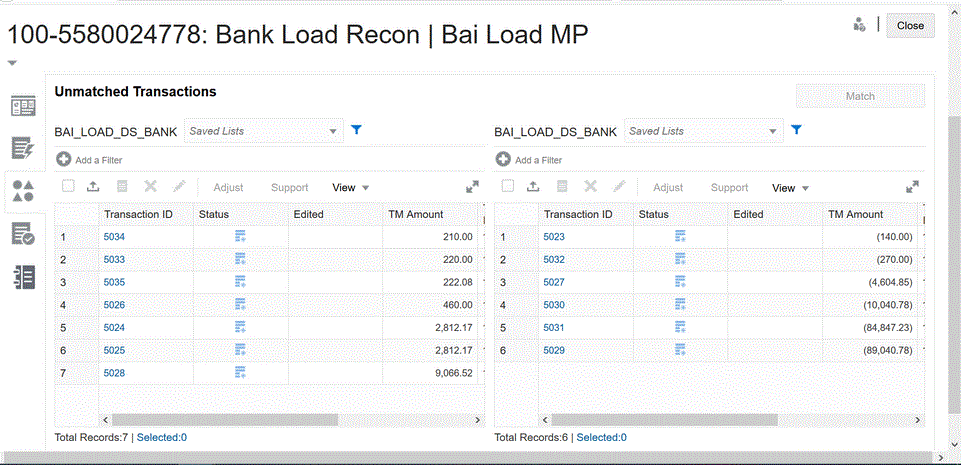
In the example from step 15, ten transactions are loaded here when aggregation is enabled:
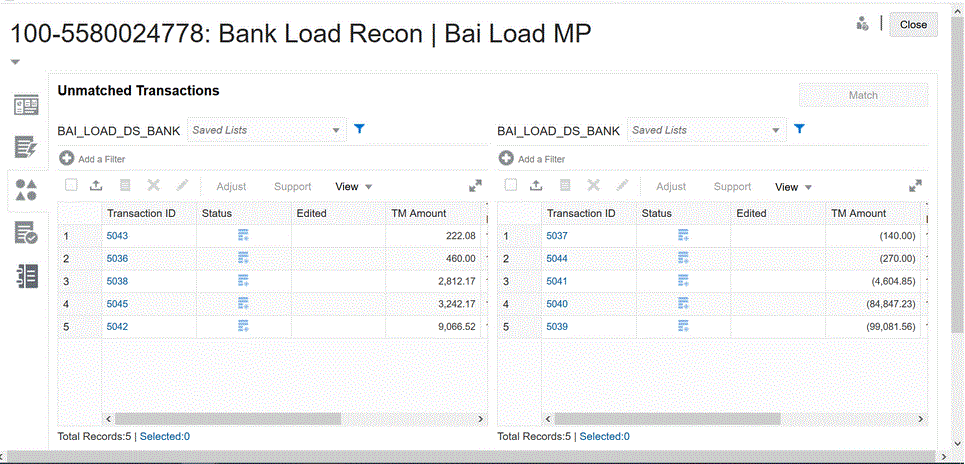
If the aggregation option is disabled, a total of thirteen transactions are loaded:
