Creating Connections to Narrative Reporting

After you install Oracle Smart View for Office, as described in Downloading and Running the Smart View Installer, you can create connections to Narrative Reporting.

Connections require information about your service URL. Your Smart View administrator should provide you with the information that you need to create the connection.

For the connection to Narrative Reporting, use the quick connection method in Smart View.

Note:

Use the procedure in this topic to create connections.

Once connections are created, use the procedure in Connecting to Narrative Reporting in Smart View for connecting on a routine basis.

To create a private connection to Narrative Reporting using the quick connection method:

  1. Open Microsoft Excel, Word, or PowerPoint, and select the Smart View ribbon.
  2. From the Smart View ribbon, click Panel.
  3. From the Smart View Panel, select Private Connections.

    Alternatively, from the Smart View Panel, click the arrow next to the Switch to button, The Switch to button, and then select Private Connections from the drop-down list.

  4. Still in the Smart View Panel, in the text box shown in Figure 23-1, enter the service URL for the Narrative Reporting.

    Figure 23-1 Quick Connection - Enter a URL


    Shows the Smart View Panel, private connection area and text box where you enter a URL to make a quick connection to Narrative Reporting.

    The URL syntax:

    https://serviceURL/epm/SmartView

    Your Smart View administrator should provide you with the URL for Narrative Reporting

  5. Press Enter.

    Alternatively, click the Go button, The Go button next to the text box where you entered the service URL.

  6. In the login window, enter your Oracle Cloud Identity Service Domain credentials, and click Sign In.
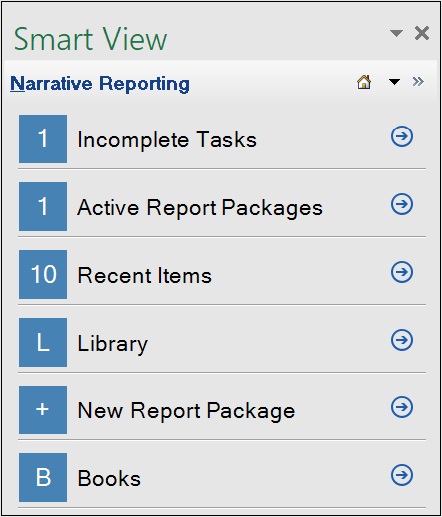
  7. If the Narrative Reporting Home panel is displayed, select Library to launch the Smart View Panel (if the Home panel does not display, skip to the next step).

    Shows the Narrative Reporting Home panel, providing access to the items that require user attention and access to recently accessed items as well as the Narrative Reporting Reporting Library node.

    The Narrative Reporting Home panel will display if you have already installed the Narrative Reporting extension, and are creating other connections to Narrative Reporting. For example, an administrator may be creating connections to a test environment and to a production environment.

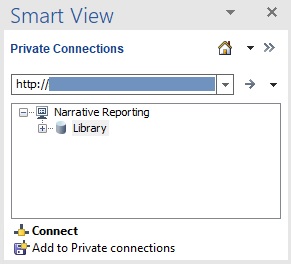
  8. In the Smart View Panel, expand the Narrative Reporting node, then select the Library node, and then click Connect.

    The Smart View panel showing the Library node selected and the Connect option below in the Action panel.
  9. Perform an action:
    • If the Extension Alerts dialog is displayed, then click the Go to Extension Dialog button. The Extension Alerts dialog informs you of the latest Narrative Reporting extension available for installation. To complete the extension update procedure, see Working with Extension Alerts.

    • If the Extension Alerts dialog is not displayed, continue with Installing the Narrative Reporting Extension