- Working with Disclosure Management for Narrative Reporting
- High Volume XBRL Tagging Process
- Publishing an Instance
Publishing an Instance
To publish an XBRL instance:
- Open Excel or Word, and click the High Volume XBRL tab.
- Click Connect.
- Enter Disclosure Management user and password details.
-
Click Publish.
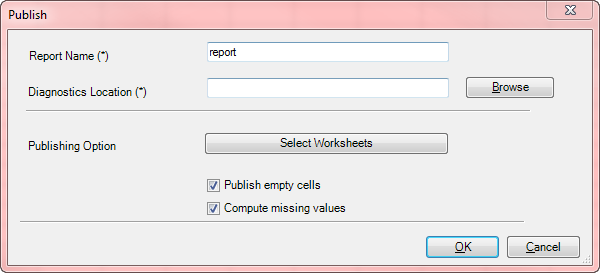
The publish dialog box is displayed.

- In Report Name, enter the name of the report.
- In Diagnostics Location, enter the location of the intermediate mapping files.
-
In Publish Option, click Select Worksheets to choose which worksheets to publish.
In the Select Worksheet dialog box, select the required worksheet for publishing, and then click OK
Note:
You may get duplicate tagging issues if you publish all worksheets at the same time. Oracle recommends that you publish each worksheet, and then validate the report. If there are any duplicate tags issues, then resolve issues in the current worksheet.
-
Optional: Select Publish empty cells, and Compute missing values, and then click OK
Note:
Selecting the Compute missing values option overrides the application setting. See Setting the High Volume XBRL Options
Publishing begins, and the XBRL instance is generated.
-
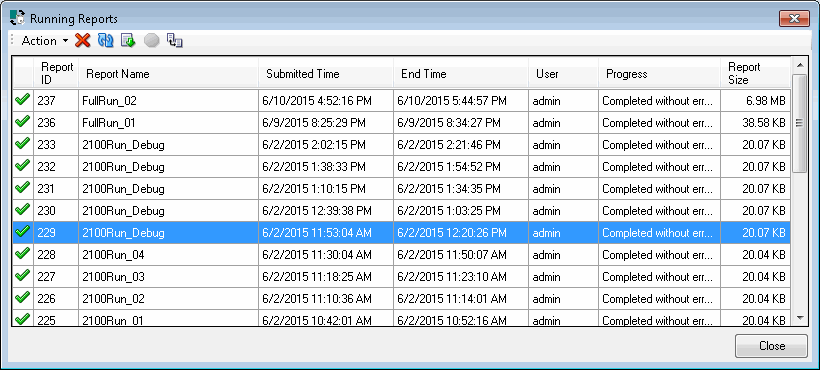
To view the report status, click
 .
.
The Running Reports dialog box displays the list of successfully completed reports and errors, if any exist.

Note:
You can store maximum of 50 reports at time.
After you update the Disclosure Management High–Volume XBRL client, you may not able to view the previously stored reports in the Running Reports dialog. Oracle recommends that you download the results and archive it in a different location, which helps you to view the report results even after updating the software. However, the Running Reports dialog box is not meant for long term storage.
(Optional): After the report has finished, click
 to download a the zipped file containing the XBRL instance and a validation log.
(Optional): You can delete a report. Select a report in the Running Reports dialog box, and then click
 .
.
Note:
You can delete only Completed and Failed status reports.
(Optional): You can cancel a report from running at the background. Select a report in the Running Reports dialog, and then click
 .
.
Publishing the instance produces a zipped file that contains a file with an extension
*.xbrl. This is the XBRL instance that was generated, which can be validated using Arelle or Regulator.