Working with Review Instances in the Review Center
You perform reviews by entering comments and providing your feedback in a review instance. The review instance shows you a draft version of the areas of the report package that you have been assigned to review (see Working with Review Instances in the Review Center.) The review instance may consist of the entire report or a subset of the report content.
Hyperlinks in the Review phase, for both internal and external links are highlighted when you hover over the links. You can add a comment to the hyperlink text in the review instance, and open or navigate to the link. In order to open the link you have to hover over the link and select Ctrl + Click. When selecting an internal link, you are taken to the location in the document within the same tab of your default browser. When selecting an external link, a new tab is open in your browser and the external link is displayed.
Note:
If the report in the review center looks different from the downloaded or printed version, you may be using a font that is not in the cloud service. Contact your service administrator to upload your TrueType fonts to enhance the rendering of the report on the web. If you are using Firefox, navigate to Tools, then Options, then General, and then Advanced, and ensure that the check box for Allow pages to choose their own fonts, instead of my selections above is selected.
Watch this tutorial video, you’ll learn how to compare multiple review cycles of a report package in Narrative Reporting.
![]() -- Comparing Reviews In Report
Packages.
-- Comparing Reviews In Report
Packages.
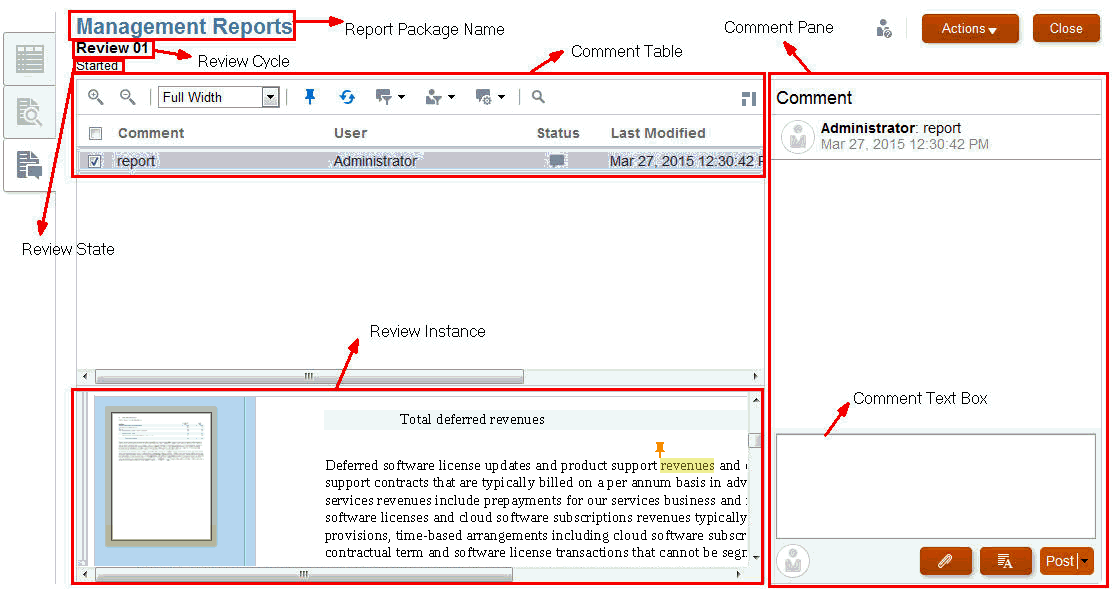
Figure 3-1 Sample Doclet in the Review Center

Working with Review Instances in the Review Center callouts are referenced in the procedures below. These are most important:
-
Comment Table—Contains the list of comments that have been entered which you can then filter using the filter icons.
-
Comment Pane and Comment Text Box—Used to enter comment text and post.
-
Review Instance—Where a review instance is displayed in the review center, and you highlight text for comment. Select or use the
 to toggle thumbnails for the review instance.
Note:
Use theReviewer Workflow
-
From a notification, select the link to view the review instance.
-
Post a comment. See Posting a Comment.
-
Add threads to comments made by others. For example, a previous reviewer may have asked a question that you know the answer to. You can add to their comment to provide an answer. See Posting a Comment.
-
Mark your review complete.
Receiving Notifications
When a report package is ready for review, a message notifies reviewers that they can begin their work. For example, in Working with Review Instances in the Review Center: see Review is required for Management Reports - Review Cycle 1. The review is past due.
Select the link to the report package to open the review in the review center.
Figure 3-2 Notifications

Posting Comments
To post a comment:
-
Do either of the following:
-
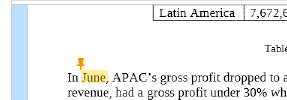
For Word-based report packages, select the text that you want to comment on and enter your comment in the comment text box.
Note:
You cannot post comments on an automatic or custom Table of Contents.
-
For PowerPoint-based report packages, click anywhere in the slide, including in the text or on a graphic, to drop a push pin for your comment, and then enter your comment in the comment text box.
-
- Select
 for your comment areas to be highlighted and marked with a push pin.
You can also add a comment to a graphic image in a review instance. Simply drop a push pin anywhere on the graphic image and enter comments as you did above for commenting on text.
Note:
You cannot add a comment to ready-made shapes in Word-based review instances. Ready-made shapes in Word include rectangles and circles, arrows, lines, flowchart symbols, and callouts.
-
To add a comment to an existing comment:
-
Select a comment in the comment table by selecting the check box next to it.
-
Enter your comments in the comment text box. You can also use the rich text editor for a comment and attach a supporting file to your comment. See Customizing Comment Text and Attaching Supporting Files.
-
Select Post. Your comment is displayed below the original comment in the comment pane, indented.

-
Miscellaneous Tasks
Reviewer can also do the following tasks:
Filtering Comments
You can filter comments in the comment management panel. For example, you can show or hide comments, display open or closed comments, or display a particular user’s comments. You can also mark comments as open, closed, or to be deleted.
To filter comments:
-
Select
 to display or hide comment pins within the report.
-
Select
 to see changes that were applied to comments by another user.
-
Select
 to view all comments, open comments, or closed comments.
-
Select
 to view only your comments, comments by a particular user, or all comments. Names displayed below the line are actual user names that you can select to see only their comments.
Note:
The default setting is to display your own comments.
-
Select the
 icon to open, close or to delete a comment. If a comment is closed, you can reopen it by selecting Open Comment from the drop-down list.
Note:
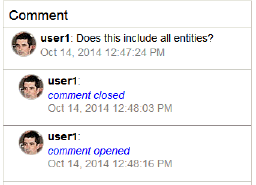
When you open or close a comment, the system indicates the change below the user name of the comment in the comment pane as follows,

Editing or Deleting Comments
You can edit or delete a thread entry when it is the last entry in the thread that you posted.
To edit or delete comments:
-
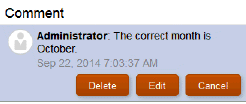
Select a thread entry that you started in the comment pane, and select Delete, Edit, or Cancel.

Note:
When deleting a thread entry, it does not delete the entire thread. It delete’s the last post, unless there is only one post.
-
Select Edit to modify the comment text, and then select Post at the bottom of the comment pane.
Attaching Supporting Files and Customizing Comment Text
You can select a local file from your computer to attach to your comment. For example, you might want to associate a supporting document with one of your comments. Or, you may want to customize the text of a comment using the rich text editor. For example, you may want to make text bold or apply a different font color. You can also add a URL to a comment.
To attach files, customize comment text, or add a link to a web page:
-
Select a comment you started in the comment pane, and select Edit.
-
Select
 to attach a local file.
-
From the Attach Local File dialog, browse to the file you would like to attach. You can also create a new name for the attached file you selected and then select
 .
.
-
Select
 to change the text, for example you can change the color of the text, size, font type, add a URL link, and so on.
-
To add a URL in a comment:
In the Comments text box, enter the URL; for example, enter:
http://www.oracle.com.For URLs to be recognized, you must precede them with a valid URL protocol identifier, such as:
http://orhttps://. For example:http://www.oracle.com.Note:
Oracle recommends testing URLs in a browser to ensure that they work before adding them to comments. -
Once you are done with your changes, select
 to post the comment and set the status as open or post the comment and set the status as closed if you are done and the change to the comment requires no further review.
Addressing Review Comments
When a comment is added to a review instance, the comment status is "Open". When the questions or concerns raised in a comment have been addressed, users can change the comment status to "Closed."
Some comments may be addressed with a simple reply to the comment. Other comments may require revisions to the original doclet. Any user except for a viewer, can respond to or address comments. Following are examples of the actions that users can take in response to comments:
-
Answer a question and then close the comment.
For example, if a reviewer asked if a figure in a doclet represented an up-to-date number, a user with that knowledge can reply to the comment and mark it closed.
-
Edit the doclet content and then close the comment.
For example, if a reviewer suggests an edit, another user can check out and edit the doclet, and then reply to the comment that the edit was made, and then close the comment.
-
Send the doclet back to the doclet author for additional revisions.
For example, if a reviewer suggests that a doclet is using old data and needs to be updated with the latest figures, the report package owner can send the doclet back to the author. When a doclet is restarted, a notification is sent to the doclet author indicating that the doclet has been reopened, and the doclet status is changed to "Started". Note that the doclet due dates for authors and approvers may be changed by the report package owner.
Marking Reviews Complete
If you are satisfied with your review and you would like to notify the report package owner, mark your review complete by selecting Mark Complete. After you mark your review complete, it prevents you from adding new comments. However, you can still reply to existing comments. The button toggles to Reopen for Comments.
Note:
To add more review comments to the report package, select the Reopen for Comments button.