Creating Dimensions
The dimension is the core building block of an Narrative Reporting application. It is a data category used to organize business data for the retrieval and presentation of data.
The Dimension type determines the type of business data that will be gathered and reported by the system, such as entities, currency, time periods, and so on.
Each application must include at least two dimensions:
-
One Time dimension
-
One Account dimension
You do not need to use all dimension types in your model. There are no restrictions on the number of additional dimensions or dimension types you can create, although you can only enable up to 20 dimensions in a model at one time.
When a dimension is edited, the dimension is locked to prevent concurrent editing. When a lock is applied, you see a lock icon next to the dimension name on the Dimensions and Models tab or in the dimension title on the Overview tab. When you close the edit dialog box, the lock is automatically removed. Dimension locking is applied in the following situations:
- When a dimension is selected for editing.
- When a dimension is being edited during the member/dimension selections for data grants. These locks are obtained at the dimension level and are based on which dimensions are in use at that moment.
- When a bulk operation is performed on a application, associated dimensions are locked.
Standard Dimension Types
There are seven standard dimension types:
When a lock is applied, you see a lock icon next to the dimension name on the Dimensions and Models tab or in the dimension title on the Overview tab. When you close the edit dialog box, the lock is automatically removed.
Table 4-1 Standard Dimension Types
| Dimension Type | Description | Dimensions per Model |
|---|---|---|
| Time | Represents reporting time periods, such as quarters and months. This dimension is required. | 1 |
| Account | Contains items that you want to measure, such as profit or inventory. This dimension is required. | 1 |
| Currency | Provides a list of currencies available for reporting. | 0–1 |
| Entity | Describes the structure of the users organization, such as departments, groups, locations, and so on. | 0–1 |
| Scenario | Enables you to view data in a selected perspective, such as Budget, Actual, Forecast, and so on. | 0–1 |
| Year | Defines the range of years that apply to this application. | 0–1 |
| Generic | Customized, user-defined dimension type can represent any dimension type that you require for your organization, such as product, customer, segment, and so on. | 0 –18 (This maximum is based on the assumption of 20 dimensions per model, with the mandatory Time and Account dimensions, and no other dimensions.) |
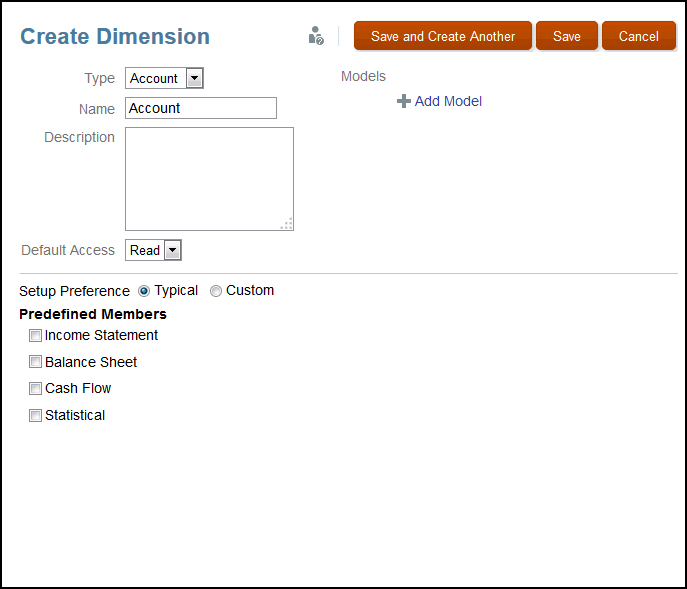
When creating your dimensions, you are offered two Setup Preferences to decide how you want to populate the dimensions in your application:
After a dimension is created, it can be edited manually in the Dimension Hierarchy or updated using a dimension build flat file.
Typical Setup Preferences
Typical setup preferences provide a set of predefined selections for each dimension type, except Generic. As the Dimension Type is selected, the screen changes to display the predefined properties that correspond to that selected dimension. The following table displays the predefined members for each dimension type.
Table 4-2 Typical Setup Preference Members
| Dimension Type | Predefined Members |
|---|---|
| Account | Select the account types you want to use:
|
| Currency | Select the Currencies your organization uses. The Currency code and country name are both displayed. |
| Entity | Select the entity types you want to use:
|
| Scenario | Select the scenario you want to use to calculate the variance or variance percentage between the selected Variance Scenario pairs. Variance expresses the difference as a numerical value, and %Variance expresses the difference as a percentage. The following scenarios are available, and can be used for comparison:
|
| Time | Select the Base Time Period (Monthly or Quarterly) and the Start Month for the period.
|
| Year | Select a Start and End year. |
| Generic | No predefined options are available for a Generic dimension. |
Custom Setup Preferences
Rather than building dimensions with the Typical Setup Preferences that use predefined properties, Custom options enable you to populate your application, using one of these methods:
-
Import metadata from an existing database using a dimension build flat file to customize the dimensions for your organization and application. If you decide to load from a flat file, you must format the file according to the Narrative Reporting file formats. For details on formatting existing metadata files for use in Narrative Reporting, see Load and Extract Dimension Members.
-
Define dimensions manually in the Dimension Hierarchy. For details on working with the dimensions and their properties, see Manage Dimensions Using the Hierarchy Editor.
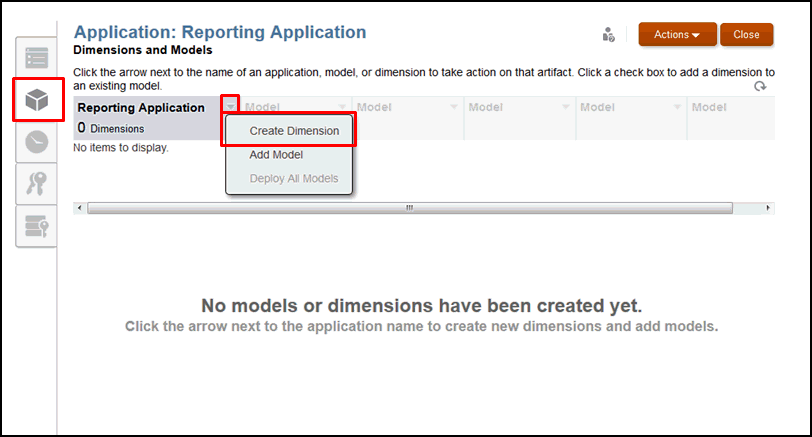
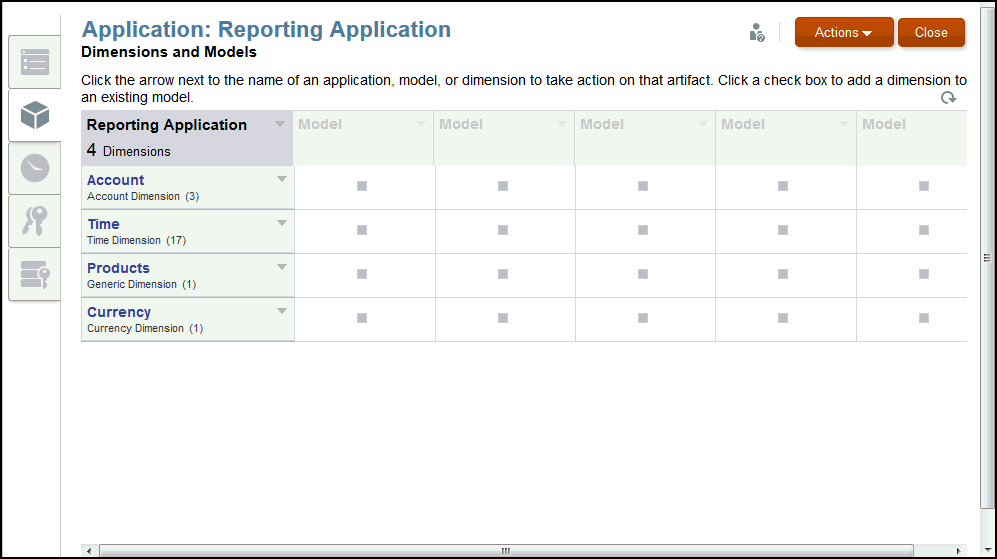
To create a dimension:


