Extracting Data
You can easily extract data from a model. You can choose to extract all data in the model or just a portion of the data. We recommend, as a best practice, to perform extracts to:
-
Back up data in a model on a regular basis
-
Back up data before performing a Clear All or Clear Partial Data action.
Extracting All Data from a Model
To extract all data from a model:
-
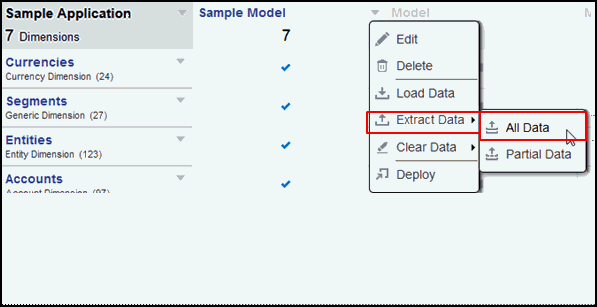
From the Model drop down menu, select Extract Data, then All Data.
-
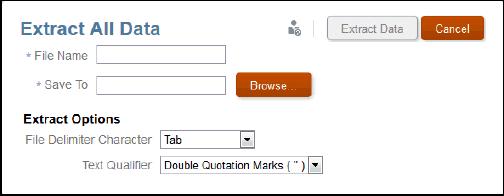
Identify the target file name. Since the file will be a ZIP file, the .zip extension is automatically added.
-
Select the location in the library for the data extract.
-
Decide on the Extract Options:
-
File delimiter character (tab, space, comma, colon, semicolon)
-
Text qualifier: Double or single quotation marks
-
-
Click Extract Data. A confirmation message displays that a background process to extract the data has initiated and the data will be saved to the location you specified in the Library.
Extracting Partial Data from a Model
To extract partial data from a model:
-
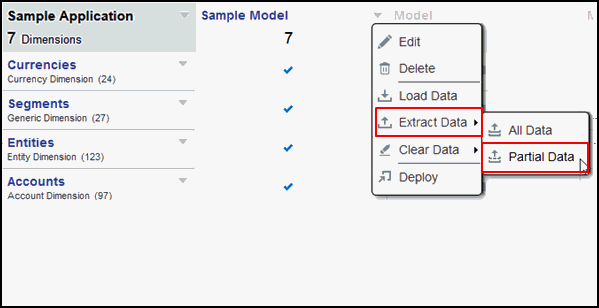
From the Model drop down menu, select Extract Data, then Partial Data.
-
Select a dimension from the dimension drop-down. For example, Fiscal Calendar.
-
Click the Member Selector icon to allow you to choose members and drill down to the next level.

-
Click the arrow icon to add the member to your selection.
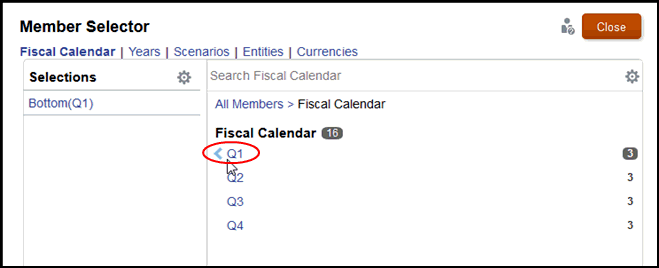
If the member is a parent, like Q1, the Bottom function is added automatically in your selection list. This function returns all of the lowest-level members in the hierarchy below the selected member.
-
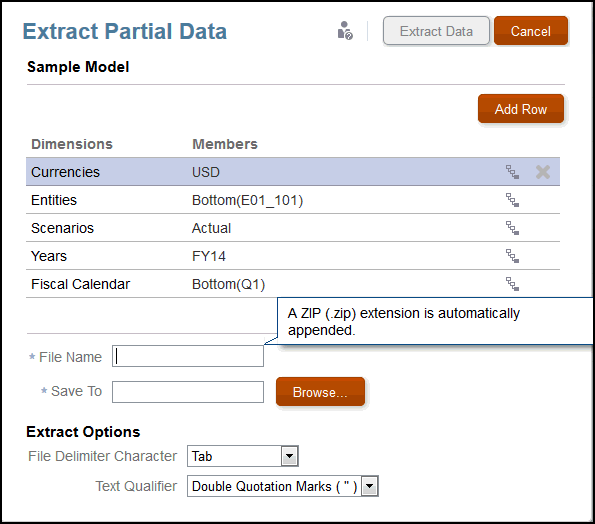
Repeat these steps to select the remaining dimensions and members that define the partial data extract.
-
Identify the target file name. Since the file will be a ZIP file, the .zip extension is automatically added.
-
Select the location in the library for the data extract.
-
Decide on the Extract Options:
-
File delimiter character (tab, space, comma, colon, semicolon)
-
Text qualifier: Double or single quotation marks
-
-
Click Extract Data. A confirmation message displays that a background process to extract the data has initiated and the data will be saved to the location you specified in the Library.
An example of an extracted data file is shown:
