Creating a Point of View
To create a point of view:
-
On the Calculation Control page, click
 , or select Actions, and then
Create.
-
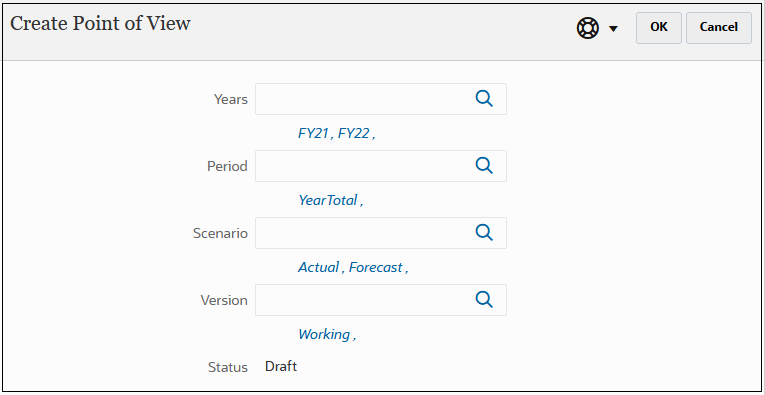
In the Create Point of View dialog box, select members for the Years, Period, Scenario, and Version dimensions.
-
Click OK.
The point of view you create is displayed on the Calculation Control page.
Note:
When you create a point of view, the Status is intially set to Draft. Later on, you can edit the point of view and change the status to Published or Archived. You cannot run calculations on a published or archived point of view.
Creating Multiple Points of View
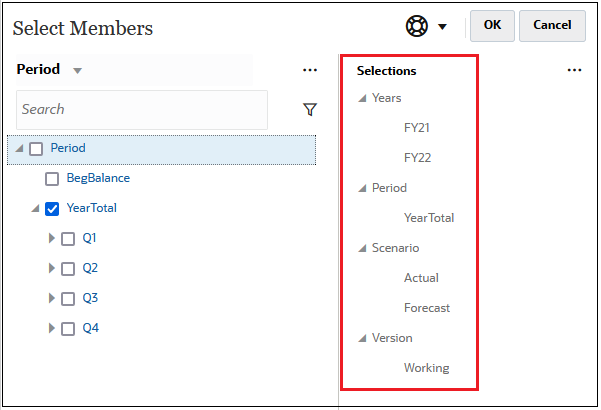
You can create multiple points of view at one time. To do this, select multiple members for one or more POV dimensions. This creates a POV for each intersection.
For example, you could create all the points of view needed for modeling the actual
and forecasted data for 2021 and 2022. To do this, you would click ![]() next to each POV dimension and make the following selections in the
Select Members dialog box:
next to each POV dimension and make the following selections in the
Select Members dialog box:

Note:
When you select an upper level member, POVs are created for all the level 0 descendants of that member. In this example, selecting "YearTotal" in the "Period" dimension will create POVs for all 12 months.
The selections you make for each dimension are displayed in the Create Point of View dialog box.

In this example, 48 points of view would be created to model the actual and forecasted data for 2021 and 2022.
Note:
If any of the POVs overlap with existing POVs, the existing POVs are skipped, and the remaining new POVs are created. The number of POVs that will be created and the number of POVs that overlap with existing POVs is displayed when you click OK in the Create POV dialog box.
Note:
For more information on selecting members, see Using the Member Selector.