Creating, Confirming, and Running Modeling and Analysis Commands
Use the PCM Agent page to request assistance with workflow tasks by executing confirmed modeling commands.
When you first open the PCM Agent page, the supported actions are available as buttons on the bottom right of the page. Supported actions include:
- Create Model
- Create Rule Set
- Create Rule
- Add Member
- Replace Member
- List Rules
- Run Trace
- Copy Rules to Rule Set
- Copy Rules to Model
- Enable Rules
- Disable Rules
- Calculate Model
Figure 14-1 PCM Agent Page Showing the Actions Supported by PCM Agent
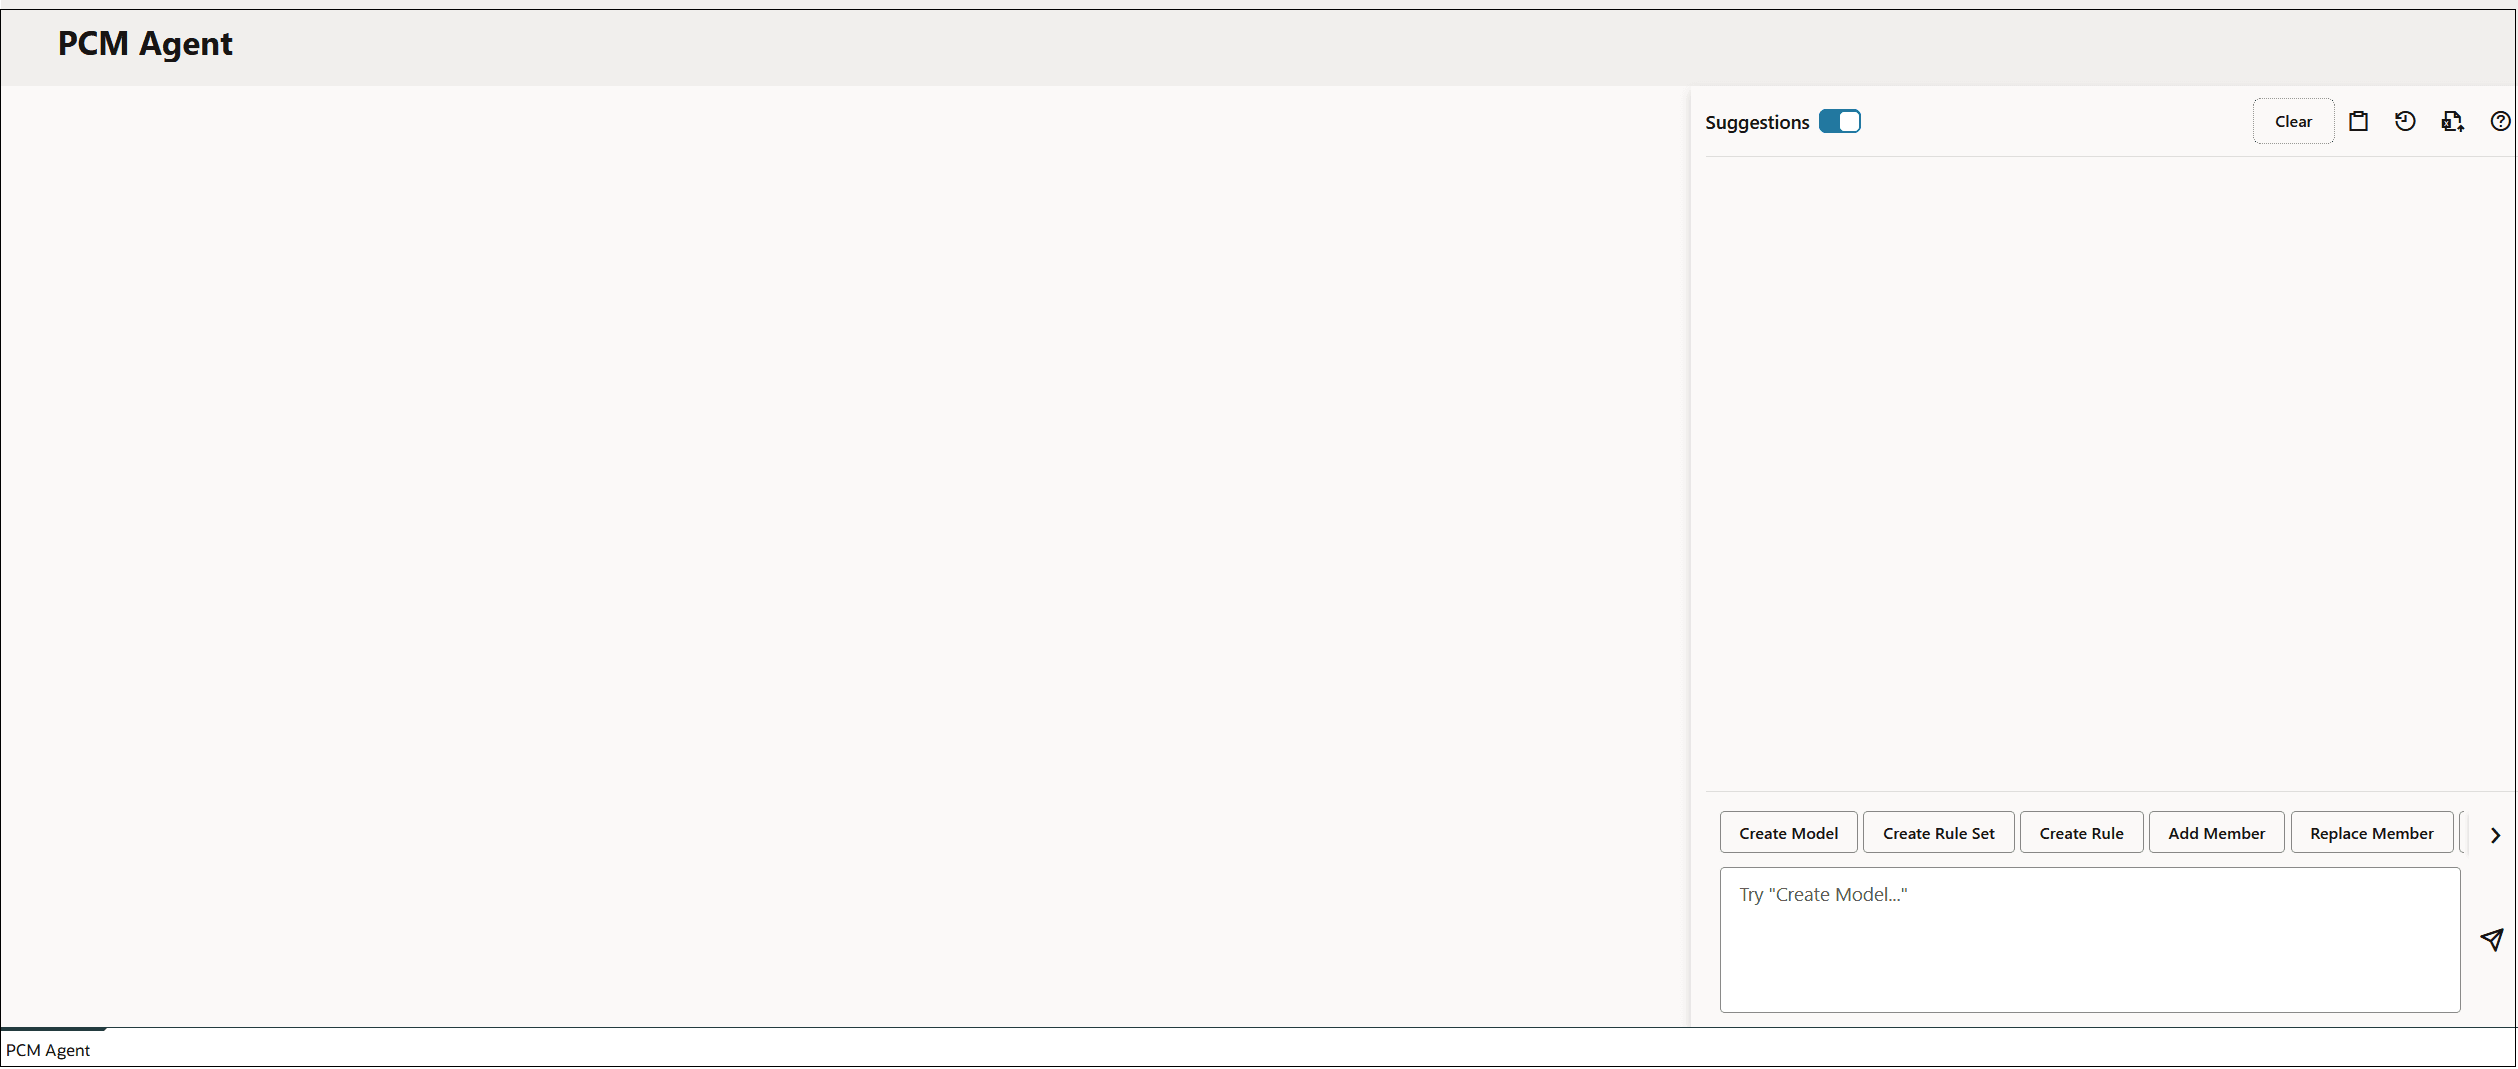
You can select an action by clicking the button corresponding to the action, or by typing
text that describes the action. For example, to create a model, you can click ![]() , or you can type '"Create Model" in the text box.
, or you can type '"Create Model" in the text box.
You can narrow down the available actions by typing in the first word of the action. For example, if you type "create", only the buttons with "create" in the action are displayed:

When you type text or click a button to select an action, the PCM Agent page displays the following information related to the action:
-
Suggestions: Lists the required and optional parameters. (Move the slider next to Suggestions to enable or disable the display.)
-
Example Requests: Provides examples of requests that you can make. The example requests include all of the required parameters and some or all of the optional parameters.
When you enter a request to complete an action, you can either type in the request or
click ![]() (Copy to Request) next to one of the example requests to
copy the request into the text box.
(Copy to Request) next to one of the example requests to
copy the request into the text box.
In the following example, the first example request to create a model is copied to the text box at the bottom of the screeen.
Figure 14-2 PCM Agent Page Displaying Example Requests and Suggestions for Creating a Model
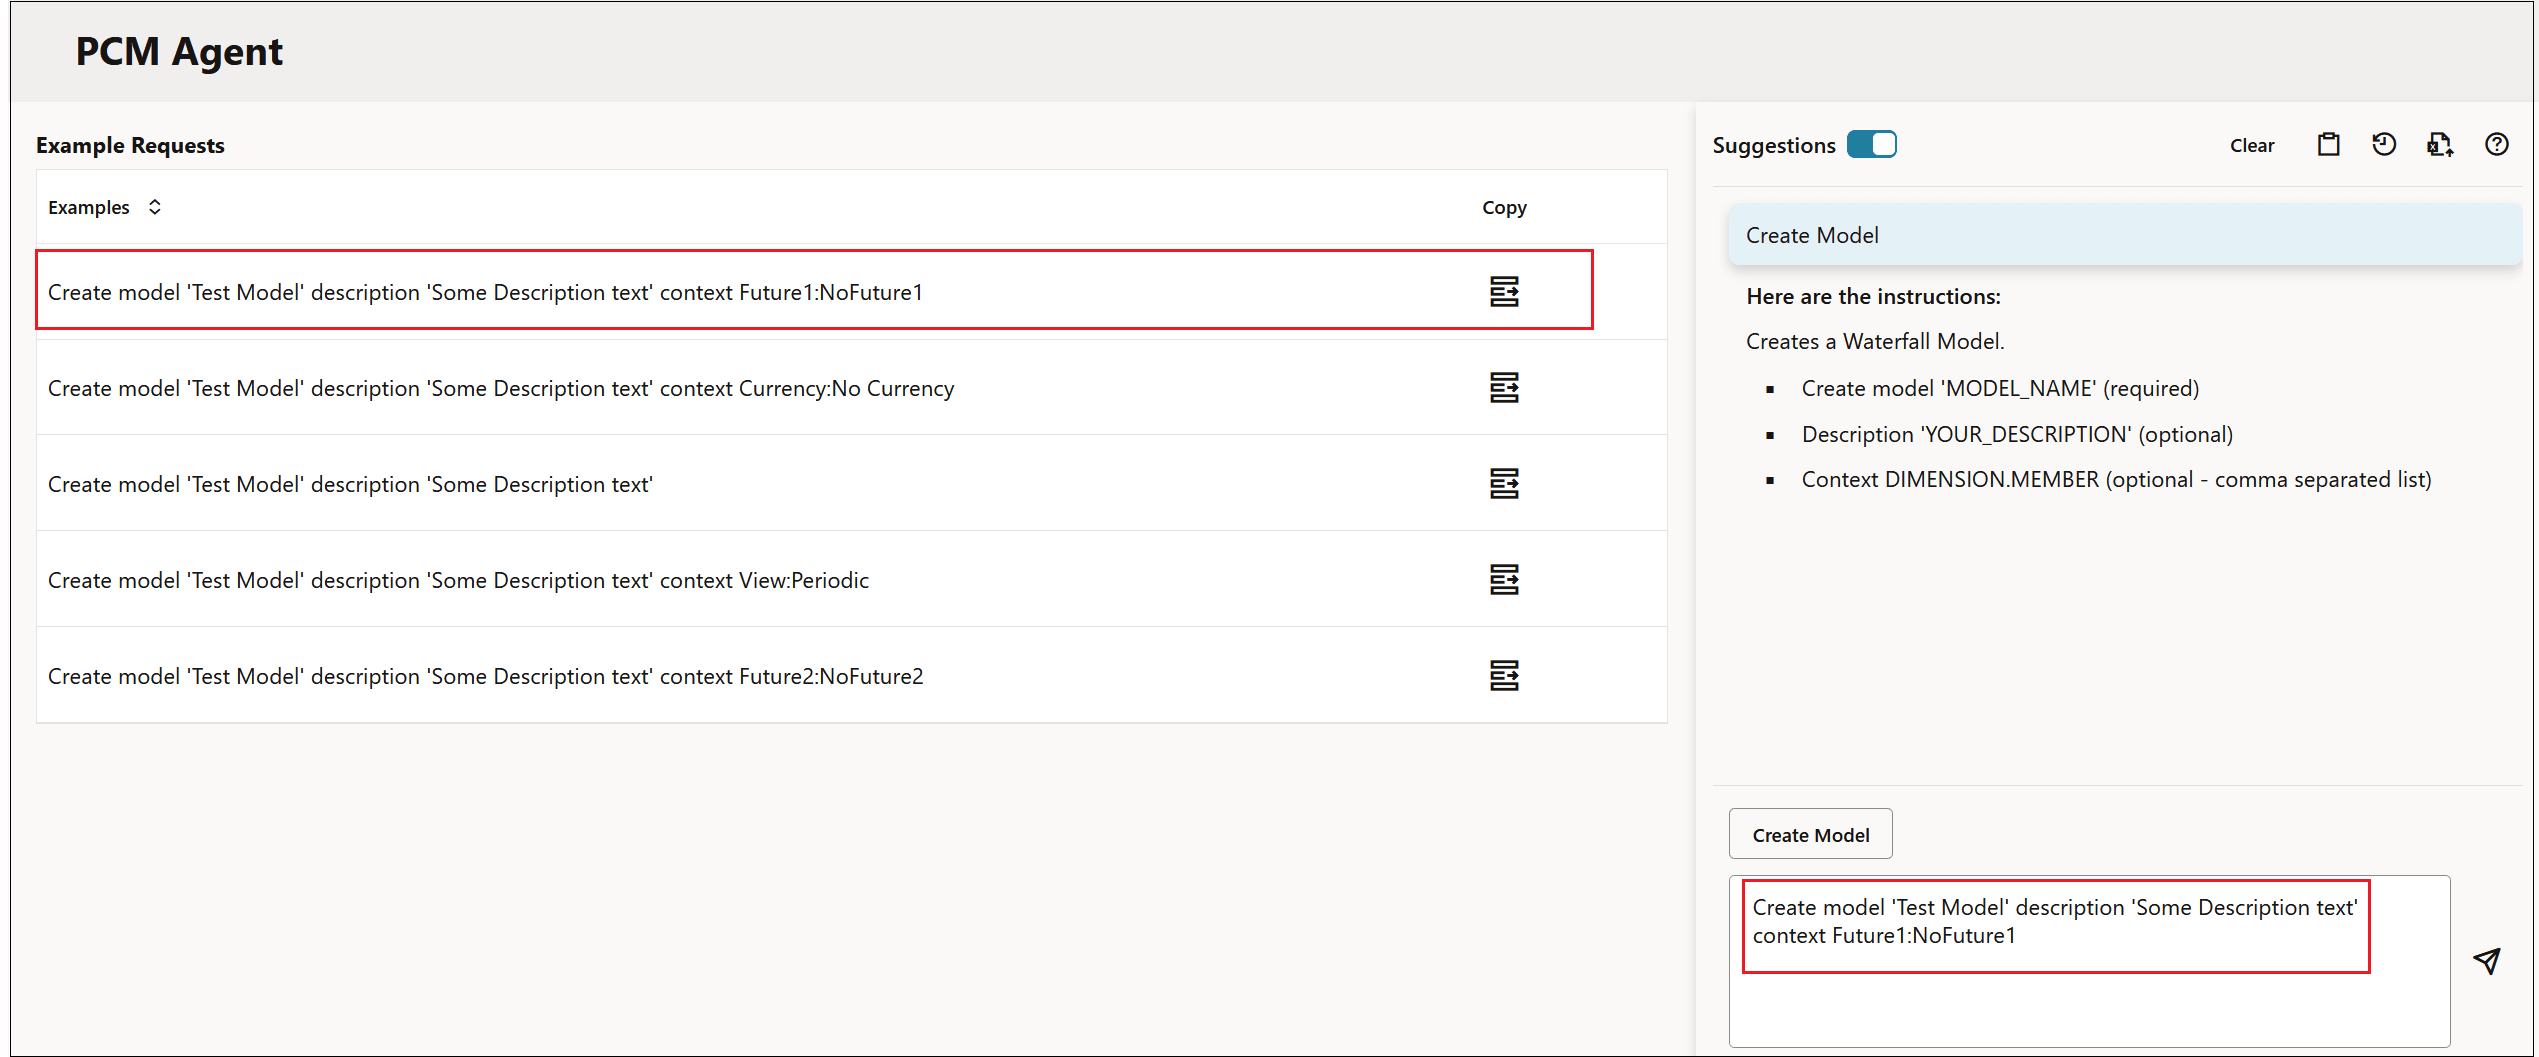
If you copy an example request, replace the text in the quotation marks with actual parameter values.
When you are satisfied with the request, click ![]() (Send).
(Send).

After you click ![]() (Send), the PCM Agent page is
updated with the request information.
(Send), the PCM Agent page is
updated with the request information.
Figure 14-3 PCM Agent Page Displaying Request Information for Creating a Model
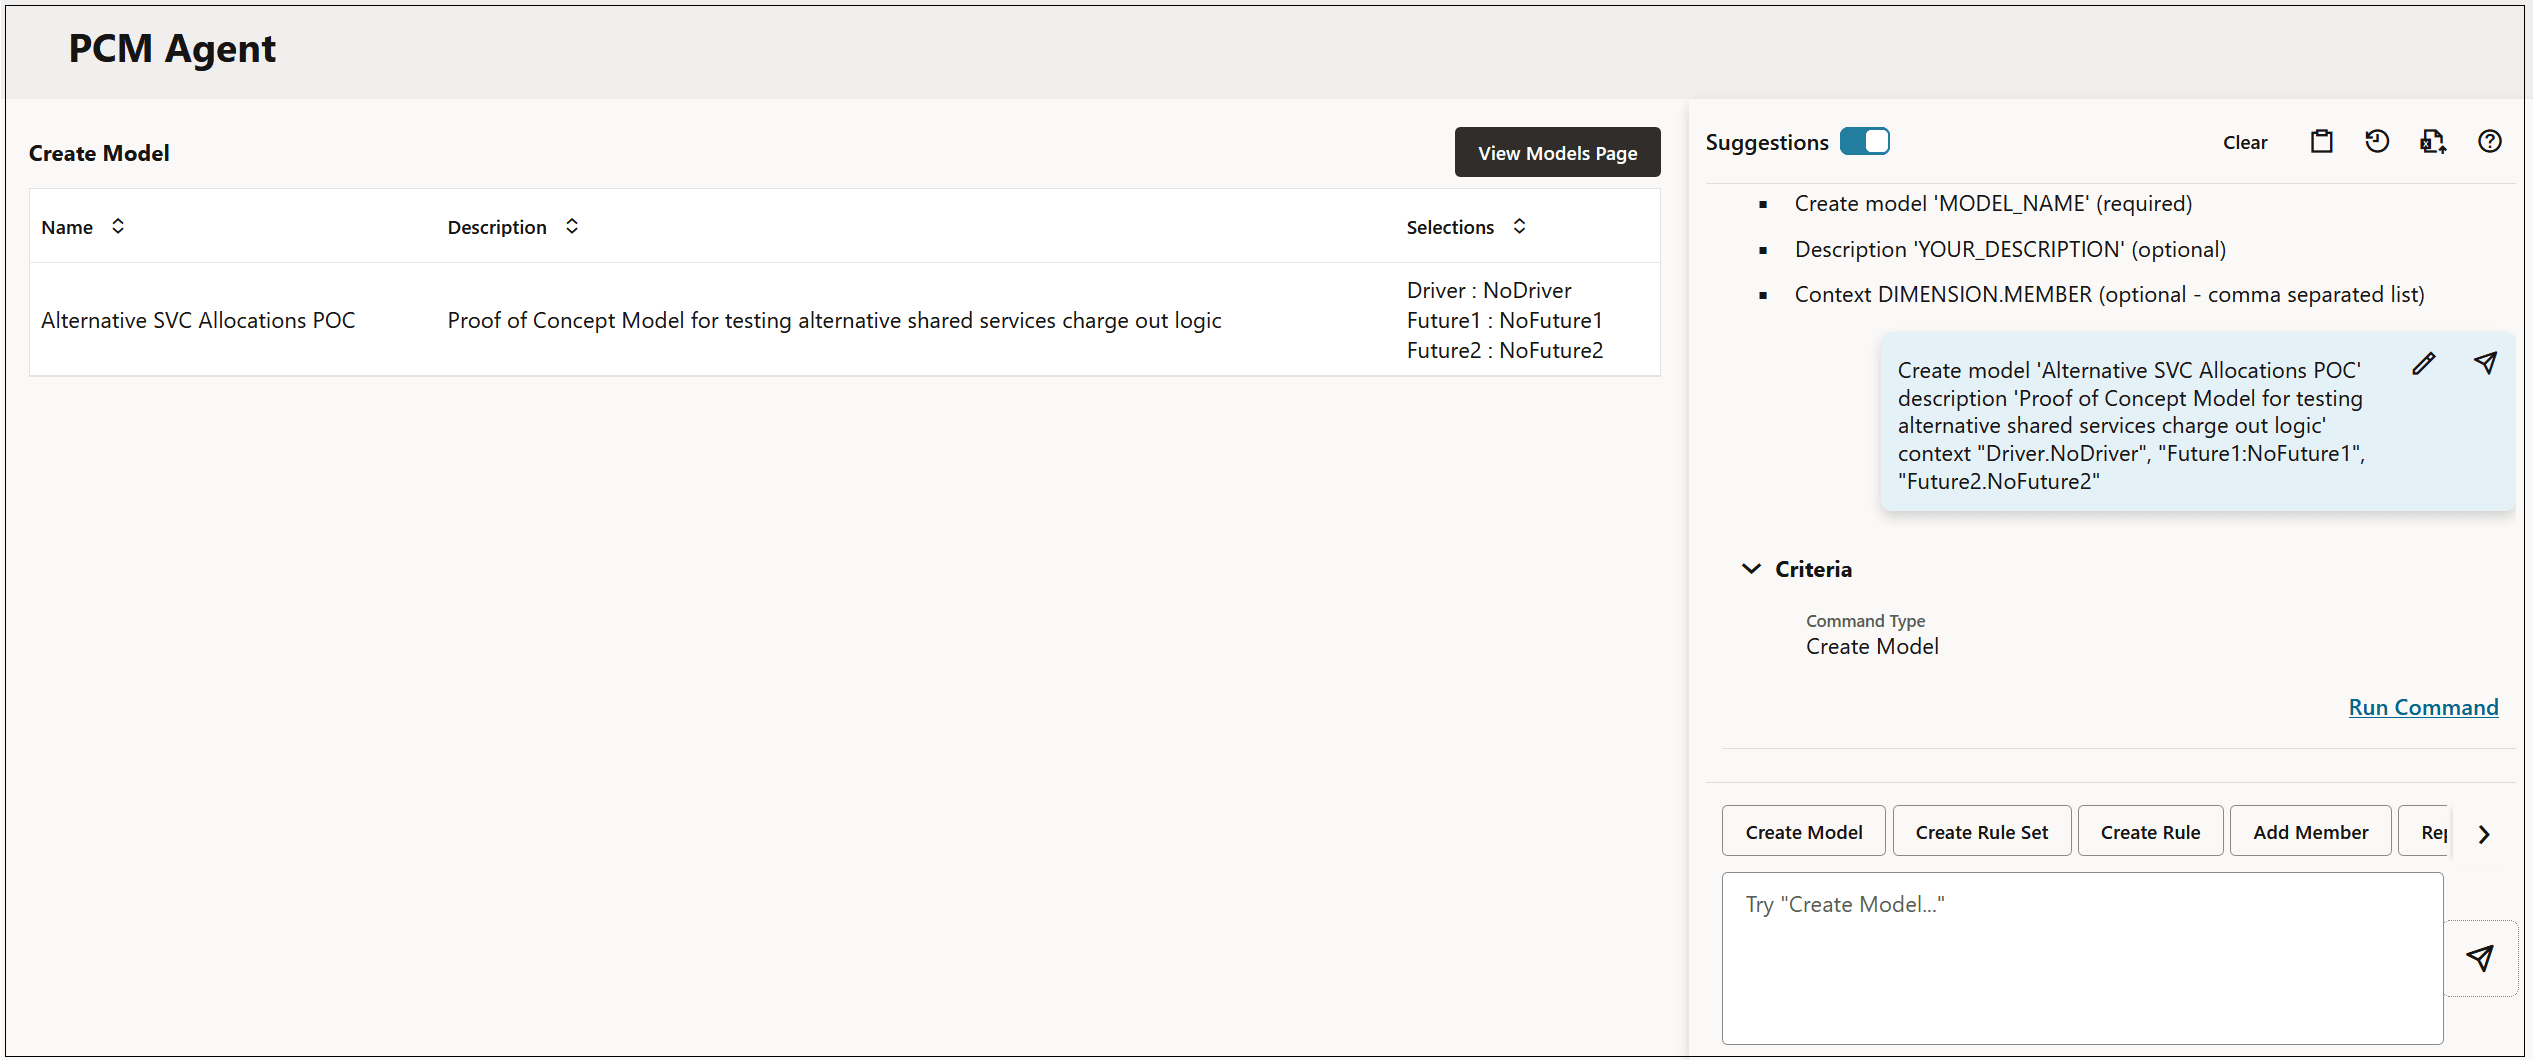
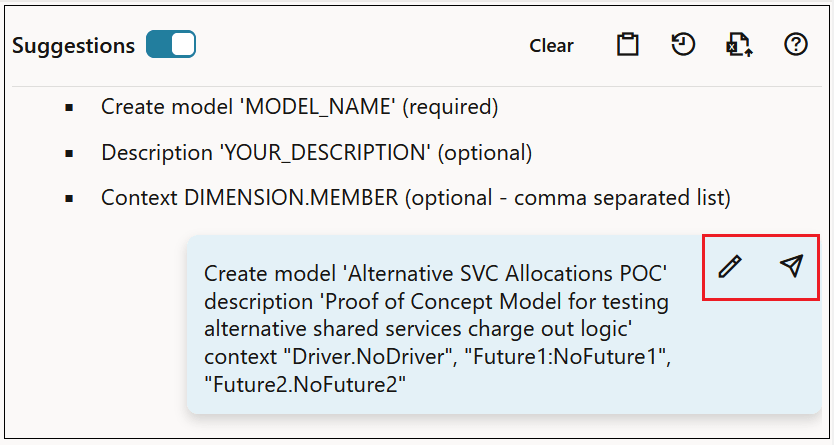
At this point, you can review the request. If you need to make any changes, click ![]() (Refine), and then click
(Refine), and then click ![]() (Resend).
(Resend).
When you are satisfied with the request, click Run Command.

You will get a message that the command ran successfully, or it will display any errors. You can then select an option to view the action for which your request was designed.
For example, if you enter a request to create a model, you can click View Models Page to view the model on the Models page.
Figure 14-4 Clicking View Models Page Opens the Models Page in a New Tab
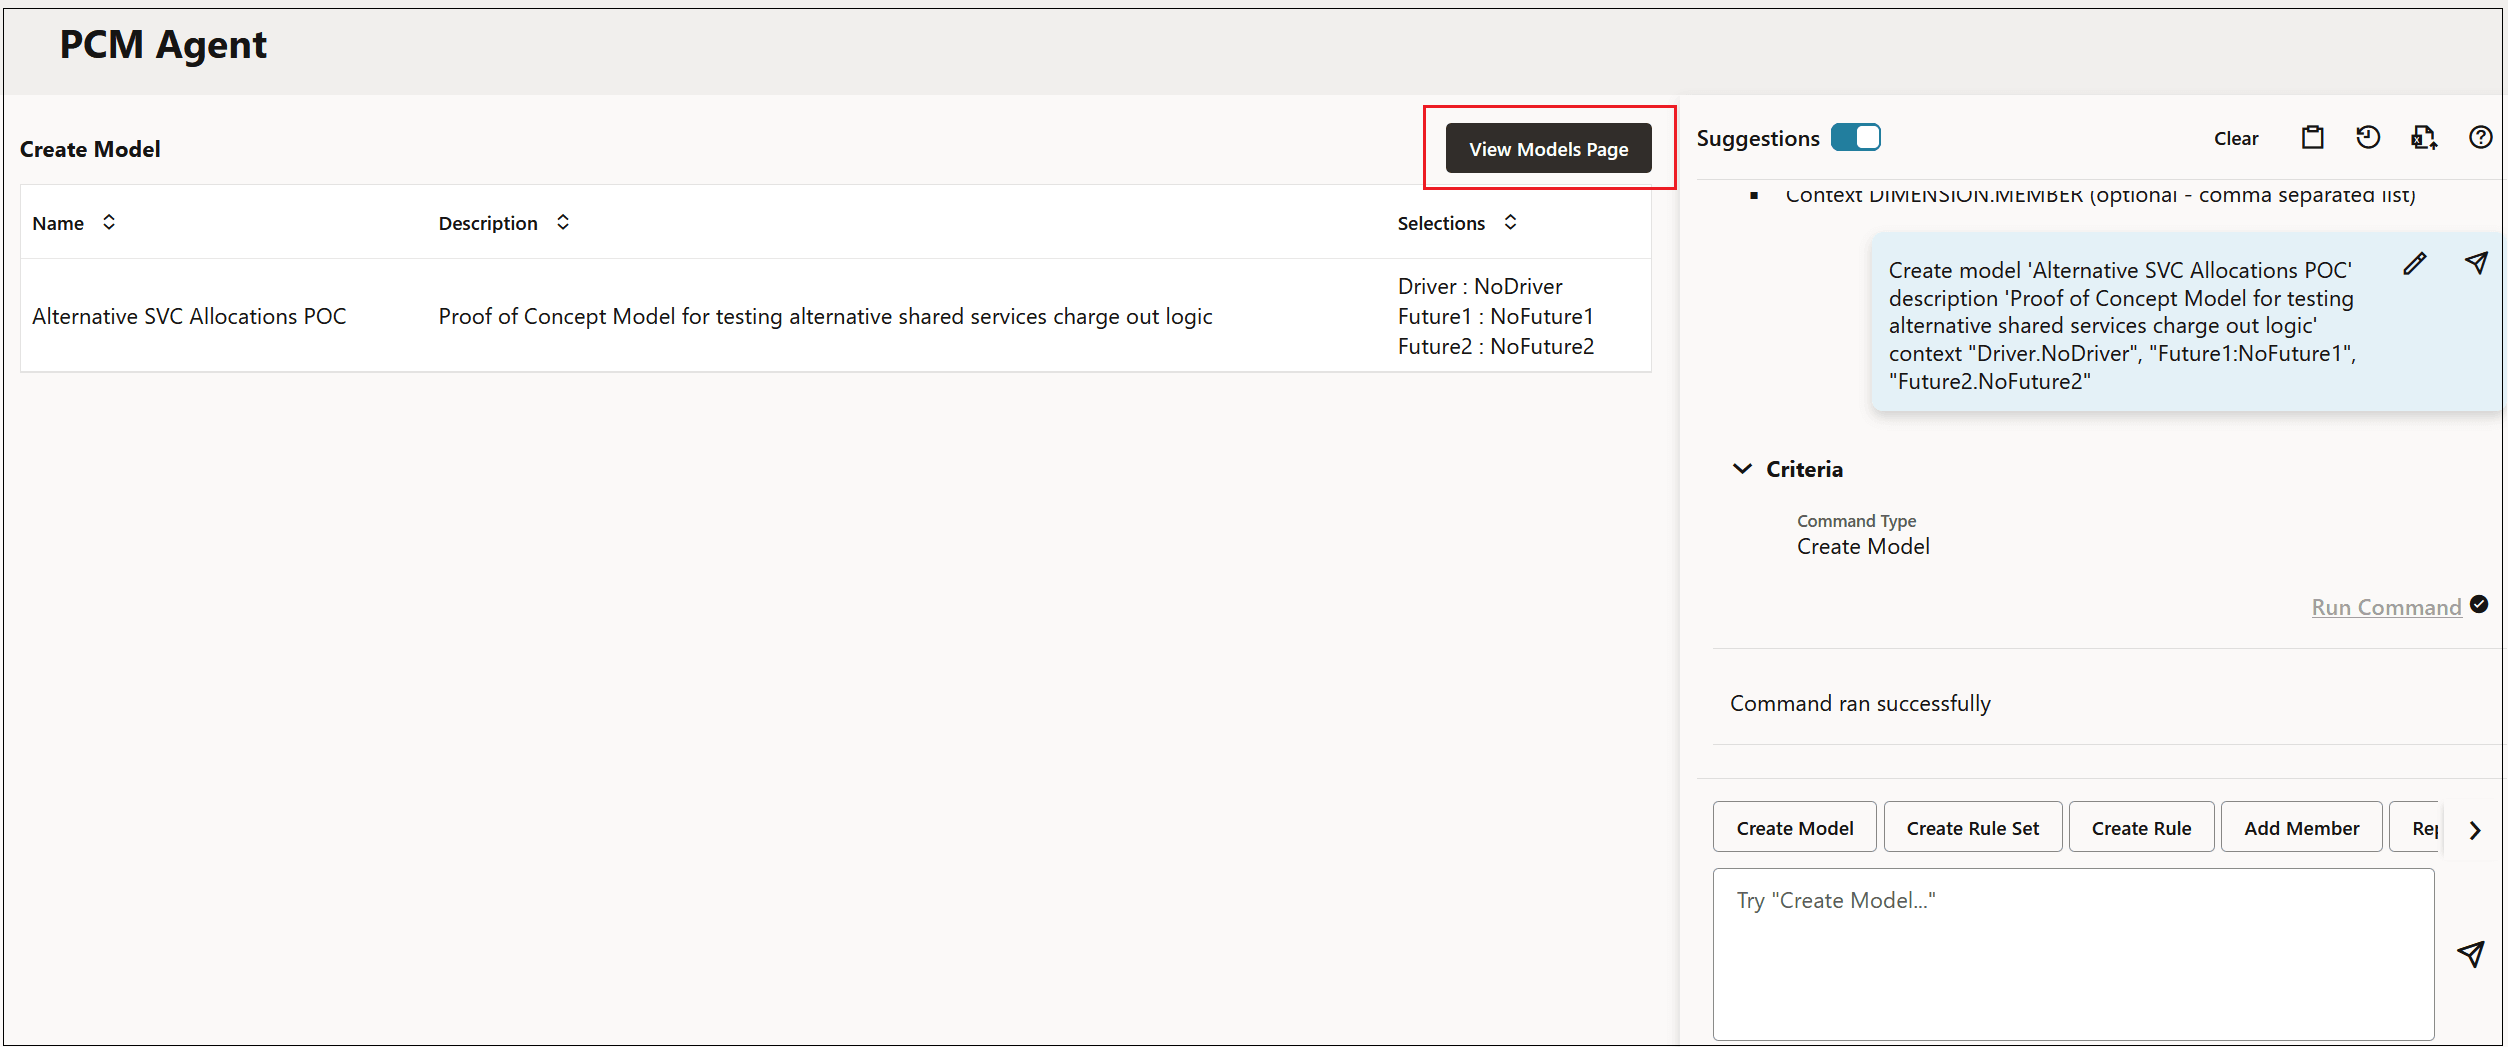
Figure 14-5 Models Page Opened in a New Tab Showing the Model Created with PCM Agent
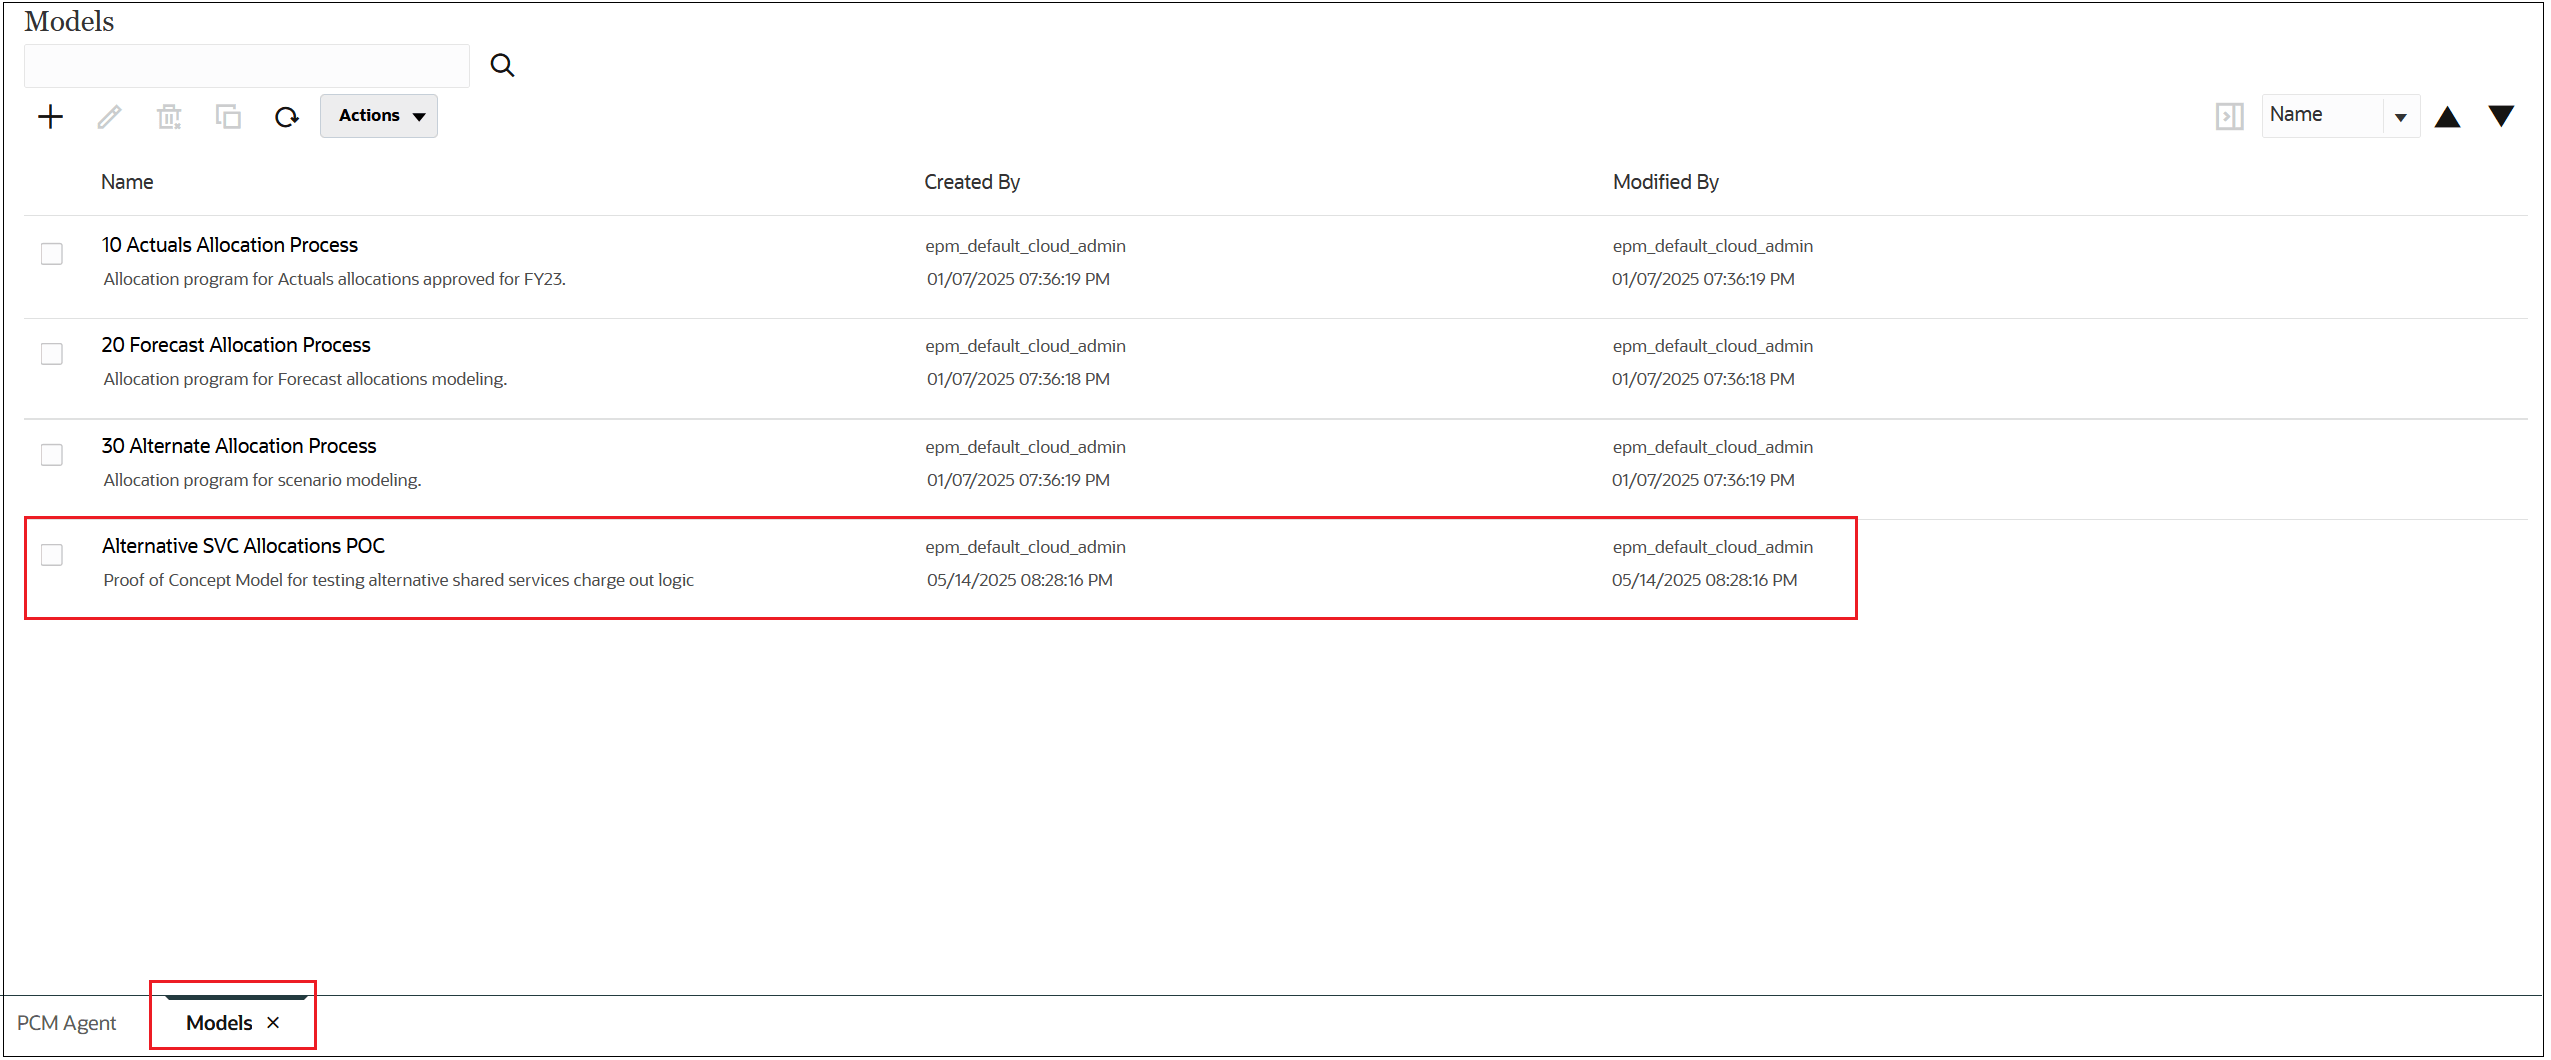
To go back to the PCM Agent page, click the PCM Agent tab at the bottom of the page.
Other actions that you can perform on the PCM Agent page include:
-
Click Clear to clear the request information under Suggestions.
-
Click
 (View Jobs) to display the jobs created for the
request.
-
Click
 (Examples) to display additional example
requests.
-
Click
 (Export to Excel) to export a prompt history CSV
file to Excel, where you can review all the requests you have created.