Complete the Conditions Tab

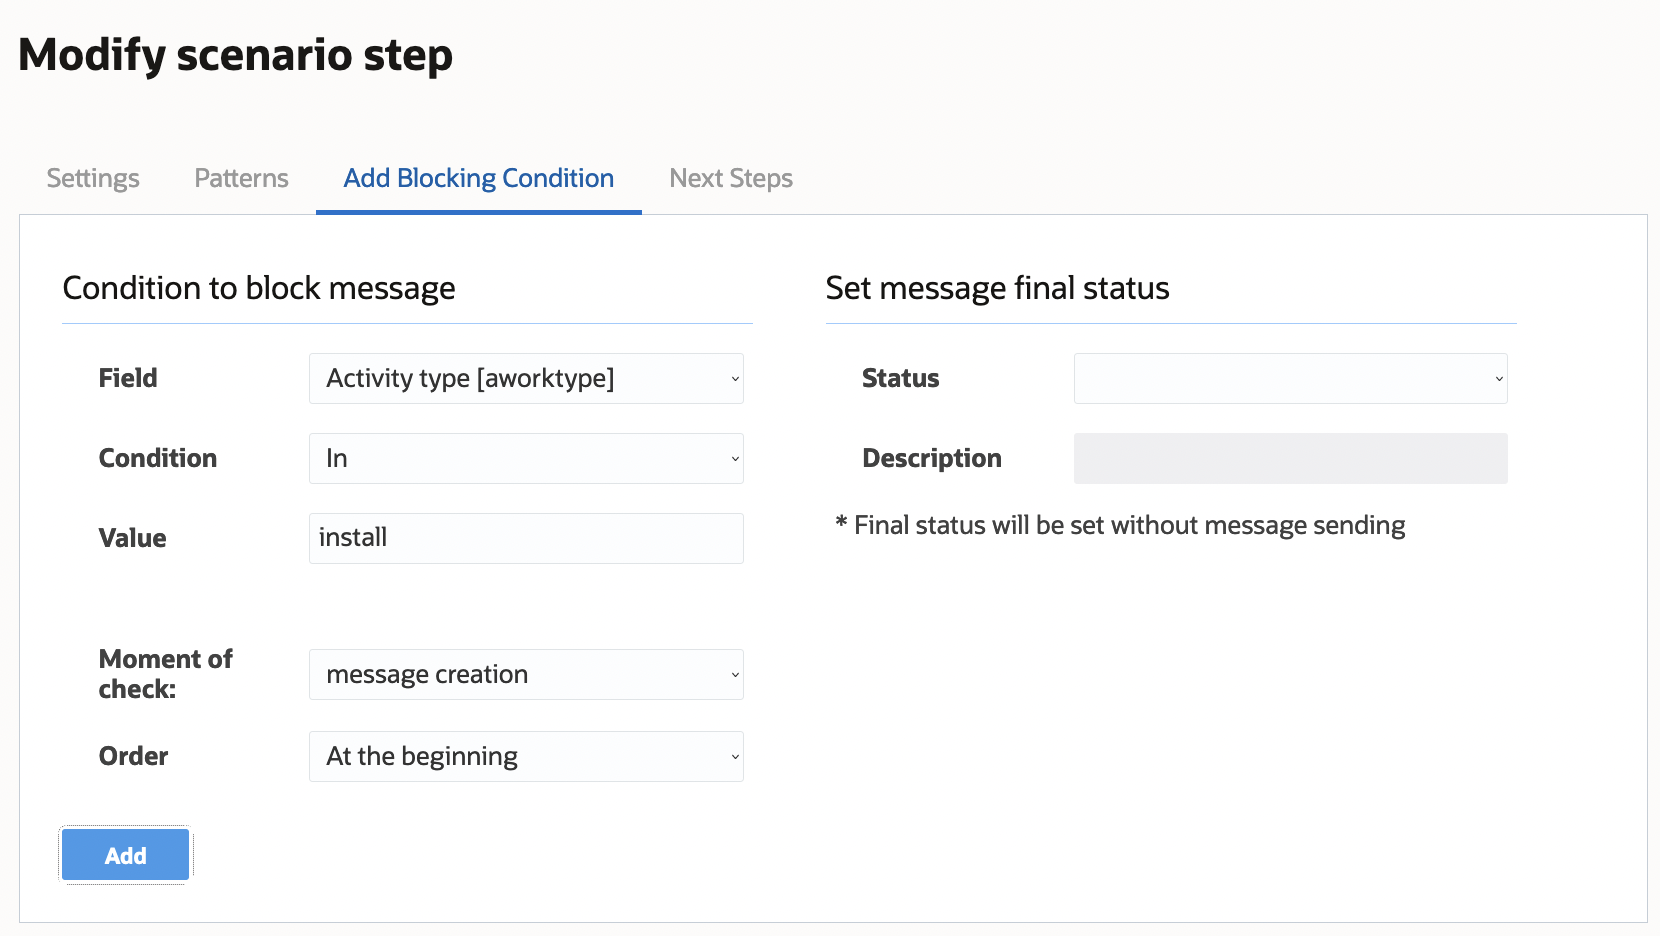
The Conditions tab is used to define the set of blocking conditions under which the message should not be sent.

To define blocking conditions:
  1. Open the scenario step for which you want to define blocking conditions.
  2. Click the Conditions tab.
    The Add Blocking Condition tab opens:
    This screenshot sows the Add Blocking Condition tab.
  3. Complete the fields as described in the following table.

    Fields in the Add Blocking Condition tab

    Field Name Description
    Condition to block message
    Field

    Select the property from the menu that you want to use as the blocking condition. The menu includes all available properties related to activity, inventory, resource, service request, route, visit, user, and shifts and calendars. Additionally, several other fields, such as interface and day of the week, can be used for blocking conditions.

    Check on
    Choose one of the following options to define the time when the message’s blocking conditions should be checked:
    • On creation—The conditions are checked at time of the message generation and not checked again.

    • On sending—The message is generated and stored in the message queue. The blocking conditions are checked at the time of message sending, which allows the system to account for any changes since the message was generated.

    • On creation and sending—The blocking conditions are checked at time of both message creation and sending.

    Condition

    Select the operator from the menu that relates the field you selected and the value you'll enter. For example, to block a message if the day hasn't changed, you'd select Day changed? for the field, enter no for the value, and select in from the Condition menu. The menu options include:

    In–The field value matches the entry in the Value field.

    Not in–The field value doesn't match the entry in the Value field.

    Contains—The field value contains the entry in the Value field.

    Does not contain—The field value doesn't contain the entry in the Value field.

    Note: Don't use the Contains or Does not contain option for enumeration properties.

    Is empty—The field value is null or undefined.

    Is not empty—The field value isn't null.

    >

    >=

    <

    <=

    These operators compare the field value to the entry in the Value field. They apply to integer, string, enumeration properties, and date/time fields.

    Does not start with—The field value doesn't start with the entry in the Value field.

    Starts with—The field value starts with the entry in the Value field.

    Status
    Select the final status that will be assigned to the message when the defined conditions are met. Setting the status lets the message be processed further in the scenario, even though the actual message creation is blocked by the defined conditions. The options include:
    • Failed

    • Sent

    • Delivered

    • False Method

    • Obsolete

    Note: If you don't select an option from the Result menu, no message is created.
    Set message final status
    Value

    Type a value that will be compared to the field value with the following operators: In, Not in, Contains, Does not contain, >, >=, <, and <=.

    You can enter only one value for the >, >=, <, and <= operators. To enter multiple values for the other operators, separate the values with commas.

    Description
    Type a description that defines what happens when the message is blocked.
    Note: The Description field isn't enabled until you make a selection from the Result menu.
  4. Click Add to add the blocking condition.
    The new blocking condition appears in the Block Conditions tab.
  5. To add more blocking conditions, repeat steps 1 through 4.
  6. To rearrange blocking conditions, select an option from the Order drop-down list in the Add/Modify Blocking Condition tab.
    The application processes the blocking conditions one by one in order of their appearance in the list in the right panel. Checking stops after the first blocking condition is met, so the order of the conditions may change the message-sending logic.
  7. To delete a blocking condition, select it in the right panel and click Delete.
  8. Click Save to save the blocking condition addition or changes to the scenario step.

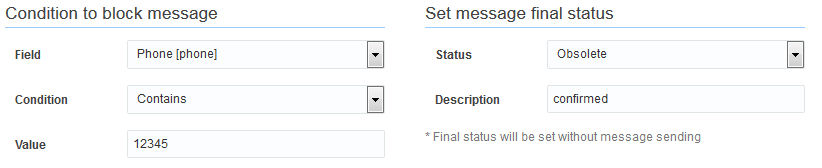
    In this screenshot, the blocking condition has been set so that the customer with phone number 555–12345, who has confirmed the appointment earlier in another manner, will never receive any messages. Therefore, the message’s final status will be set as Obsolete with the Previously confirmed description.

    Blocking conditions and message status sections in the Add Blocking Condition tab.

    Note: For troubleshooting message scenario configurations, ensure that you include properties used in Blocking Conditions and Message Scenario Steps to the Monitored activity and Monitored inventory fields. You can configure the properties on the Configuration, Displays, Display, Activity history page.