Configure the Run Schedule for a Routing Plan

The run schedule identifies when you want the plan to run, how often you want to run it, and whether you want to run it over multiple days. You can also specify the day’s activities to run the plan against. The run schedule that you choose affects the information you can share with your customers through notifications. For example, to launch a notification the afternoon before an activity, but you don’t run routing until the evening, your notification will not include the time slot.

To configure the run schedule for the Routing Plan:

  1. Navigate to the Routing Profiles page and locate the routing plan that you want to configure.
  2. In the Actions column, click Modify.
    The Edit Routing Plan screen appears.
  3. Expand Run Schedule.
  4. Configure one of the following routing plans:
    1. Create a plan to start routing manually:
      1. Select Manually from the Run routing drop-down list.

      2. Enter a number in the Apply to activities within day interval field. The activities selected for this routing plan are executed within the number of days selected in this field, starting the selected day.

      3. Select the duration for which the plan must run in the Time limit field.

      This figure shows an example of a manual routing plan:

      Image shows a manual routing plan.

    2. Create a recurring routing plan:
      1. Select Recurrent from the Run routing drop-down list.

      2. Enter a number in the Apply to activities within day interval field. The activities selected for this routing plan are executed within the number of days selected in this field, starting the selected day.

      3. Select the start and end time at which the routing plan must run, in the Start time and End time fields.

      4. Enter the interval between each run in the Interval between runs in minutes field.

      5. Check the boxes corresponding to the days on which the routing plan must run recurrently, in the Activity days field.

      6. Select the duration for which the plan must run in the Time limit field. This time denotes the maximum number of minutes and seconds that the routing plan will run before producing a result. When the application launches a routing plan, it runs the plan over and over again until it either finds the best match or the time limit expires, whichever comes first. Three minutes is usually sufficient. The maximum time limit possible is 20 minutes.

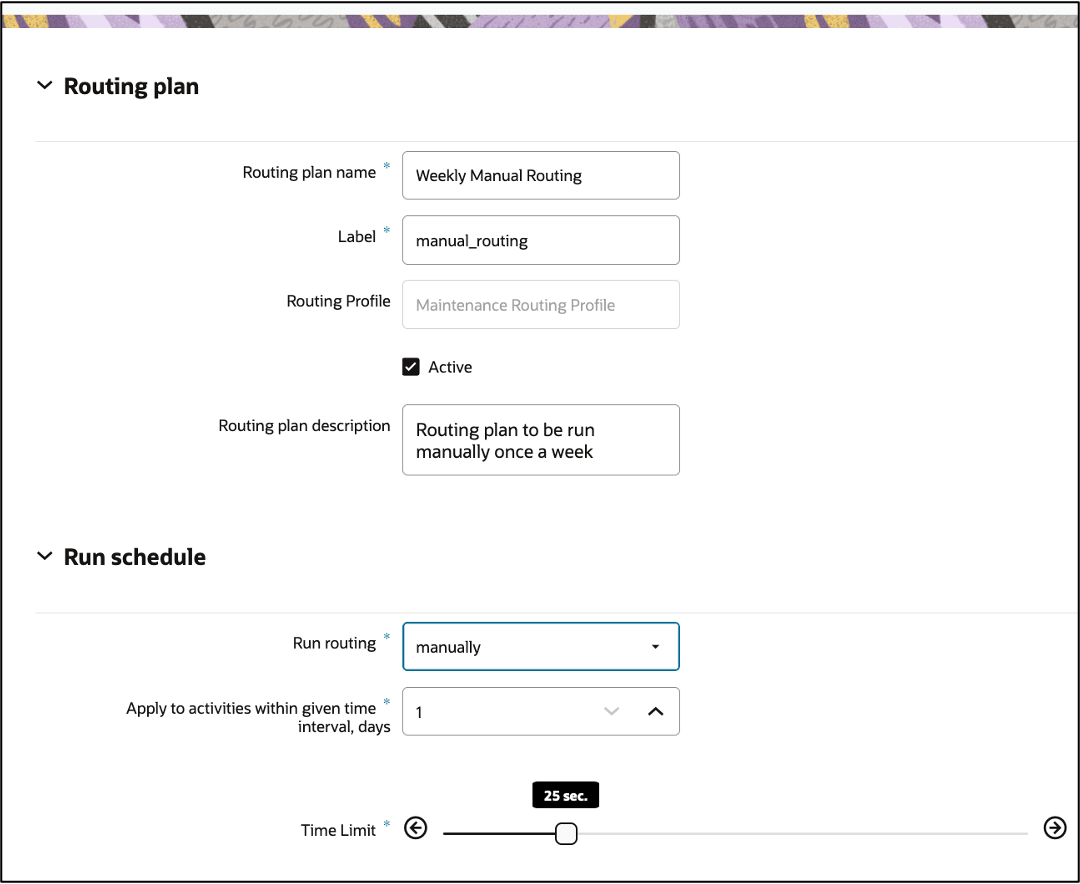
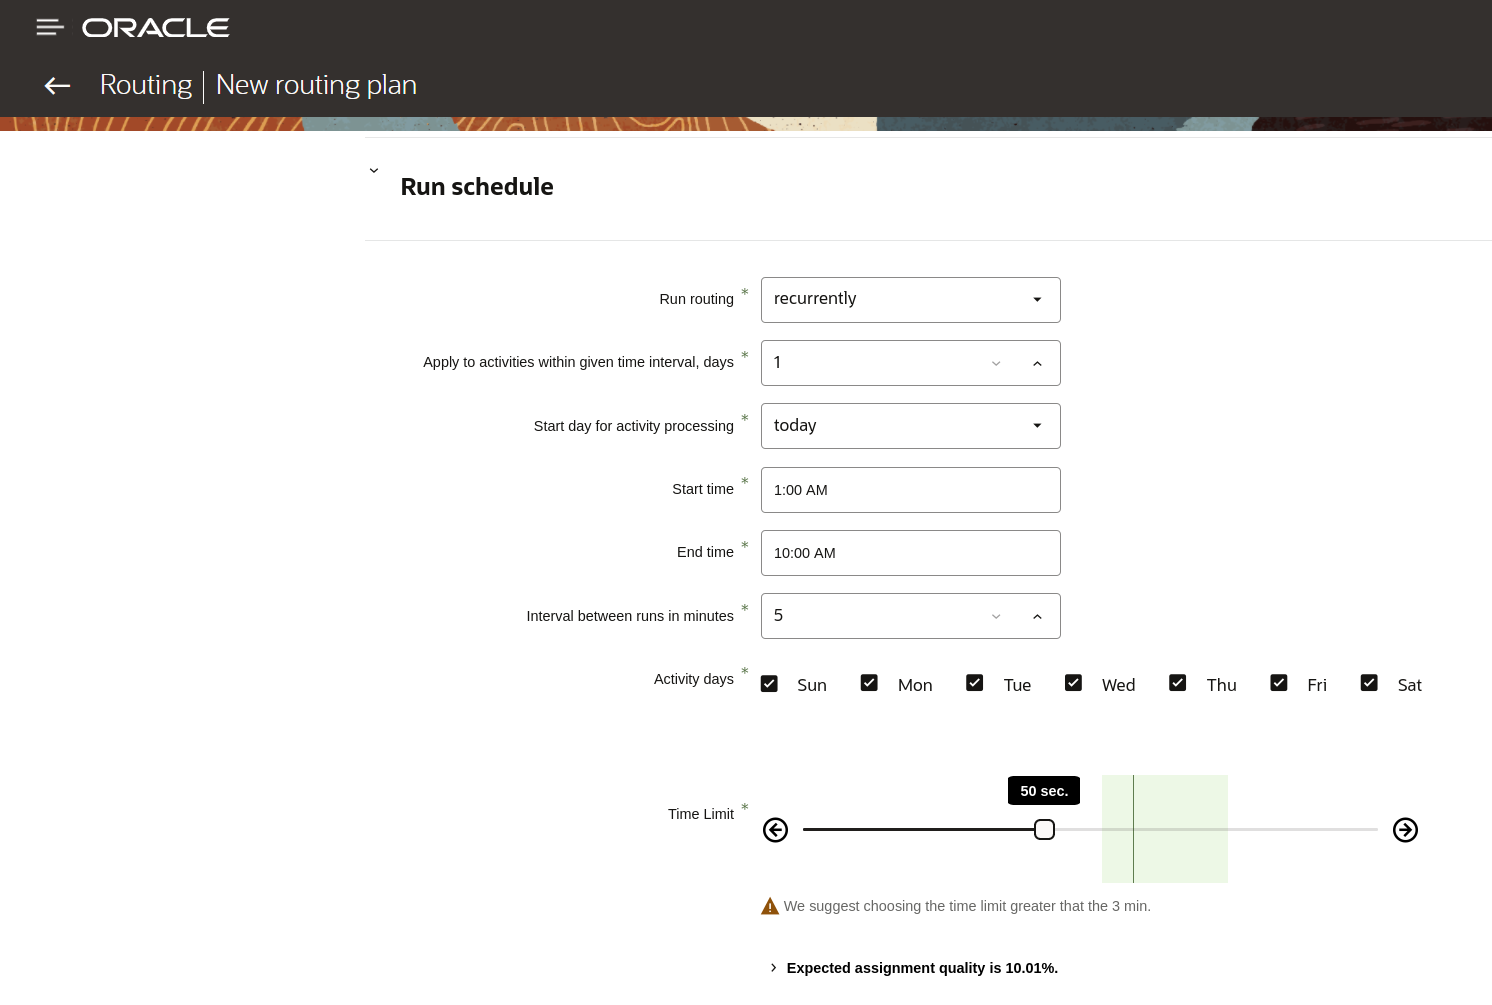
    3. Create a plan that runs once a day:
      1. Select once a day from the Run routing drop-down list.

      2. The activities selected for this routing plan are executed within the number of days selected in the Apply to activities within day interval field, starting the selected day. The default value is 1.

      3. The Start day for activity processing field is used in the Once a Day and Recurrently plans. New values for Start day for activity processing allow to run routing starting at 2, 3 or 4 weeks in future.

        Select one of these values from the drop-down list:

        • yesterday

        • today

        • tomorrow

        • +2 days

        • +3 days

        • +4 days

        • +5 days

        • +6 days

        • +7 days

        • +8 days

        • +2 weeks

        • +3 weeks

        • +4 weeks

      4. Enter the time at which the routing plan must run, in the Time of run field.

      5. The Activity days field specifies the days on which activities are scheduled.

      6. Select the duration for which the plan must run in the Time limit field. This time denotes the maximum number of minutes and seconds that the routing plan will run before producing a result. When the application launches a routing plan, it runs the plan over and over again until it either finds the best match or the time limit expires, whichever comes first. Three minutes is usually sufficient. The maximum time limit possible is 20 minutes.

      This figure shows an example of a plan that runs once a day:

      Image shows a routing plan that runs once a day

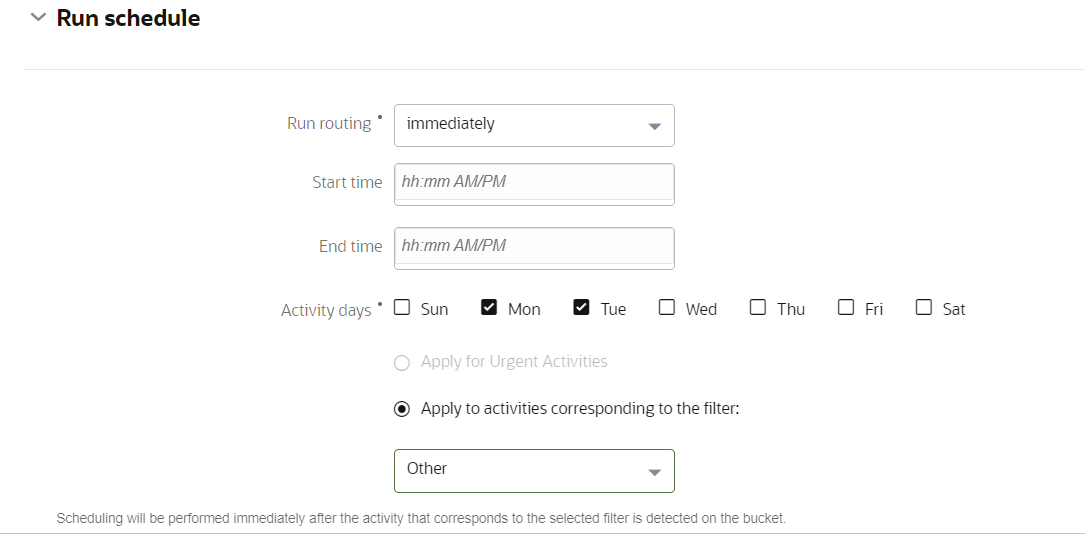
    4. Create a plan that runs immediately:
      1. Select Immediately from the Run routing drop-down list.

      2. Select one of the following options:

        • for Urgent Activities: Activities are assigned and scheduled the same day, regardless of whether this assignment disrupts other scheduled activities. In this case, the SLA is not honored for the activity.

        • activities that correspond with filter: Only those activities that correspond to the selected filter are assigned immediately. Such activities can also be bundled with other activities that are scheduled for the same location and bucket in the near future.

          The image shows the Run routing field in the Add Routing Plan screen:


          Image shows the Run routing field with immediately option selected.
      3. Use the Assignment and Bundling within __ day interval starting fields to configure bundling activities.

    5. Create a plan that runs sequentially after another plan:
      1. Select Sequentially from the Run routing drop-down list.

      2. Select the plan that must run before the current plan, from the after the completion of drop-down list.

      3. Select the duration for which the plan must run in the Time limit field. This time denotes the maximum number of minutes and seconds that the routing plan will run before producing a result. When the application launches a routing plan, it runs the plan over and over again until it either finds the best match or the time limit expires, whichever comes first. Three minutes is usually sufficient. The maximum time limit possible is 20 minutes.

  5. Use Street Level Routing (SLR) to obtain travel data in your routing plan:

    This feature can be used with routing runs that run Manually, Once a Day, Recurrently and Sequentially; it is not available for Immediate routing runs. To improve the quality of the routing run with SLR, configure the plan with adequate time to gather enough SLR data. We recommend that you allocate a minimum of five (5) minutes for Once a day and Manual routing plans. This time will vary based on your business and the amount of activities to be optimized. You may increase the time if needed.

    The Run schedule section shows the Use SLR to obtain travel data check box. This indicates that the time limit includes extra time for SLR data.

    1. Select the Use SLR to obtain travel data check box.
    2. Select the duration in the Time limit field to adjust the time limit accordingly.

      The routing run time includes both gathering SLR data and using that data to run Routing.

      In some situations when there are several pending activities, every point to point travel combination can't be obtained in the allotted time period. When this occurs, routing will use SLR data and learning travel data to optimize the routes. This ensures routes are optimized quickly with the best combination of travel data.

      Definition of SLR: SLR (street-level routing) maps the best path for a vehicle traveling from Point A to Point B, and then estimates the travel time. It computes the distance on roads considering turn-by-turn directions; this means, it's based on the actual road speed and the expected speed based on the type of road.

      The figure shows the Run schedule section in the Add Routing Plan page:


      Image shows the Run schedule section in the Add Routing Plan screen.
      Note: SLR in Routing requires a subscription to Oracle Field Service Enterprise and Oracle Field Service Standard Map Service with Google Maps or Oracle Field Service Standard Map Service with Baidu Maps.
  6. Click Add to save your changes.
    Note: In some cases, when routing's evaluation has to terminate due to time limit, it consumes slightly more time than configured. This is because termination cannot occur at the arbitrary point; it occurs only after the completion of the current block of computations.