Create Workflows
A workflow consists of a sequence of nodes used for deterministic, rule-based orchestration of tasks in which every step is preconfigured. Workflows are ideal for scenarios where compliance, repeatability, and governance are essential. The workflow tasks are represented as a connected sequence of nodes. Each node within the workflow performs a defined function, such as extracting data, calling a business object function, running an LLM, or sending an email. The output from each node is seamlessly passed to the following step, ensuring a controlled and efficient process flow.
When designing your workflow, keep these process breakdown steps in mind:
- Model the manual workflow. Start from a high-level process and break it down into smaller, automatable steps.
- Identify task dependencies and group nodes by type. For example, distinguish between back-end logic tasks and those driven by LLMs. Doing so helps to streamline operation and minimize unnecessary LLM usage.
- For each task, define the node type, required input values, expected outputs, and any transformation logic needed.
-
For recommendations about improving your agent's efficiency, see How do I make agents respond faster?
Let’s look at an example to illustrate how a workflow operates in practice. The following workflow is designed to help buyers manage order inquiries within predefined constraints. It allows buyers to retrieve details about their existing orders, including order status, shipment tracking, payment status, and order history. The workflow provides real-time updates on order progress and answers specific questions regarding terms, delivery dates, and other order-related inquiries. For complex issues or inquiries that fall outside its predefined capabilities, the workflow seamlessly escalates the request to a sales representative, ensuring that the buyer receives the necessary support while maintaining an efficient self-service experience.
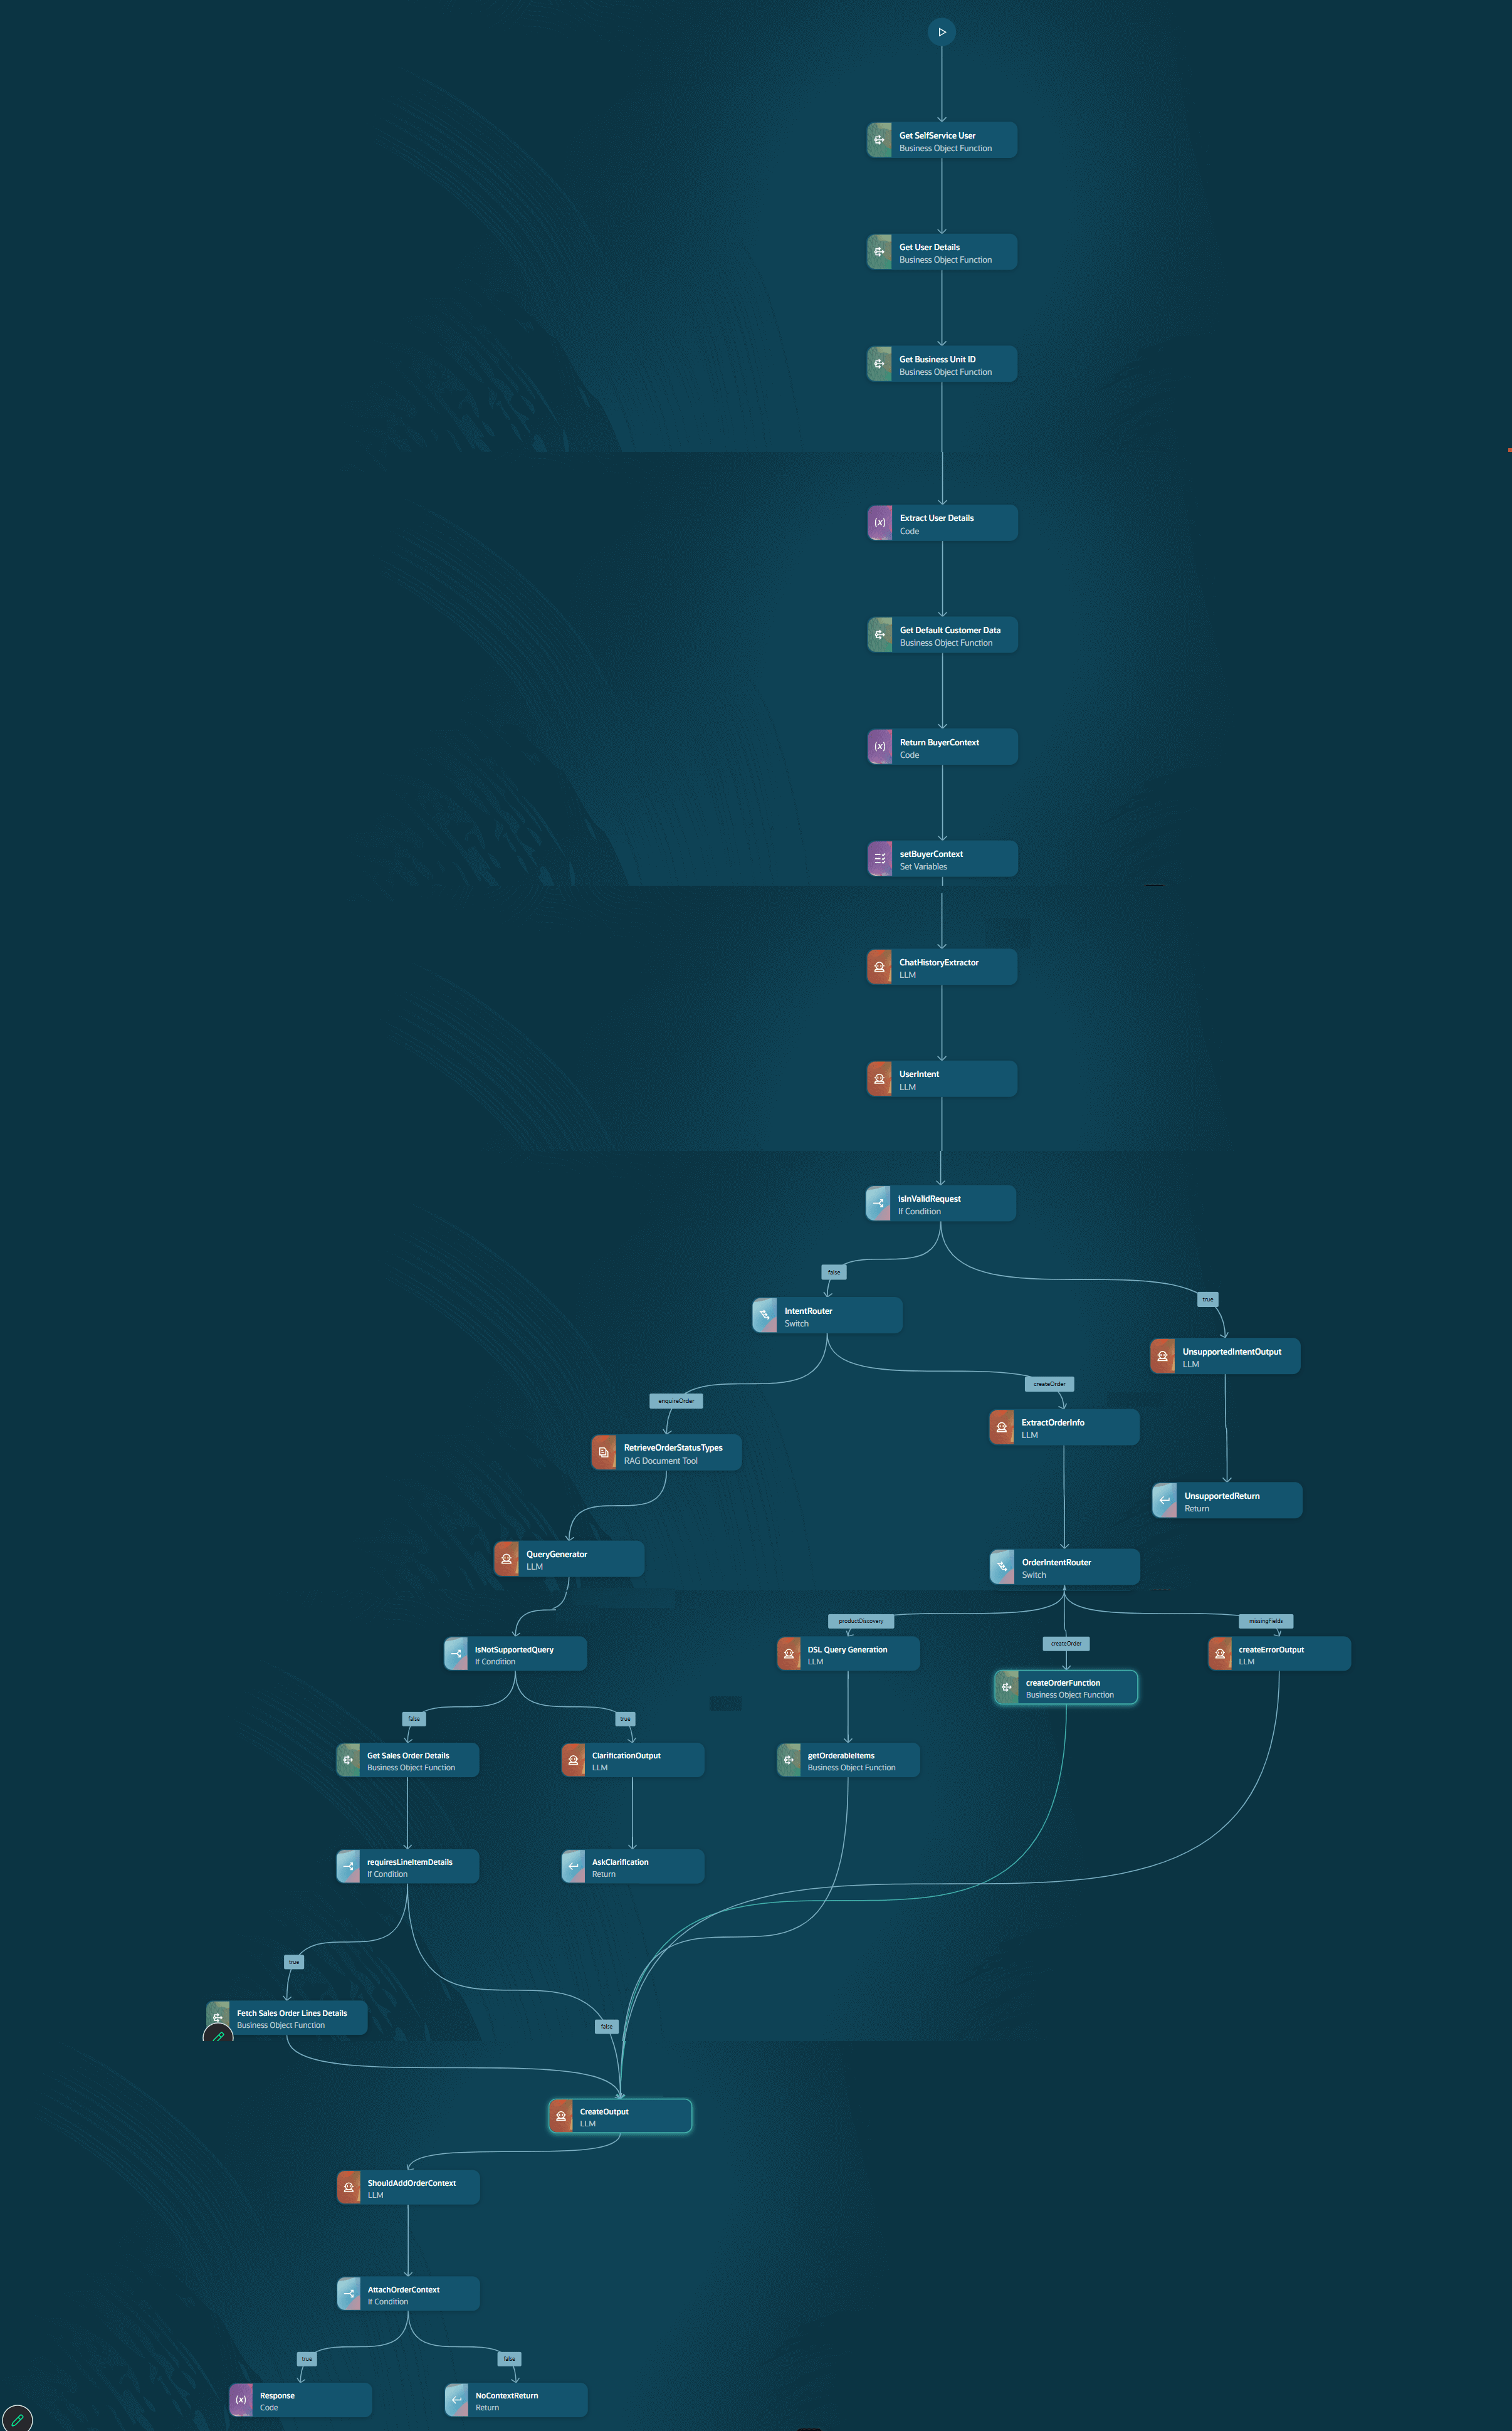
| Step | Node Name | Description |
|---|---|---|
| UserIntent | LLM | Classifies the request as create, enquire, modify, cancel, or not supported. |
| UnsupportedReturn | Return | Returns the unsupported request response. |
| UnsupportedIntentOutput | LLM | Generates a buyer-friendly response for unsupported requests. |
| Start | Start | Begins the workflow. |
| setBuyerContext | Set Fields | Loads the buyer profile, default order attributes, and supported intents into workflow variables. |
| RetrieveOrderStatusTypes | Document Retrieval | Retrieves valid sales-order status values from the reference document. |
| Response | LLM | Wraps the buyer-facing content into the standard response JSON. |
| requiresLineItemDetails | Condition | Determines whether detailed line-item information is required. |
| QueryGenerator | LLM | Converts the buyer inquiry into a structured output and identifies support or additional information needs. |
| ProcessInput | Code | Extracts the current user message from the incoming interaction. |
| OrderIntentRouter | Switch | Routes the create-order subflow. |
| isValidRequest | Condition | Checks whether the classified intent is supported. |
| IsSupportedQuery | Condition | Checks whether the enquiry is supported. |
| IntentRouter | Switch | Routes supported requests to the Create, Enquiry, Modify, or Cancel flows. |
| getOrderableItems | Business Object | Searches the orderable product catalog. |
| Get Sales Order Details | Business Object | Retrieves sales-order headers, totals, and line summaries. |
| Fetch Sales Order Lines Details | Business Object | Retrieves detailed line information for the first matching sales order. |
| ExtractOrderInfo | LLM | Extracts product, quantity, order-line information and buyer defaults; determines whether to create an order, perform product discovery, or request missing fields. |
| ExtractModifyOrderInfo | LLM | Extracts order header ID, product ID, and requested quantity. |
| ExtractModifyIntent | LLM | Determines whether the modification is to add or remove a line item. |
| ExtractCancelOrdreNumber | LLM | Extracts the sales order number to cancel. |
| End | End | Completes the workflow. |
| DSL Query Generation | LLM | Generates Elasticsearch query clauses for product discovery. |
| CreateOutput | LLM | Converts processing results into buyer-friendly content. |
| createOrderFunction | Business Object | Creates a sales order using buyer defaults and extracted order details. |
| createErrorOutput | LLM | Explains missing mandatory order fields. |
| ClarificationOutput | LLM | Generates a clarification message describing supported enquiry options. |
| Cancel Order | Business Object | Cancels the specified sales order. |
| AskClarification | Return | Returns the clarification response. |
| addNewLineToOrder | Business Object | Adds a new product line to an existing sales order. |
| Add (False Branch) | Pass-through | Passes control to the next node on the false branch. |
| Add (False Branch) | Pass-through | Passes control to get sales order details. |
| Add (False Branch) | Pass-through | Passes control to create output. |
Here are the steps to create your own workflow.
- Go to AI Agent Studio.
- From the Workflows tab, select Add.
Configure the workflow.
Details Tab
Field Description Agent Team Name and Code Enter Agent Team Name and Code. Use letters, numbers, and underscores for the code. Family Select the family to which this agent team belongs. Product Select the product within the family to which this agent team belongs. Description Add a description of the workflow. LLM Tab
Field Description Provider Choose to use the default model or select a model. When using a custom model, specify the model properties. Security Tab
Field Description Add Select the roles which will have access to this workflow. Chat Experience Tab
You can enable users to upload files directly in chat or from third-party providers and receive responses in their preferred language.
These are the supported file types users can upload to the chat: PDF-Tagged / Scanned, HTML, JSON, MARKDOWN, XML, TXT, DOCX, DOCX-Multimodal, XLSX, CSV, PPTX, JPG, PNG, and ZIP.
Field Description Answer in user's language Select this option to allow users to receive answers in their preferred language. Enable file upload Select this option to allow users to upload files from local storage. Enable third-party file upload Select this option to allow users to upload files from connected cloud storage accounts. To enable this functionality, add credentials for your provider by navigating to the Credentials tab in AI Agent Studio and completing the Chat Experience setup. Questions Tab
Field Description Starter Questions Enter initial questions for the workflow. Follow-up Questions Enable this option to indicate that the workflow can ask follow-up questions based on the user' s conversation history.
Triggers Tab
Create triggers to begin the workflow. Triggers define the conditions or events that start the workflow and identify when and why it begins.Field Description Type Add the data type of the trigger. For more information about setting up triggers, see Configure Workflow Triggers.
Variables Tab
Define workflow-level variables, making them accessible to all nodes within the workflow. Variables are ideal for storing IDs, constants, or any values you need to share and use across different parts of the workflow.Field Description Type Add the data type of the variable. Error Handling Tab
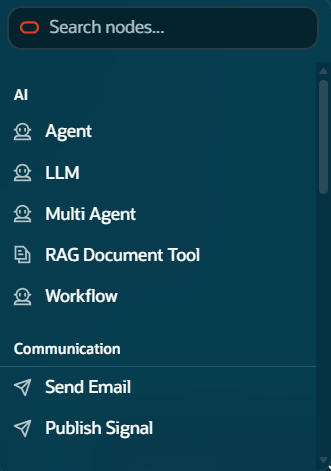
Specify where to send an email when a workflow instance runs into a permanent error. You can also use context expressions in these fields for more clarity.- Add nodes to the workflow.
 Tips
Tips- Connect nodes in sequence to control how input values are received, processed, and forwarded throughout the workflow.
- You can insert new nodes before, after, or between existing nodes as needed.
- For more information about Vector nodes, see Configure Vector DB Writer and Reader Nodes in a Workflow.
-
Publish the workflow.
Users can view the published workflows from the Agents and Applications page. To access this page, go to .Note: Make sure that your users have access to interact with the AI agents. For information, see How can I give users access to AI Agents?