Manage Contacts
Expand the Contacts folder to view the contacts for the case.
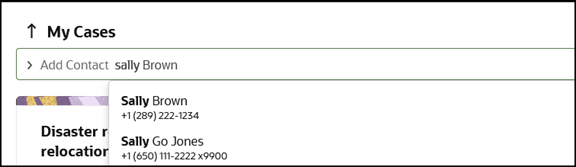
Let's add Sally Brown to the case and make her the primary contact.

- Type Add Contact in the Action Bar
Keep typing the contact's name. the Action Bar will narrow down existing contacts in the drop-down list list. Select the contact you want to add to the case.
- Make Sally the Primary Contact, but clicking the More icon (the icon with the
three dots), and selecting Make Primary.
You can click the contact name to view details of that contact.
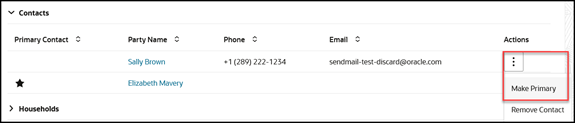
The star icon has now changed to denote Sally as the new primary contact.

You can also remove a contact from the case by clicking selecting Remove Contact from the More icon.