- Using Oracle Internet of Things Production Monitoring Cloud Service
- Configure Oracle Internet of Things Production Monitoring Cloud Service
- Upload Your Data
- Create Machine Types
Create Machine Types
Create a machine type, and specify common attributes applicable to all machines of the machine type. Also, create sensor attributes that will map to your device sensor attributes.
- Click Menu (
 ), and then click Design Center.
 - Select Machine Types from the Design Center sub-menu.
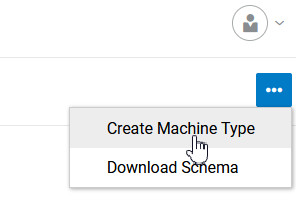
- Select Create Machine Type from the Machine Types menu.

- Enter a Name and an optional Description for the machine type.Do not use spaces or special characters in the Name field. If you add spaces or special characters, an error message appears.
- (Optional) Click Upload Icon to upload an icon for the machine type. An icon makes it easier to quickly identify the machine type in the map view.
- Add any required and optional attributes for the machine type:
- Click Add Attribute (
 ) to add a new attribute.
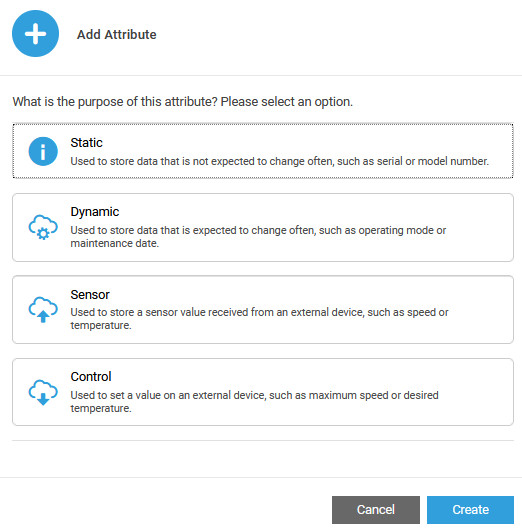
 - Select the attribute type.

- Custom Attributes: A custom attribute is specific to the machine type, such as a model number for a vehicle. Custom attributes are not associated with machine sensors. Custom attributes can be of the following types:
- Static: Static custom attributes are used to store data that is not expected to change often, such as the serial or model number of a machine.
- Dynamic: Dynamic custom attributes can change often, such as the operating mode or maintenance date for a machine. You can use the operations center, or automatic action-based rules to update the dynamic attribute values.
- Sensor: A sensor attribute corresponds to a device sensor value. For example, a packaging machine might support temperature and vibration sensors. Note that the actual linking to the device happens when you create the machine.
- Control: A control attribute lets you send data back from your digital twin to the actual device. Use control attributes to set the actuator attribute values for your IoT devices. For example, if a motor supports the Overheat attribute, you can set the attribute from your IoT application.
Note:
Control attributes can be currently used for sending MQTT data back to devices using direct ingestion.
- Custom Attributes: A custom attribute is specific to the machine type, such as a model number for a vehicle. Custom attributes are not associated with machine sensors. Custom attributes can be of the following types:
- Specify a Name for the attribute.
- (Optional) Add a Description about the attribute.
- (Optional) Choose a Category if available.By default, the UNCATEGORIZED category is used. You can choose to rename the category from the Attributes page.
- Select whether the attribute is Required or optional.You must specify a value for a required attribute when instantiating a machine type to create a machine.
- Choose a data Type for the attribute.This field is only applicable to custom and sensor attributes. You can select between text, number, date, boolean, and image data types.
- (Optional) For static and dynamic attributes, specify a Default value of the attribute.This field is only applicable to custom attributes. If you do not specify an attribute value when creating a machine, the default value is used.
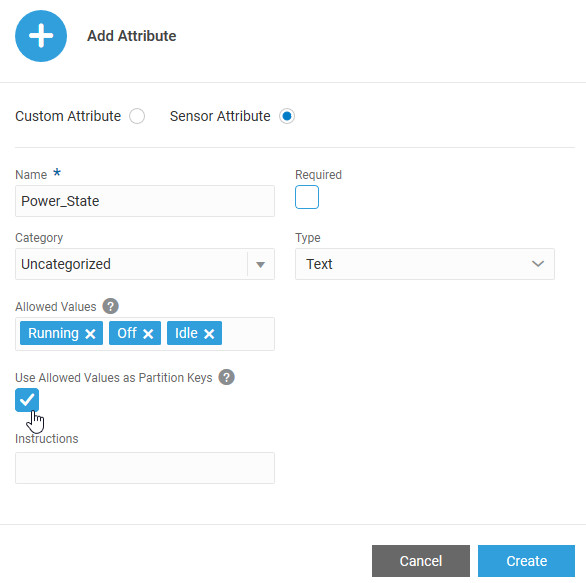
- (Optional) You can specify a list of Allowed Values for your attribute.Press Enter after entering each value.Some attribute types, such as Number, also allow you to specify a range of allowed values.
- (Optional) For sensor attributes, if you have used the Allowed Values field, you can optionally choose Use the Allowed Values as Partition Keys.
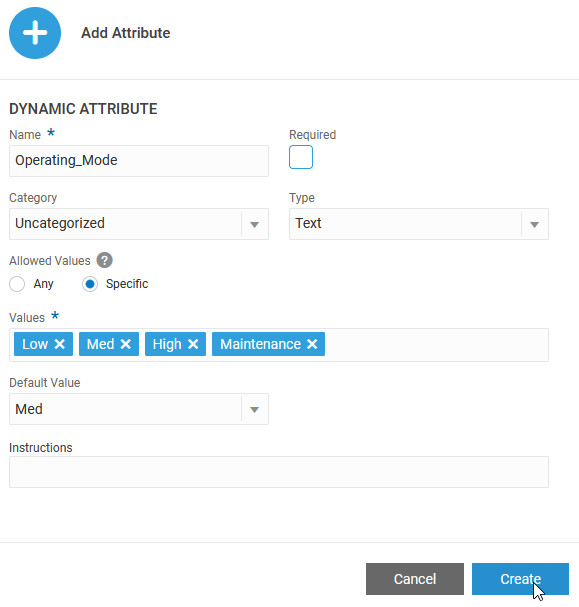
 Select this option if you intend to use the allowed values as partition keys in your state-aware anomalies. See Define an Automatic Anomaly for more information.The following example shows a dynamic attribute, Operating_Mode that has predefined modes of operation. A default operating mode is also selected.
- Click Create.
- Repeat the above steps to create additional attributes.
- Click Add Attribute (
- Click Save and then click OK.
- Close the window to return to the Machine Types list.