- Using Oracle Internet of Things Production Monitoring Cloud Service
- Configure Oracle Internet of Things Production Monitoring Cloud Service
- Upload Your Data
- Create Machines
Create Machines
Manually upload the data for the machines in your factories.
- Click Menu
 and then click Design Center.
 - Select Machines
 from the Design Center menu.
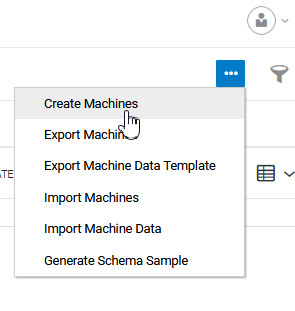
 - Click the Machine Inventory Menu
 and select Create Machines.
- To create a single machine, click Create Single Machine.
- Select the Entity Type (Machine Type) for the machine.The Machine Type must already exist in the application.
- From the Factories list, select the factory where your machine is located.
- Enter a Name for the machine.The application creates a default name for the new machine. You can choose to change this to a name meaningful for your environment. Default names are especially useful when creating machines in bulk.
- (Optional) Select the Data Source for the machine sensor attributes.If you are using direct data ingestion for your device, you can choose to specify the direct data source details here.
Note:
You can also choose to specify the data source for your sensor attributes in the machine editor after creating the machine.-
Direct: Use for devices that can directly connect with the application.
-
External ID: You can enter the external identifier for the device. This is usually the Hardware ID. If you do not enter a value, the default entity ID is used for authentication.
-
Authentication: Select between Client Certificate and Client ID/Secret.
Client certificate is the recommended option for increased security. The default Common Name used for client certificate is the entity ID. If you have specified an External ID, then this is used as the common name.
If using Client ID/Secret, specify a secure password in the Secret field. The default Client ID used for client certificate is the entity ID. If you have specified an External ID, then this is used as the client ID.
- Payload: Select Schema if you are using the standard schema format for data ingestion. Select Custom if the payload does not follow the schema. If choosing the custom option, you must specify a previously created Interpreter to interpret the payload.
-
-
Direct via Any Connector: Use for devices that connect using a connector.
External ID: You can enter the external identifier for the device. This is usually the Hardware ID. If you do not enter a value, the default entity ID is used for authentication.
-
Direct via Specific Connector: Use for devices that can connect using the specified connector.
-
Connector: Select a connector that you have previously created.
-
External ID: You can enter the external identifier for the device. This is usually the Hardware ID. If you do not enter a value, the default entity ID is used for authentication.
-
-
- Click Create to continue create the machine.The machine editor opens up where you can edit the machine details and finalize the data sources for your sensor attributes.
- Select the Data Source for the machine sensor attributes.
- Direct:
Select if you are ingesting IoT data from directly connected devices, gateways, and network servers directly into your machine sensor attributes. Choose direct ingestion to eliminate the need for registering devices and device models, and for creating IoT messages.
- Linked Device:
Select to link to an IoT device registered with Oracle Internet of Things Intelligent Applications Cloud.
- Direct:
- Depending on your choice in the preceding step, complete the direct data source settings, or complete linking the sensor attributes to your device attributes.
If you selected Direct under Data Source, complete the direct data source settings:
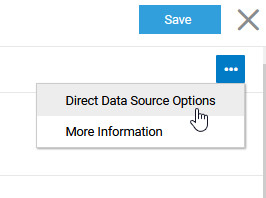
- Select Direct Data Source Options from the editor menu.

- Select the Data Source:
-
Direct: Use for devices that can directly connect with the application.
-
External ID: You can enter the external identifier for the device. This is usually the Hardware ID. If you do not enter a value, the default entity ID is used for authentication.
-
Authentication: Select between Client Certificate and Client ID/Secret.
Client certificate is the recommended option for increased security. The default Common Name used for client certificate is the entity ID. If you have specified an External ID, then this is used as the common name.
If using Client ID/Secret, specify a secure password in the Secret field. The default Client ID used for client certificate is the entity ID. If you have specified an External ID, then this is used as the client ID.
- Payload: Select Schema if you are using the standard schema format for data ingestion. Select Custom if the payload does not follow the schema. If choosing the custom option, you must specify a previously created Interpreter to interpret the payload.
-
-
Direct via Any Connector: Use for devices that connect using a connector.
External ID: You can enter the external identifier for the device. This is usually the Hardware ID. If you do not enter a value, the default entity ID is used for authentication.
-
Direct via Specific Connector: Use for devices that can connect using the specified connector.
-
Connector: Select a connector that you have previously created.
-
External ID: You can enter the external identifier for the device. This is usually the Hardware ID. If you do not enter a value, the default entity ID is used for authentication.
-
-
- Click OK in the Direct Data Source Options dialog.
See Use Direct Data Ingestion for Your Sensor Attributes for detailed information and examples on using direct data ingestion for your machine attributes.
If you selected Linked Device: under Data Source, complete linking the sensor attributes to the registered device attributes:
A sensor attribute lets you link to an IoT device sensor. For successful linking, the IoT device should be already present in Oracle Internet of Things Intelligent Applications Cloud, and the corresponding device model should have been selected for the Oracle IoT Production Monitoring Cloud Service application.
- Click Link to Device (
 ) against a sensor attribute.
 - Select from the list of available devices. For successful linking, the IoT device should be already present in Oracle Internet of Things Intelligent Applications Cloud, and the corresponding device model should have been selected for the Oracle IoT Production Monitoring Cloud Service application.You can use Select Filter to filter the available devices, say by device name or serial number.
- Under Sensor Attribute Binding, confirm that the correct Device Model/URN is displayed.
- Select the Device Attribute that corresponds to the sensor attribute.
- Click Select.The sensor attribute is now linked to your IoT device attribute.
- Select Direct Data Source Options from the editor menu.
- Add your machine to the factory floor plan:
- Click Floor Plan
 .
. - Zoom in our out to view the location where you want to place the machine.
- Drag the machine icon to the desired location on the factory floor plan.
- Click Floor Plan
- Click Save.
- Close the editor to return to the Machine Inventory page.