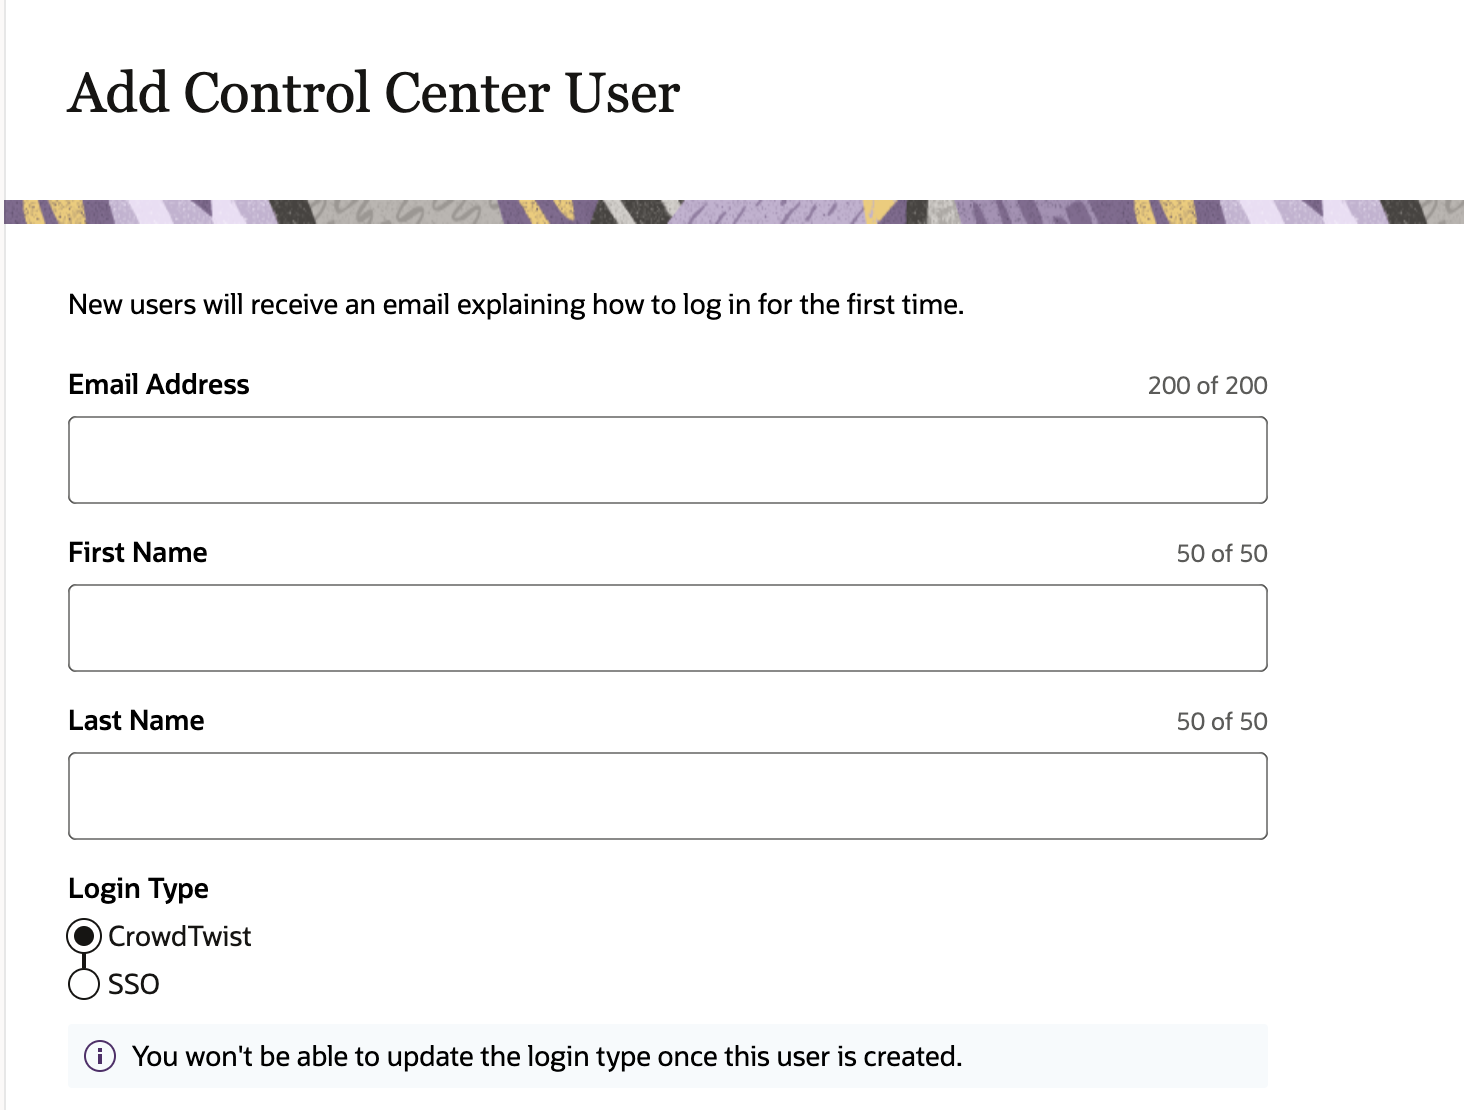
Adding users
When you create users, you have the ability to control which area(s) of the control center the user can access. For example, you may want customer support representatives to have access to the member care area only.
To add a new user:
- In Control Center, navigate to Settings > Users.
- Click Add new user.
-
Configure the details for the new control center user:

- Email Address: Specify the email address of the new user.
- First Name: Specify the first name of the new user.
- Last Name: Specify the last name of the new user.
- Login Type: Select the log in method for the new user.
- CrowdTwist: If selected, the user can only log in using their CrowdTwist credentials.
- SSO: If selected, the user can only log in using their SSO (single sign-on) credentials. This requires SAML configuration.
- Permissions: For each control center permission, choose the appropriate access level for your new control center user:
- N/A: If selected, that area of the control center is hidden from the user.
- READ: If selected, that area of the control center is available, but changes cannot be made.
- WRITE: If selected, the user has full access to that area of the control center.
Warning: Once the user is created, the Login Type cannot be updated. If a Login Type change is needed, you can deactivate the user and recreate them with the appropriate Login Type.
- Click Submit.
After the new user is created, the user will receive a welcome email with instructions and a link to set their password.
Tip: This password link in the welcome email expires after an hour for security purposes. If the link is expired, the new user must go to the Control Center and follow the Forgot Password flow to trigger the password reset email.
Adding user to multiple programs:
To add an already existing user to a new program:
- In Control Center, navigate to Program > Users.
- Click Add new user.
- Enter the email address of already existing user.
-
Configure the new permissions for the user.
-
Click Submit.
Warning: A message will appear indicating user is already associated with an existing program. First Name and Last Name will be auto populated.
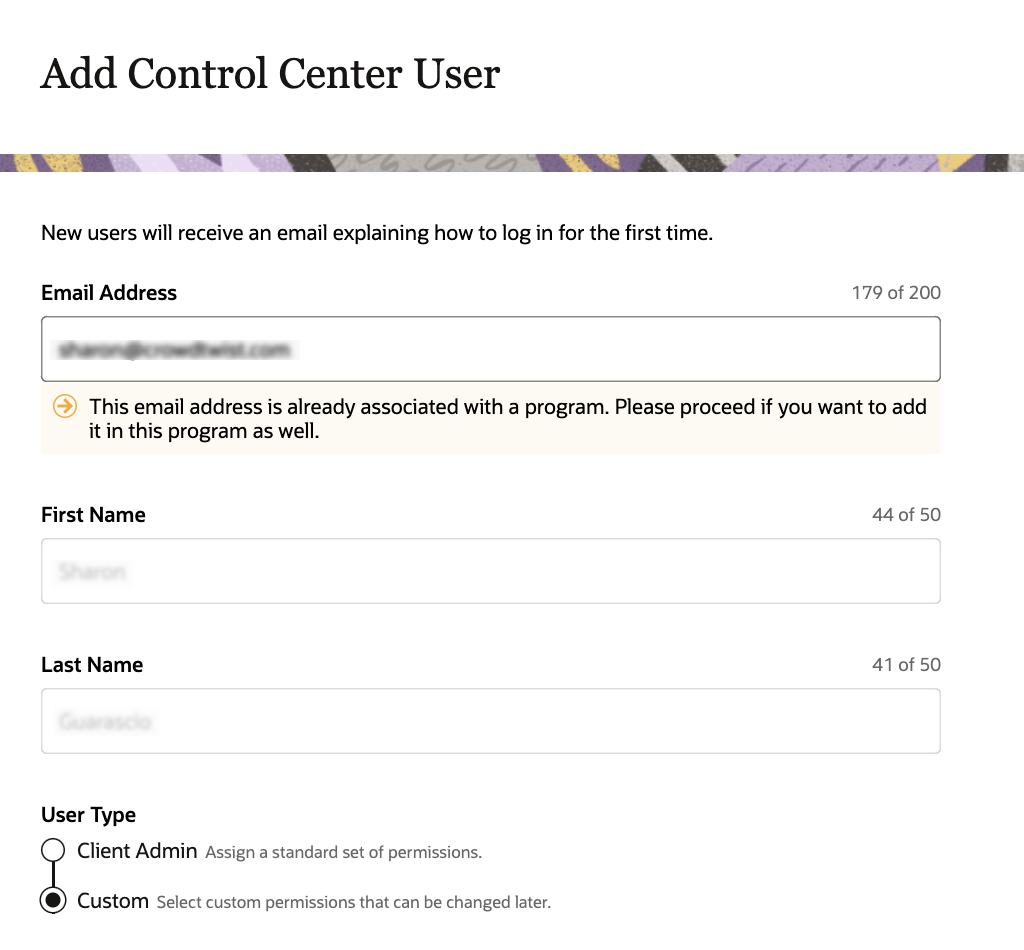
Note: Once the user is associated with new program, an e-mail will be triggered to user's email address to notify the new association.