Adding the Salesforce cloud action to your campaign
In order to use the Salesforce (SFDC) cloud action service, the Salesforce Campaign Association app must be installed by a Customer Administrator.
To add the SFDC cloud action to your campaign:
-
Open an existing campaign or create a new one.
-
Click on the Actions section to expand it, and view all available action elements, including installed apps.
- Drag the SFDC Campaign Action element onto the campaign canvas. Then, double-click on it to open the configure screen. The window that opens enables you to do the following:
- Change the name of the step to something more meaningful
- Configure the element
- Choose to route contacts that resulted in an error to another step (see the cloud action section in Configuring campaign canvas elements-Actions for more information).
- Click the Edit icon to configure the action. The Salesforce Campaign Association setup screen will open in a new window.
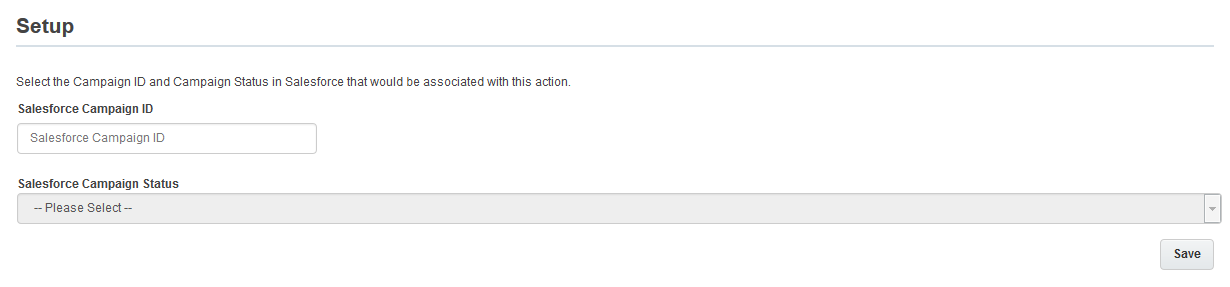
- Input the Salesforce Campaign ID.
- Select the appropriate Salesforce Campaign Status.
Note: If you have campaign sync enabled with your Salesforce CRM integration, the Salesforce Campaign ID will be automatically populated. You can then choose the appropriate status from the drop-down menu. If you do not have campaign sync enabled, you can input a Salesforce Campaign ID manually. You can also configure the Salesforce Campaign ID in the campaign's settings by clicking the Gear menu, then Settings, and inputting the value in the CRM Campaign ID field.
-
Click Save.
The SFDC cloud action should now be properly configured. When contacts flow into the step, Eloqua calls out to create a campaign member in Salesforce for that contact.