Creating field merges with custom objects
The custom object field merges you create are available for inclusion in most assets that support field merges, including hidden fields. Engage is the only exception: it only supports contact field merges. Before you attempt to create a field merge with a custom object, ensure that the custom object you need exists. Learn more about creating custom objects.
Important: Make sure that if you're creating a custom object field merge, the custom object you are using is linked to a contact and not to an account. A custom object that is linked to the account a contact belongs to will not result in successful field merge for contact data.
To create a field merge using a custom object:
-
Navigate to Assets > Components, then click Field Merge.
-
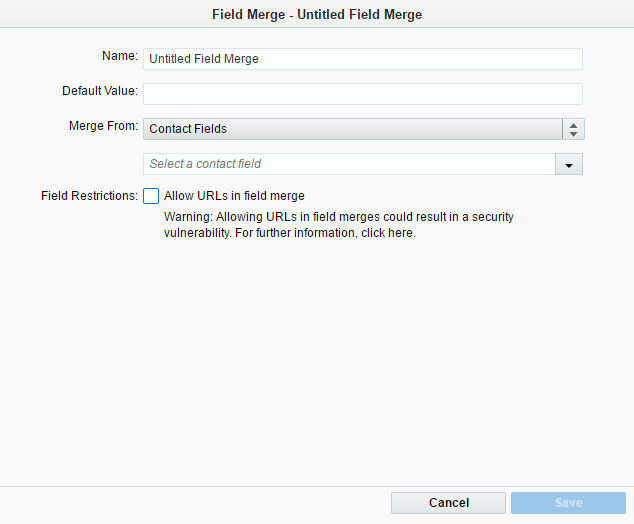
Create the field merge. In the classic UI, click New. In the Redwood experience, click Create.
Classic UI
Redwood experience

- Enter the name of the field merge in the Name field. You will use this name to identify the field merge in lists.
-
Enter a default value to be displayed in case if no value is saved in the field that you are merging.
Example: If you are merging from the Purchase History field in the custom object, you could use "No purchases" as the default value in case the contact has made no purchases.
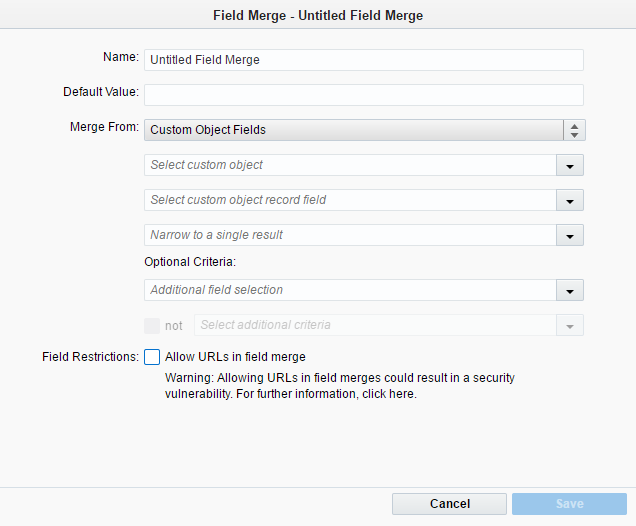
- On the Merge From drop-down list, click Custom Object Fields. It can take a moment for the remaining drop-down lists to load.
Classic UI
Redwood experience

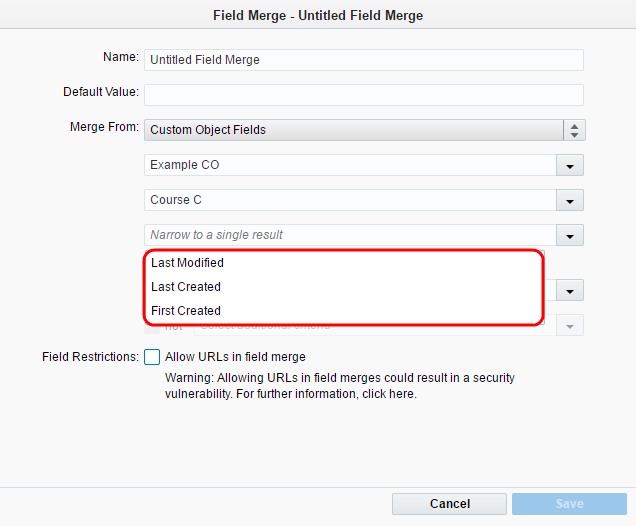
- Select the custom object that contains the field you want to use in the merge and then select the custom object record field.
- If there is more than one custom object record that can fill the field merge, select whether you want to use the Last Modified, Last Created, or First Created custom object record for this field merge.
Classic UI
Redwood experience

- At this point you can either save the Field Merge with the criteria you have selected, or you can opt to complete the Optional Criteria to further refine your custom object selection.
Example: You can use the Date Purchased field from a Purchase History custom object. Then, you can use the Optional Criteria settings to specify a range of purchase dates that may be pulled into the merge field. For purchases that do not fall within the specified date range, you can specify "No qualifying purchases" as the Default Value.
To set up optional criteria:
- In the Optional Criteria area, select the field on which you want to base your rule criteria.
- Configure the rule criteria. The rule criteria settings displayed differ depending on the field you selected in the previous step.
In some cases, depending on the additional field you select, you can use a blank value as your criteria. Some field types let you select is blank as the rule condition. For some fields, you can leave the Enter a value box blank to achieve this.
Note: Using URLs in a field merge can be a security risk. By default, when Oracle Eloqua attempts to insert the field merge, it removes any URLs while still inserting the remaining data. However, you can override this security feature by selecting the Allow URLs in field merge check box.
- Click Save.
If you select an additional field in the Optional Criteria area, the Save button becomes unavailable until you complete the optional configuration. To cancel your selection of an additional field, re-select Additional field selection on the Optional Criteria drop-down list. Then you can save.