Configuring data priority for Salesforce integration
Important: The Salesforce native integration was deprecated February 1, 2021. We recommend using the
Data priority specifies the order in which Oracle Eloqua evaluates sources of contact and account data and determines whether to update the data in the Oracle Eloqua database.
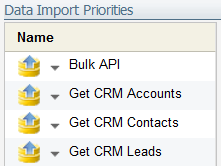
With a Salesforce integration, we recommend prioritizing CRM data imports over other data sources such as list uploads. This assumes that your CRM data is current and accurate and that your Salesforce contacts are given higher priority than your CRM leads. The recommended data priority order is:
- Bulk API
- Get CRM Accounts
- Get CRM Contacts
- Get CRM Leads
These data priorities will be shared by multiple data sources. For example, the data sources Get CRM Contacts and Delete CRM Contacts will use the same data priority setting of Get CRM Contacts. This ensures that Oracle Eloqua omits the specified ID values and also allows for the ID values to be repopulated should the deleted entity be recreated in Salesforce.
To configure data import priority and the data sources:
- Click Settings
 .
. - Click Integration under Platform Extensions.
- Click the Inbound tab.
- From the Management menu, click Data Priority Order.
- Create the following list of data import priorities.
The order of the data priorities must be the order listed below.
Tip: After the running the CRM Integration Wizard, Oracle Eloqua created a default list of data import priorities. You can rename those items to match the list above or remove them and create your own list.
- In the Inbound tab, expand the folders under All Data Sources. This folder lists all the data sources corresponding to each auto synch set up earlier.
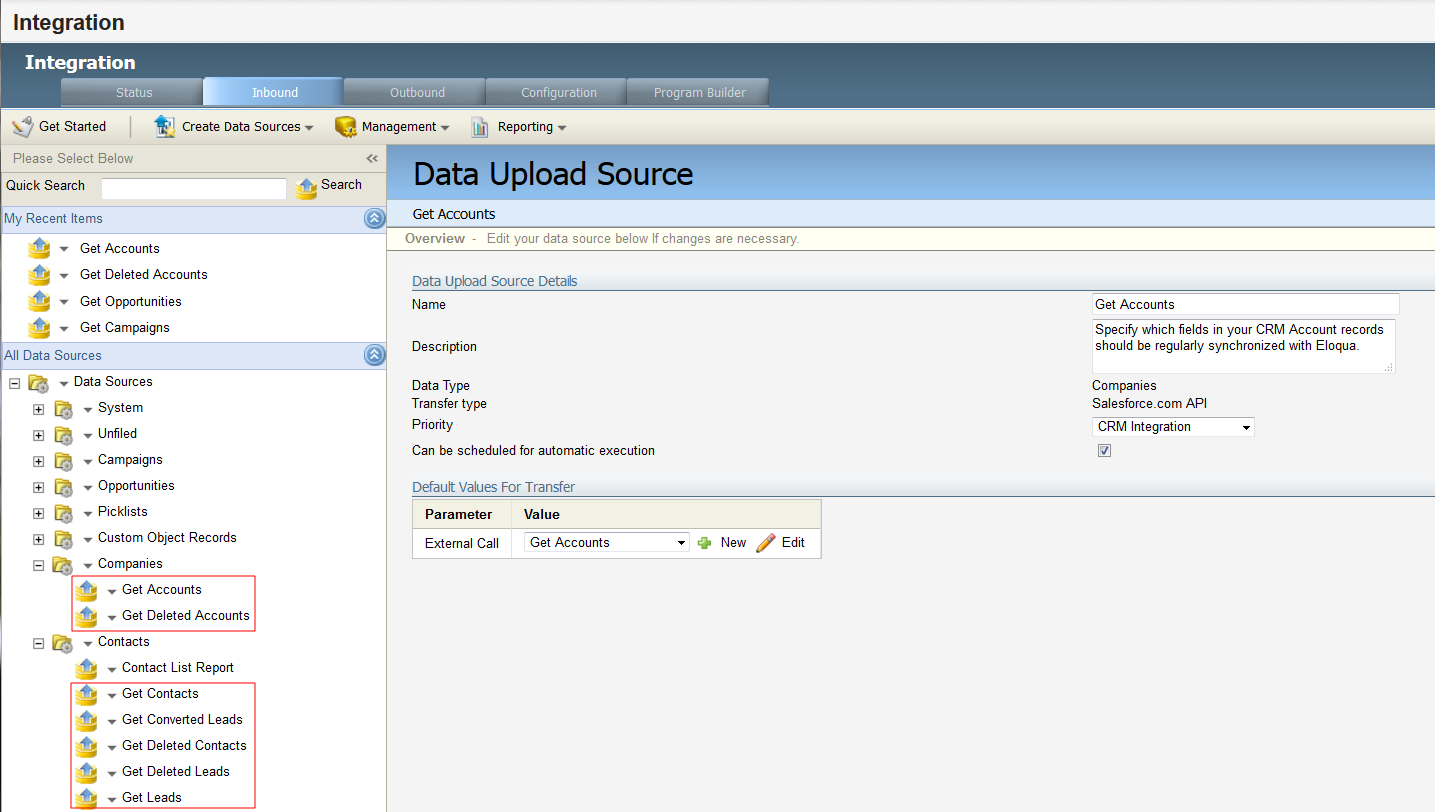
- For each data source listed, set the priority using the Priority drop-down list with the following settings:
Data source Data priority Get Accounts Get CRM Accounts Get Deleted Accounts Get CRM Accounts Get Contacts Get CRM Contacts Get Deleted Contacts Get CRM Contacts Get Leads Get CRM Leads Get Deleted Leads Get CRM Leads Get Converted Leads Get CRM Leads
After you finish: Continue to Creating Salesforce fields in Oracle Eloqua.