Importing picklist options
Importing picklist options in Oracle Eloqua allows you to efficiently add or update a large number of picklist values from an external file. This is especially helpful for initial setup, major updates, or synchronizing picklists across different environments.
You can import a picklist so that you can:
-
Create a new picklist from an existing file (such as a CSV spreadsheet)
- Update many picklist values at once (for example, after making edits in an exported file)
- Quickly onboard standardized values maintained elsewhere in your organization
Good to know:
-
Picklist uploads should not exceed the recommended maximum of 2500 options in a picklist.
- The classic UI allows up to 2,500 values per picklist. The Redwood experience displays a maximum of 500 values per picklist. Lists larger than 500 in Redwood can only be managed by uploading values.
- Your upload file must include columns for the option name (i.e. display name) and option value (i.e. stored value).
-
During the upload process, you can choose whether to delete existing options. Selecting this will permanently remove all existing values in the picklist. Only choose this if you intend to replace the entire picklist. Otherwise, the new values will simply be added.
To upload picklist values from a file:
- Click Settings
 .
. - Click Manage Picklists in the Database Setup area.
- Open the picklist that you want to update.
- Start the upload:
- In the classic UI, open the Picklist drop-down menu in the upper-right corner, then click Upload Picklist.
- In the Redwood experience, click
 > Edit. Then click Upload Options.
-
Complete the information about the upload and choose the upload file.
-
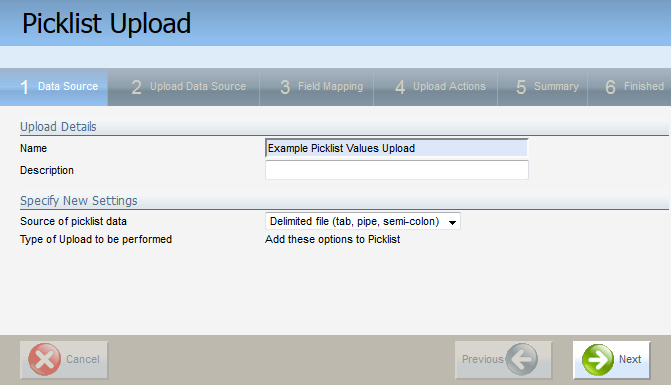
In the classic UI, add the name and description of the upload on the Data Source step. Then upload your file on the Upload Data Source step.
-
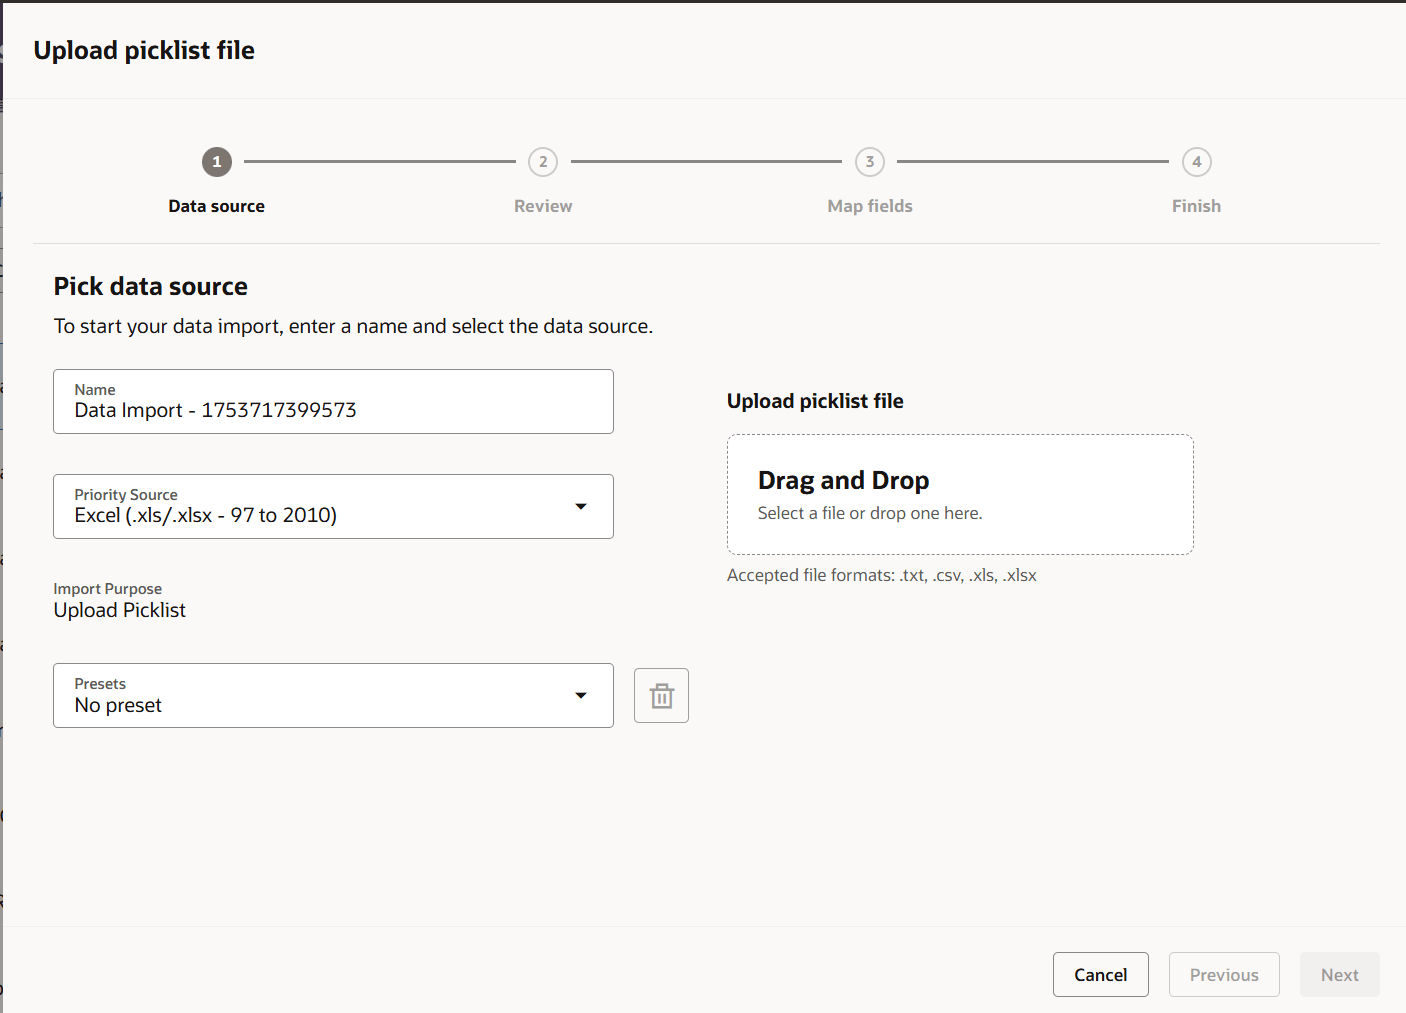
In the Redwood UI, add the name of the upload and the upload file on the Data Source step.
Classic UI
Redwood experience
-
-
Verify the contents of the file.
-
In the classic UI, preview the uploaded file on the Upload Data Source step.
-
In the Redwood UI, preview the uploaded file on the Review step.
-
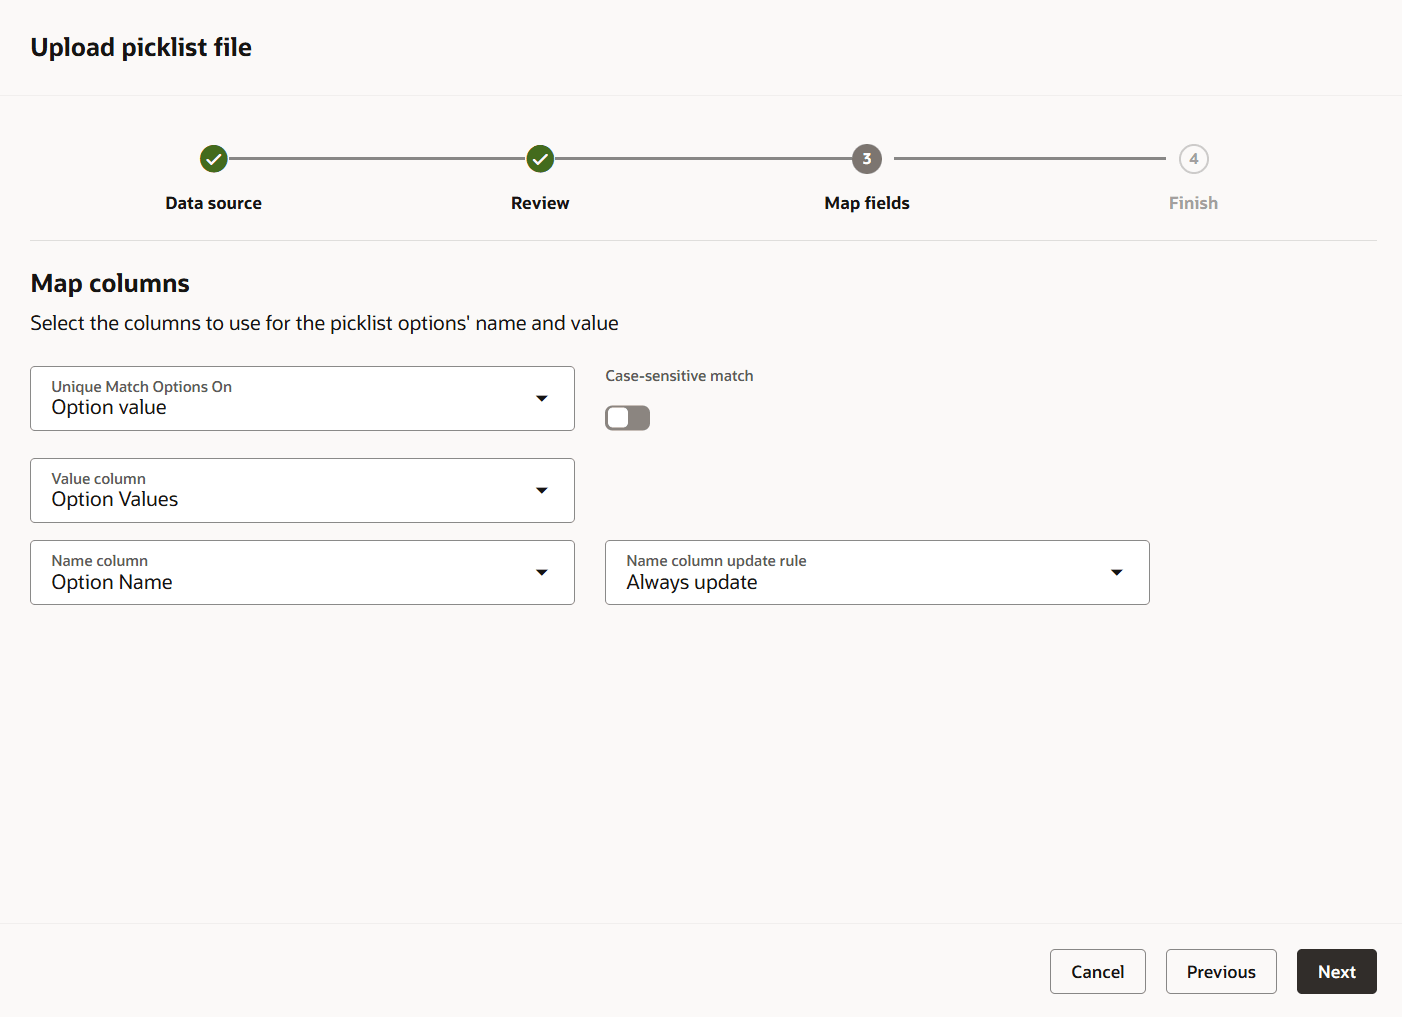
- Map the fields in your file to the picklist fields.
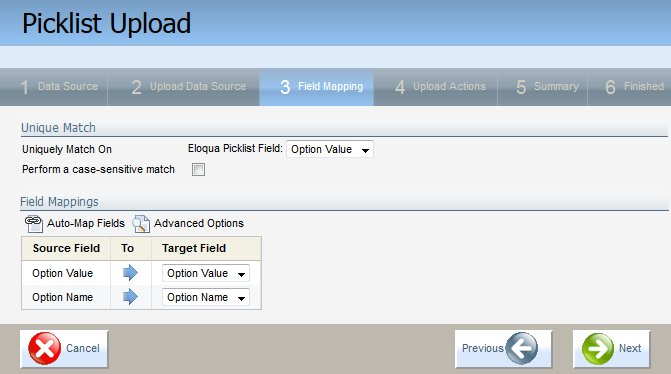
Choose a unique identified for the uploaded options. Option value (i.e. the stored value) is usually the unique identifier. The unique identifier helps prevent duplicates.
In the classic UI, Auto-Map Fields can be used to find the best possible matching columns. Use Advanced Options to display advanced options for handling imported data such as field update and overwrite options.
Classic UI
Redwood experience
- Choose your final upload actions.
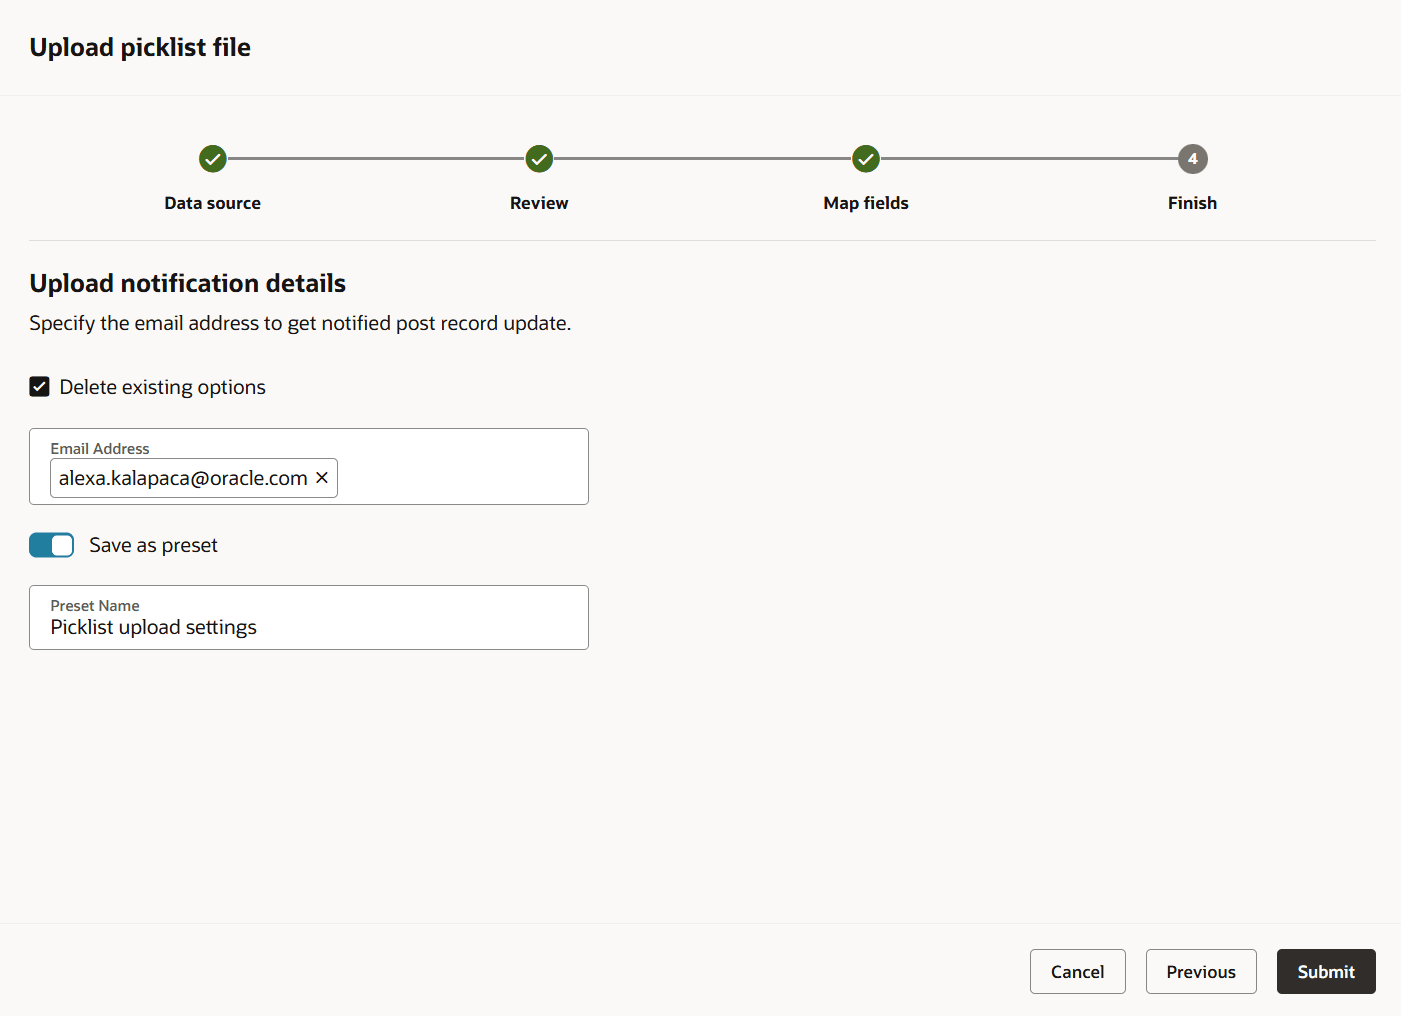
Choose whether to delete all existing options (overwriting your current picklist) or add new values. In the classic UI, this is on the Upload Actions step. In the Redwood UI, this is on the Finish step.
Specify who should get a notification of the upload. In the classic UI, this is on the Summary step. In the Redwood experience, this is on the Finish step.
Choose whether to save your upload settings as a preset that you can use again in the future. In the classic UI, this is the Run once using these settings, or Save these settings for re-use settings on the Summary step. In the Redwood UI, this is the Save as preset setting on the Finish step.
Classic UI

Redwood experience