Embedding Profiler in Microsoft Dynamics 2016
Profiler can be embedded in Microsoft Dynamics.
Prerequisites:
-
In Oracle Eloqua, build an allowlist of the domains that will be hosting embedded Profiler pages. Learn how to configure Profiler.
- Determine the Oracle Eloqua login URL you want to use. You can use the simplified login URL or a specific legacy URL based on the desired login method. Learn more. The steps below assume you are using the simplified login URL.
To install Profiler in Dynamics:
- Navigate to Menu > Settings > Customization > Customizations > Customize the System.
- Under Components, select Entities > Contact > Forms.
- Click New, then select the form to which you want to add Profiler.
- Click the Insert tab in the top menu.
- Add a one-column tab.
- Add an iframe to this tab.

- Name: IFRAME_Profiler
- URL: http://about:blank
- Label: Eloqua Profiler
- Ensure that Restrict cross-frame scripting is unchecked
- On the Formatting tab, modify the height by setting the number of rows, such as 20.
- On the Dependencies tab, add email as a dependent field.
- Click OK to close the IFRAME window.
- On the Home tab, click Form Properties in the Form section.
- Under Form Libraries, click Add, then click New.
- Name: new_EPPOnLoad
- Type: Script (JScript)
- Click the text editor button that appears.
- In the text editor, copy and paste the following string: function loadProfiler() {
- Copy and paste one of the simplified login URL code snippet below. To use the legacy URLs, replace the URL value above with the Legacy login URLs.
var newUrl = https://login.eloqua.com/siteLogin?SiteName={CompanyName}&ReturnUrl=/apps/embed/salesTools/profiler?emailAddress=" + document.getElementById("emailaddress1").title;Xrm.Page.ui.controls.get("IFRAME_Profiler").setSrc(newUrl);
- Be sure to close everything with a final }. If you chose auto-login, your code should look something like this:
function loadProfiler() {var newUrl = "https://login.eloqua.com/siteLogin?SiteName={CompanyName}&ReturnUrl=/apps/embed/salesTools/profiler?emailAddress="+ document.getElementById("emailaddress1").title;Xrm.Page.ui.controls.get("IFRAME_Profiler").setSrc(newUrl);}
- Click OK to close the text editor.
- Click Save, then click Publish, and close the window.
- Close the Look Up Record window.
- Under Event Handlers, click Add.
- Select the new function you created from the list and then name it.
- Click OK.
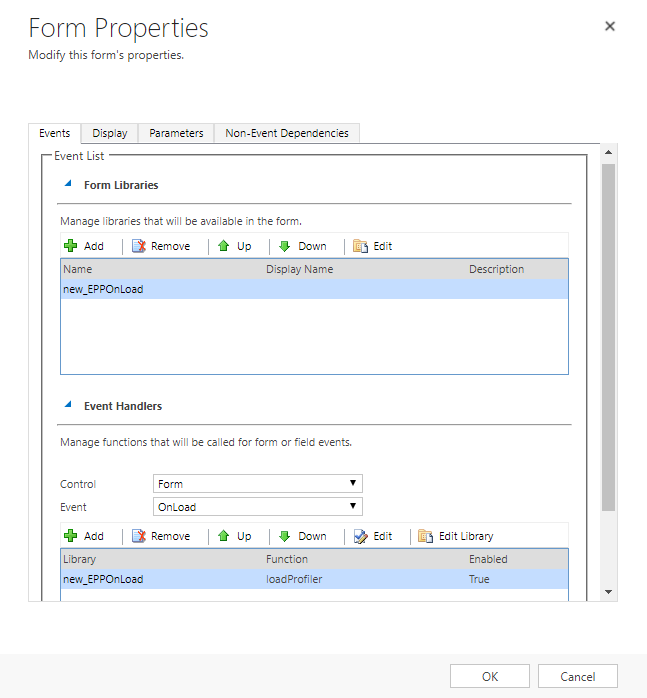
- Click OK in the Form Properties window.
- Click Save, then click Publish on your form.
- Repeat for the Leads entity if needed.
Important: If the IFRAME window appears blank, navigate to Settings > Administration > System Settings > General, and change the setting for Use legacy form rendering to Yes. Microsoft Dynamics will then correctly render the Profiler iframe.