Build Data Warehouse Transformation Logic
After you select Create, the transformation design canvas will be displayed. This is where you define the logic and structure of your transformation using a visual canvas. You can click the plus (+) icon at the center of the canvas to begin adding transformation steps.
You use the visual canvas to:
- Select the primary data object (which becomes the destination object)
- Choose source attributes
- Automatically generate table and attribute aliases
- Add joined data objects
- Configure join conditions (Inner, Left Outer, Right Outer)
- Build expressions using an expression editor with syntax highlighting and smart prompts
- Apply filters (WHERE clauses)
- Map transformed attributes to destination fields
Follow these steps:
- Select a Data Object to define the primary source for the
transformation.
The first data object you select, such as Customer, becomes the destination object for the transformation.
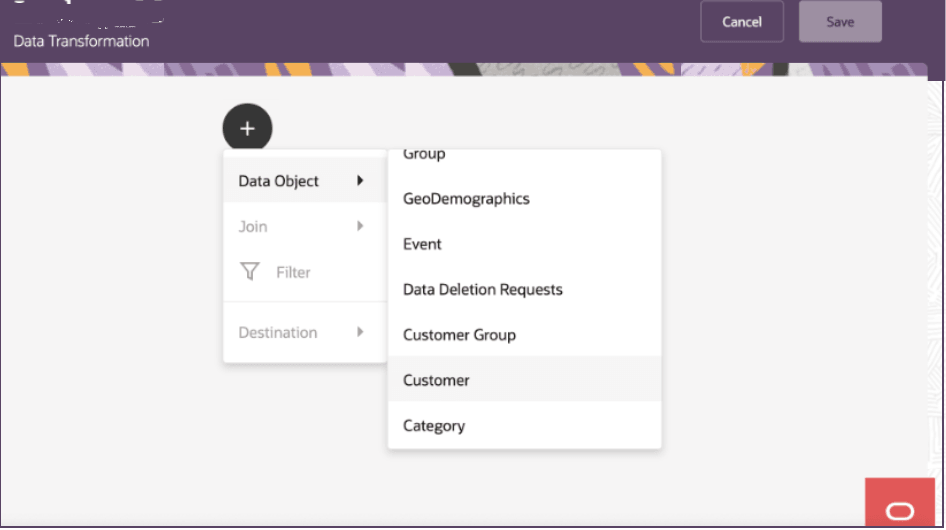
This data object is available later in the flow as the destination.
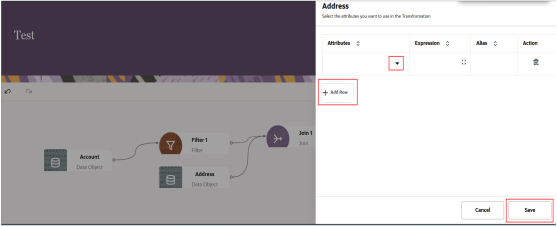
- Select the attributes to use in the transformation logic.
- Add the required attribute rows.
- Use Add row to include additional attributes.
- Use Delete row to remove attributes.
- An alias is automatically generated based on the table name to simplify use in expressions and joins.
- Click Save to confirm the selection and return to the visual canvas.
Here's a sample screenshot of the Address attribute panel.
- Add a secondary data object.
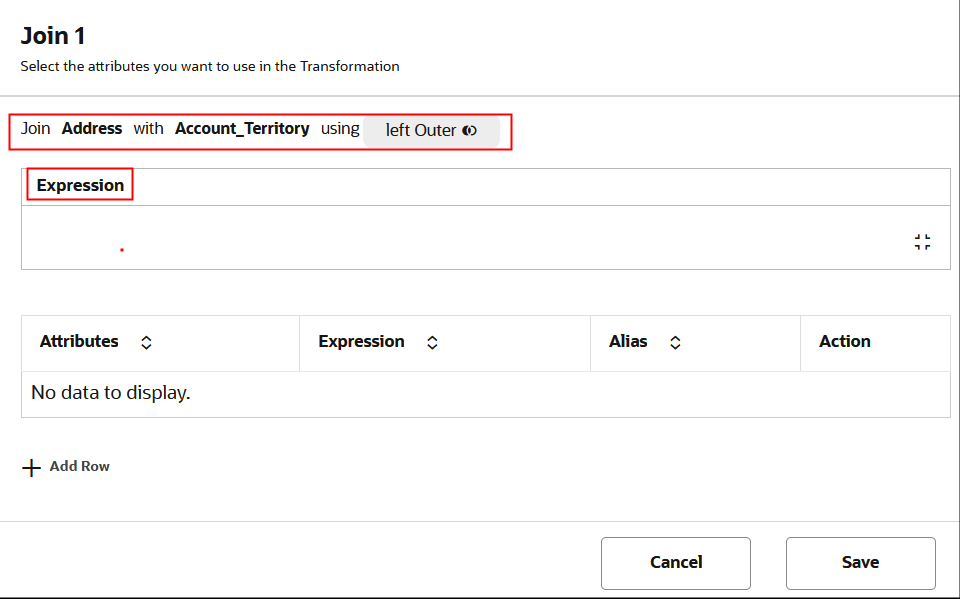
- Select Join from the next available step.
- Choose the object, such as Address.
- Select the required attributes.
- Use the expression builder as needed:
- Press # to view tables.
- Press $ to view columns.
- Press @ to view functions.
- Use syntax highlighting to help build the query.
Here's a sample screenshot of the Join panel.
- Apply a filter, if required.
- Select Filter.
- Define a WHERE clause using attribute values or logical expressions.
- Records that match the filter are excluded from the transformation logic and aren't written to the destination Data Warehouse table.
- Add the destination.
- Select the plus (+) icon.
- Select the primary data object, such as Customer.
- This defines where the transformed data is written.
- Map the transformed fields.
- Select Attributes.
- Map the transformed fields to the corresponding attributes in the destination data object.
- Verify that the output is written to the correct fields and aligned to the data model.
- Select Save after the transformation logic is complete.