Get Started with Logical Tables
Logical tables provide both List View and Diagram View that enables you browse tables or visually explore relationships between entities. Built-in search and filtering make it easy to find the tables you want, while self-service creation helps you build new logical tables without relying on technical teams.
You can also manage which tables are available for segmentation, view detailed information such as attributes, relationships, source objects, and sample data, and configure your workspace to fit your needs.
Follow these steps to get started with using logical tables:
- Sign in to Oracle Fusion Cloud Applications with a user account that has the required Logical Tables access.
- Go to .
- On the Logical Tables landing page, select the + icon as shown:
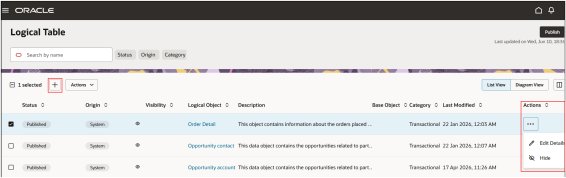
- In the Edit Logical Object panel enter the basic details such as Name, Description, and Category and select Continue.
- In the next screen, add your query definition based on your business requirement.
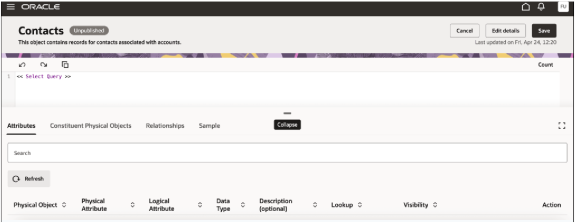
- Select Save to validate and store the logical table definition.
- Select Publish to make the logical table available for
use.
Once published, logical table/columns defined in the query are available for Segmentation purposes.