Creating campaigns
With Responsys Express , create campaigns and customize them to your marketing needs.To create a campaign:
- Click
 from any page in Responsys Express.
 - Click Campaigns.
- Click Create.
- Select a campaign tactic to start with, or click Start from blank.
From the Campaigns page, select the
 button on the tile of the campaign you want to duplicate. In the menu that appears, click Duplicate.
Click Actions > Duplicate within the campaign that you want to duplicate.
- Enter a Name and Description for your campaign, then click Save and Continue.
The campaign page opens, displaying the stage menu.

Tip: Make sure to save your campaign before leaving the canvas, otherwise your campaign is not created and does not display in the campaigns list.
- Select a stage and click on it to configure it.

Unconfigured stages are grey. Learn more about stages and how to configure them.
- After configuring your stage, add another stage and connect to it. You can do this in one of three ways:
Right-click anywhere on the canvas and click Add Stage. Hover your mouse cursor over the first stage and click on one of the four black dots bordering the stage. Then drag your cursor down and drop it at the new stage, and this will create a connection.
Right-click anywhere on the canvas and click Add Stage. Click
 on the previous stage, then click Create Connection. On the new stage, click , then click Connect to Stage to connect the new stage to the previous one.
Click
on the existing stage then click Add Connected Stage. This adds a new stage and also connects it to the previous one.
The following clip demonstrates the three ways to add and connect a stage:
Tip: To remove a connection between stages, right click on the arrow connecting the stages and select Delete Link.
- Repeat step 6 to add stages to your campaign. You should have at least one event entry stage and one action stage. To move a stage, drag and drop it elsewhere on the canvas. To delete a stage, click on the stage then Delete.
Important: If you delete an object outside the campaign, it could cause an error for your stage and/or campaign. For example, if you delete an email, it will cause issues for that particular email stage in your campaign.
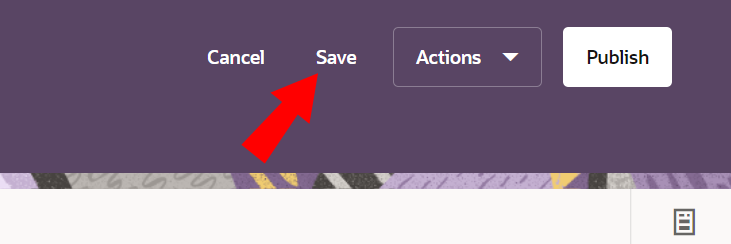
- Click Save.

- Open the Campaign properties panel and click
 to add notifications, make any changes to the campaign name and description, and to select a message to use as the thumbnail image for your campaign. The thumbnail image will be displayed on your campaign tile when scrolling through the Campaigns page.
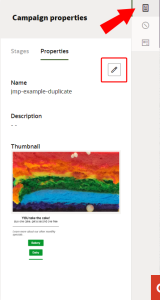
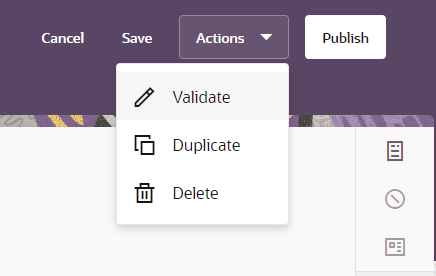
- Click Actions > Validate to validate your campaign.

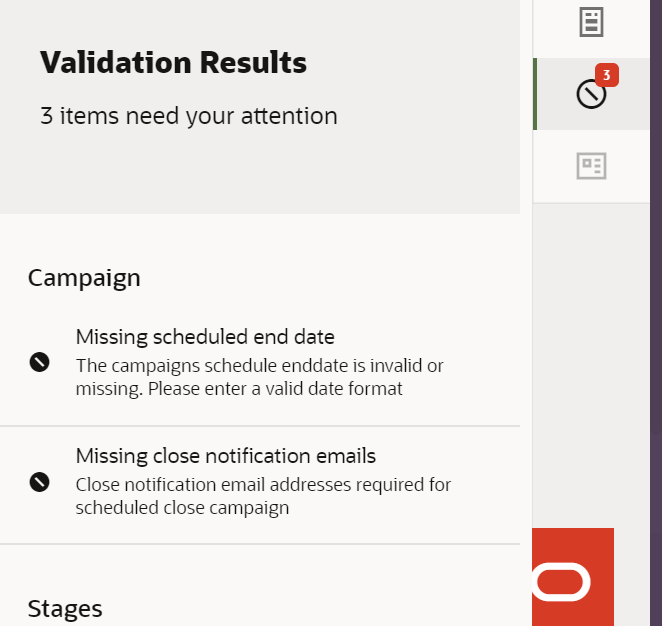
Validation ensures that all data and rules are configured. It does not publish or run the campaign. If validation fails, the campaign highlights the issues so that you can address them. If the validation passes, you can publish the campaign and it can begin receiving campaign entries.

Clicking on an error in the Stages section of Validation Results highlights the stage on the canvas and opens the stage's configuration panel.
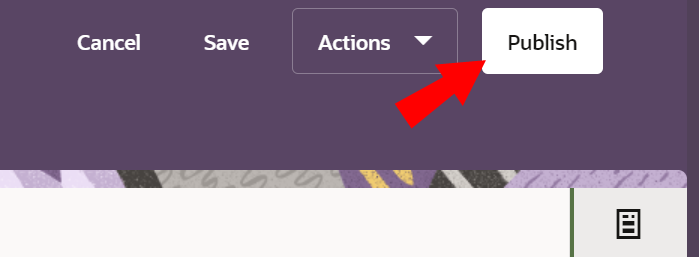
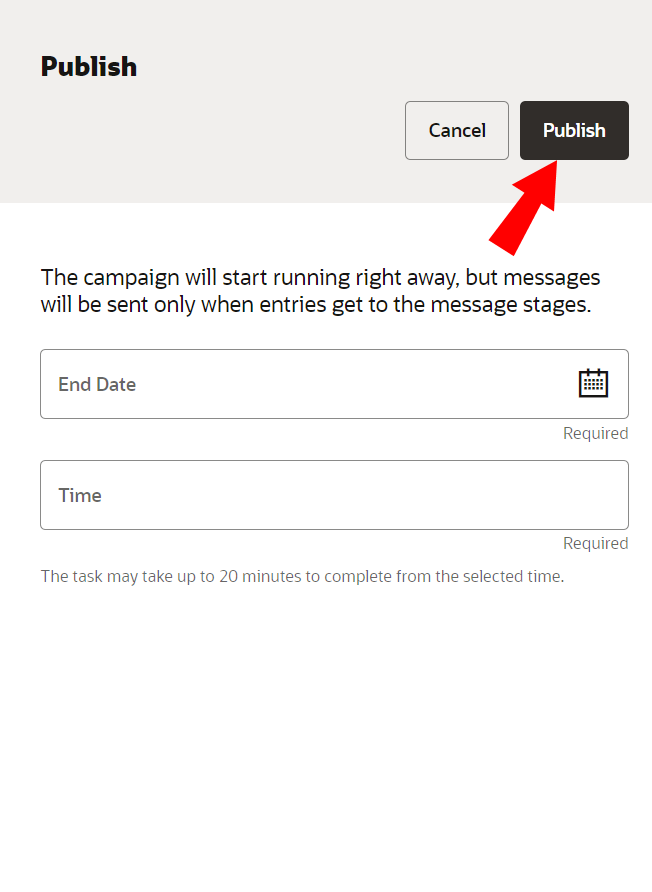
Click Publish.
End Date: Enter an end date for the campaign.
Time: Enter a time for the end date of the campaign.

- Click Publish.

Once you click Duplicate, complete step 4 to create a new name and description for your campaign. Follow steps 6-8 to add more stages and steps 9-12 to edit your Campaign properties and publish your campaign.


You are redirected to the Campaigns management page, and your campaign will show as Running.