Managing Project Plans in the Project Center
You can create and modify your project plans directly in the project center.
|
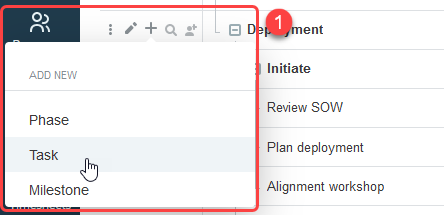
1 |
Add new phases, tasks and milestones to your project plan without having to open a form. Click the Add New icon |
|
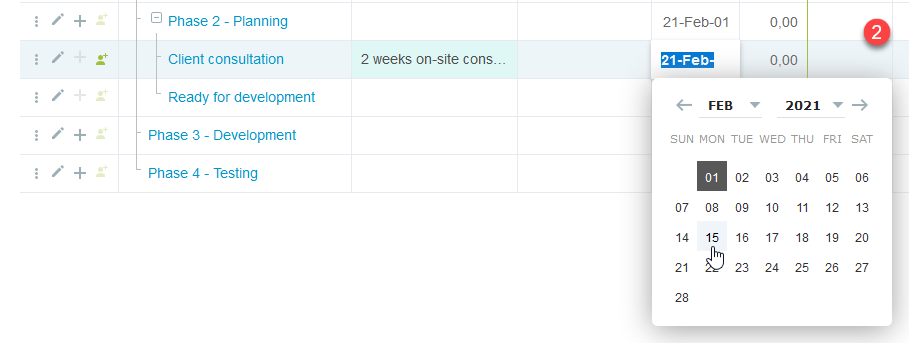
2 |
Use inline-editing to enter or update the phase, task or milestone information. See Inline-Editing in List Views. You can distinguish set start and end dates from calculated dates. The fixed date icon To change a calculated start or end date to a set date, double-click the start or end date cell, clear the Calculated date box, then select the date. Conversely, to change a set start or end date to a calculated date, double-click the start or end date cell, then check the Calculated date box. 
Click a different row or press Enter to save the changes. A message appears confirming the record was saved.
Note:
Form permissions and form rules are respected. Form scripts associated with the project phase, task or milestone form will be triggered when updating a record directly from the project center outline view. Access control at the project level is also supported. For example, if the project can only be edited by the project owner or authorized users, the project center view is read-only for all other users unless the Allow employees with appropriate permissions to add project based items when they do not have permission to modify the project optional feature is enabled for your account and the user can edit project tasks. A label above the column headers indicates whether the project center is editable or read-only, depending on the access control settings for the project you are viewing and your permissions. |
|
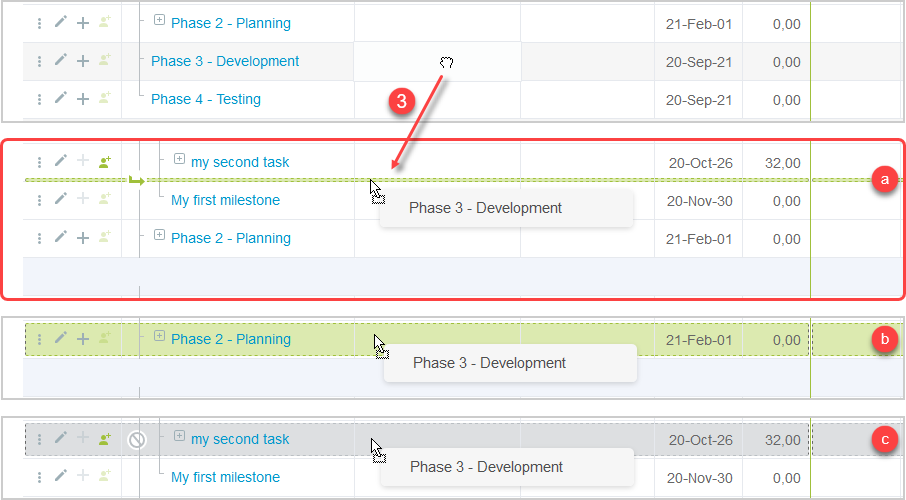
3 |
To change the sequence of your project, point to the row corresponding to the phase, task or milestone you want to move, then drag it to the required position. The mouse pointer changes to a closed hand cursor When you drag the selected entry:
|
|
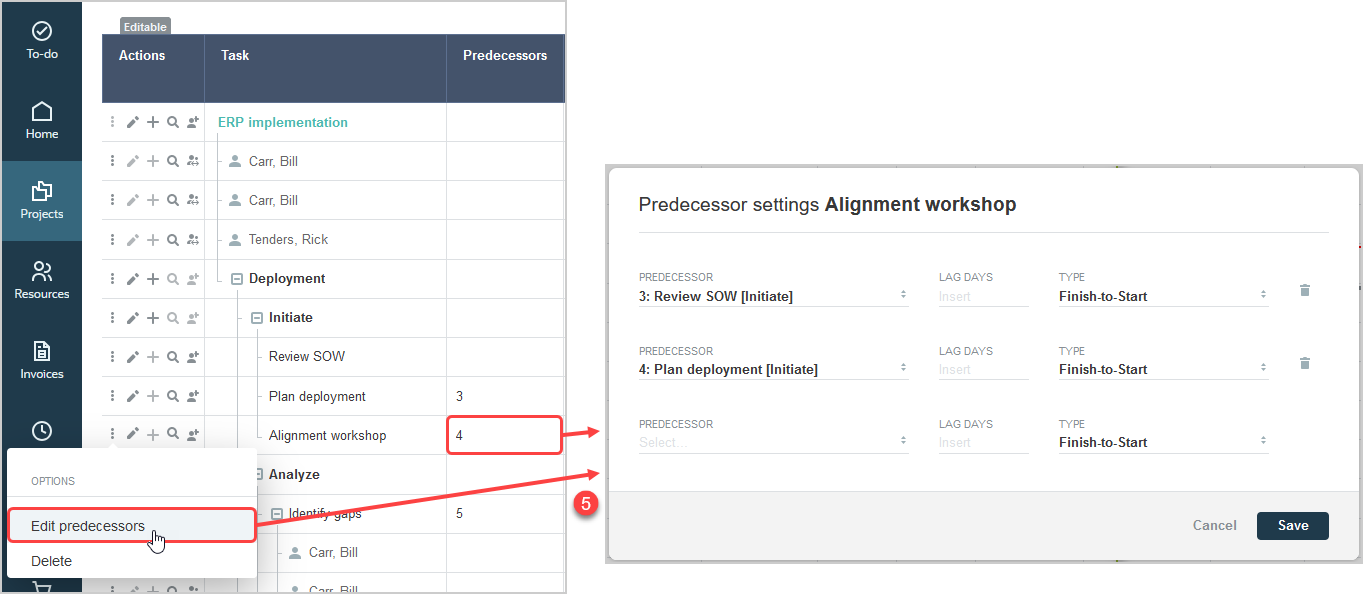
4 |
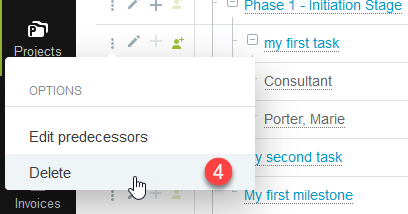
Click the Edit icon Click the More icon |
|
5 |
The project center lets you view and set dependencies between predecessor and successor phases or tasks.
Click the More icon
|