Project Center Display Options
All display option except QuickViews are available only if project center options are set to show resource booking information – See Project Center Options.
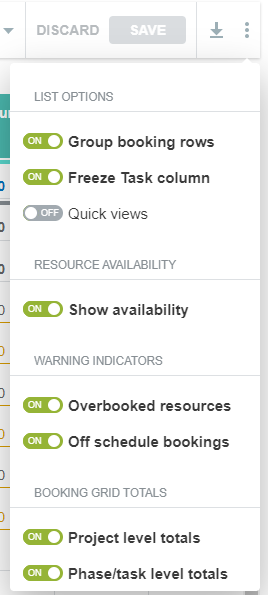
You can use the list options to control the information displayed in the booking grid. The following display options are available:
-
Group booking rows — Show bookings for the same resource, on the same task, and with the same booking type and job code on a single row or on separate rows. See Group Booking Rows.
-
Freeze Task Column — Keep the Task column always visible when you scroll horizontally in the project outline. See Freeze Task Column.
-
QuickViews — Pause or reinstate them in the context of the project center view. See QuickViews.
-
Show availability — Show or hide resource availability indicators — When shown, resource availability indicators are visible for the entire booking row when you select a cell. See Resource Availability Indicators.
-
Warning Indicators — Show or hide warning indicators for off-schedule bookings (bookings before or after the task date range) and potentially overbooked resources (booked hours making up 100% or more of working hours for the resource in a given week). See Booking Warning Indicators.
-
Booking grid totals — Show or hide total hours booked against each task, each phase, or the entire project. See Booking Grid Totals.
Group Booking Rows
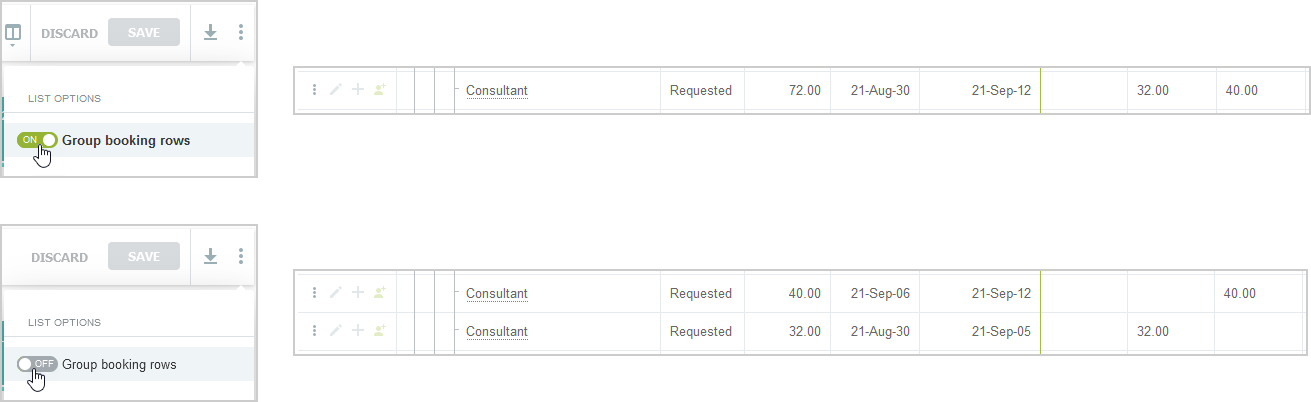
Bookings are nested under a task or at the project level. You can choose how bookings are displayed on the project center view. To change this display option, click the More icon ![]() in the toolbar, then toggle the Group Booking Rows switch under List options.
in the toolbar, then toggle the Group Booking Rows switch under List options.
-
If the Group Booking Rows switch is ON, bookings for the same resource, on the same task (or at the project level), and with the same booking type and job code, are grouped on a single row.
-
If the Group Booking Rows switch is OFF, each booking appears on a different row even if all booking information is the same.
When you add or edit a booking covering multiple weeks using the project center, a different booking is created for each week the resource is booked. If you create a booking outside of the project center covering multiple weeks, this booking always shows on a single line. If you modify the hours for this booking in the project center, there will be a different row for each week the resource is booked when the grouped display option is OFF.
Freeze Task Column
You can keep the Task column visible while you scroll horizontally in the project outline. This can be helpful as you the name of a phase, task, milestone and resource are visible while updating.
The Freeze Task column list option is enabled by default. To change this display option, click the More icon ![]() in the toolbar, then toggle the Freeze Task column switch OFF.
in the toolbar, then toggle the Freeze Task column switch OFF.
QuickViews
QuickView for the record appears when you point to the name of the project, phase, task, milestone, or resource listed in the project center view. If QuickViews are enabled for your account and in your user settings, you can pause or reinstate them in the context of the project center view.
To change this display option, click the More icon ![]() in the toolbar, then toggle the Quick views switch OFF and QuickViews are paused and do not appear.
in the toolbar, then toggle the Quick views switch OFF and QuickViews are paused and do not appear.
Resource Availability Indicators
Resource availability indicators show the availability of the booked resource for each week as you make changes. This can be helpful to avoid overutilization.
Resource availability indicators show only when the booking grid shows Hours. See Viewing Hours, Time Costs, or Time Charges in the Project Center.
To change this display option, click the More icon ![]() in the toolbar, then toggle the Show Availability switch under Resource availability.
in the toolbar, then toggle the Show Availability switch under Resource availability.
If the Show Availability switch is ON:
When you click a cell in the booking grid, all cells in the booking row show a visual indication of the resource’s availability that week. The availability indicator shows the number of hours available for booking and a horizontal progress bar representing the proportion of the resource’s working hours that are already booked that week. It is updated automatically as you make changes.
When you edit a cell value, the cell shows the availability indicator until you save your changes. This also serves as a visual reminder of the cells you updated since you last saved changes.

-
The number of hours available is calculated as the employee’s working hours less the hours the employee is booked for in that week.
Hours Available = Working Hours – Booked Hours, where:
-
Working Hours are based on the employee work schedule with any schedule exceptions and approved time off work deducted.
-
Booked Hours is the sum of hours across all relevant bookings for that resource and that week. Bookings included in the calculation depend on your account configuration.
Note:Account administrators can configure which bookings are excluded from the available hours and booked hours calculation based on the Booking type and Approval status. All booking types and all approval statuses except “Rejected” are included by default. For more information, see Project Center Options.
Example
If the resource works 40 hours in the week according to the work schedule, has 16.06 hours booked to other tasks this week, the resource has 23.94 available hours. If you book the resource for 6 hours to this task this week (1), the resource now has 17.94 available hours (2).

-
-
The progress bar is color-coded. The color code depends on your account configuration.
Note:By default, the following color code is used:
-
Gray color — No booked hours in that week.
-
Green color — Booked hours make up less than 75% of working hours in that week.
-
Orange color — Booked hours make up between 75% (included) and 100% (excluded) of working hours in that week.
-
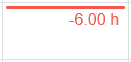
Red color — Booked hours make up 100% or more of working hours in that week. The available hours also appears
Account administrators can customize the color code to suit the business requirements of your company by defining utilization ranges and selecting a color for each utilization range. For more information, see Project Center Options.
-
Booking Warning Indicators
Booking warning indicators show potential overutilization of resources in each week and out of schedule bookings.
Booking warning indicators show only when the booking grid shows Hours. See Viewing Hours, Time Costs, or Time Charges in the Project Center.
-
Overbooked resources — Booked hours greater than or equal to a certain percentage of working hours. The resource availability indicator always shows in the cell if this percentage or more of the resource time is booked for the resource that week. The percentage of working hours (or utilization threshold) depends on your account configuration.
 Note:
Note:Account administrators can set the utilization threshold for your OpenAir account. For more information, see Project Center Options.
-
Off-schedule bookings — The cell is highlighted with a red color outline and the hours show in red color if the booking is before the scheduled start time or after the scheduled end date for the task or project.

You can control each type of warning indicators using the list options. To change these display options, click the More icon ![]() in the toolbar, then toggle the Overbooked resources or Off-schedule bookings switch under Warning indicators.
in the toolbar, then toggle the Overbooked resources or Off-schedule bookings switch under Warning indicators.
Booking Grid Totals
Booking grid totals show the total number of hours booked against each task, each phase and the entire project in the booking grid to get an overview of the planned effort.
-
Project level totals — The booking grid is showing the total number of hours booked against the project and against all tasks across the entire project for each week or month.
-
Phase/task-level totals — The booking grid is showing the following:
-
The total number of hours booked against each task for each week or month.
-
For each phase, the total number of hours booked against all tasks across the phase for each week or month.
-
The totals shown in the booking grid are updated immediately after you add or change booking hours in the booking grid. Click Save in the toolbar to update the totals shown under the Hours Planned and Hours Booked columns in the project outline (left side of the project center view).