Setting Up Custom Email Notifications
After you enable custom email notifications for a module, a Notifications list becomes available in the application settings for that module. You can review and modify existing custom email notifications or you can add new ones.
To set up custom email notifications:
-
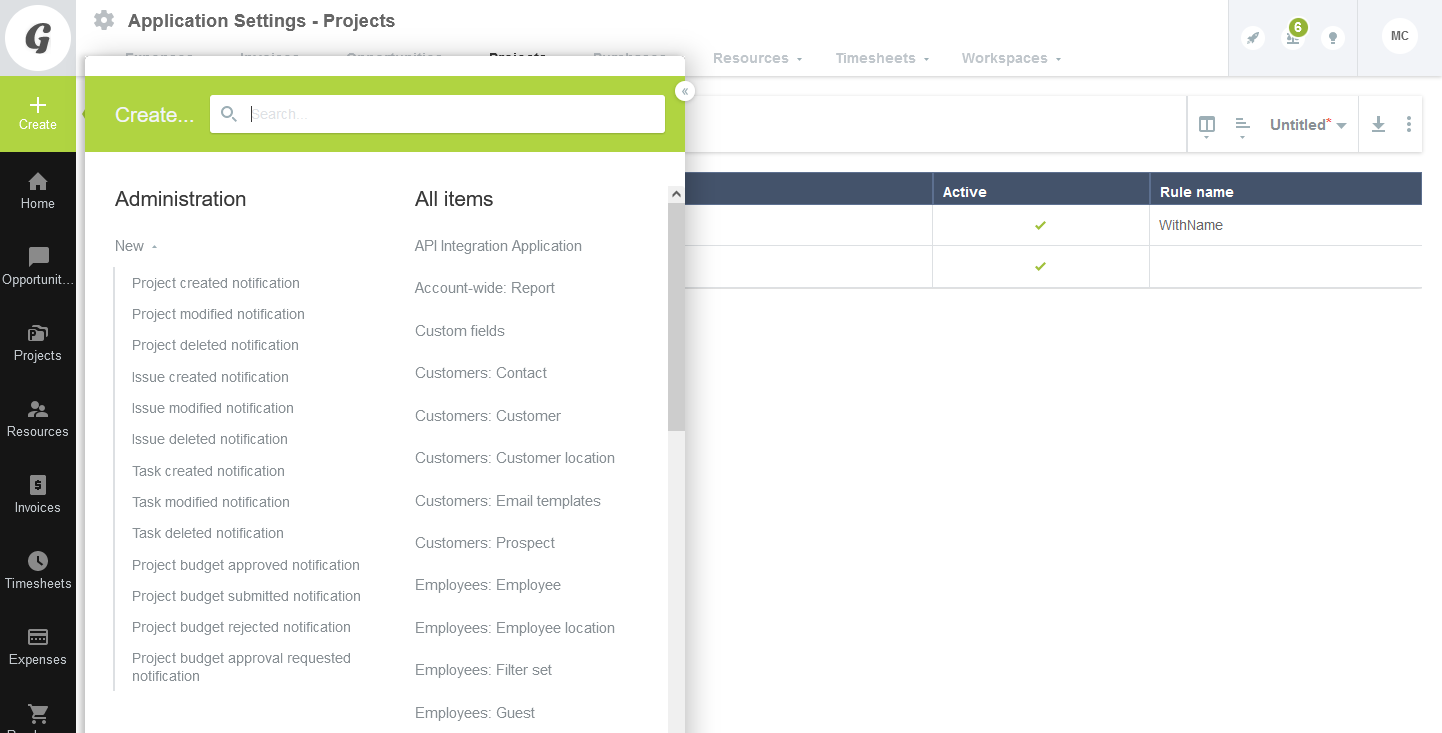
Go to Administration > Application Settings > [Select a module] > Notifications.
The list of notifications set up for record types associated with the selected module appears.
-
Do one of the following:
-
To modify an existing notification, click
<record type> <event>(for example,Project created) under the Event column. -
To add a new notification, click the Create button, then click the option corresponding to the record type and the event you would like to set up notifications for. The Create menu options also include the record type and the event for record types in the module:
<record type> <event> notification(for example,Project deleted notification).
The Notification form appears.
-
-
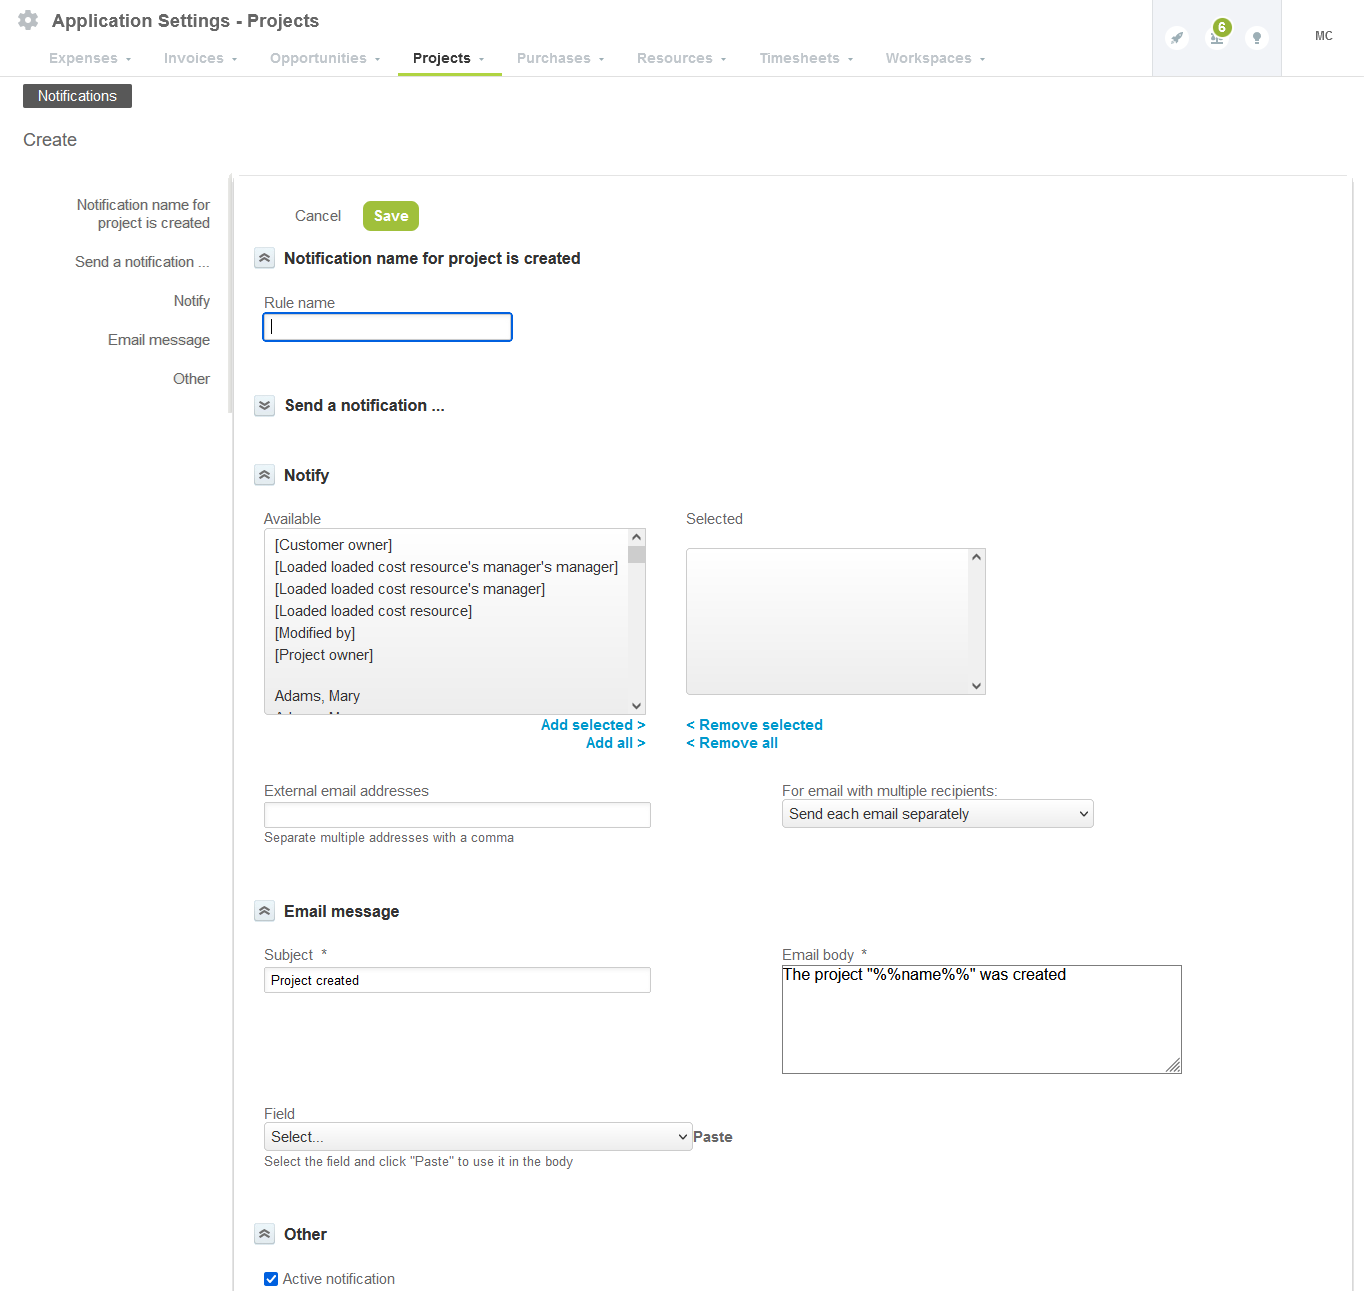
(Optional) Enter a Rule name.
-
Under Send a Notification select when the notification should be sent.
1
Click the dropdown field under Send a Notification ... and select one of the available options.
You can set up the notification to be sent: only To do so,
-
Every time the event occurs for every record of this type - To do so, select When any <record type> is <event>.
-
When one or multiple conditions are met - To do so:
-
Select When all of these conditions are met if you want to send a notification when the event occurs and the record meets all specified conditions (
ANDlogical operator). -
Select When one of these conditions is met if you want to send a notification when the event occurs and the record meets at least one of the specified conditions (
ORlogical operator).
If you select either of the latter two options, the form shows additional fields to let you define the conditions.
-
2
Click the dropdown box further left in the condition row to select a field.
3
Click the middle dropdown box to select a comparison operator from the available options.
4
Depending on the chosen field and comparison operator, define a value or a range of values by either typing, selecting a value or range from predefined dropdown options, or setting a custom value.
Dropdown lists with a large number of values support advanced search.
5
Click Add row to add a new condition.
Click the Delete row icon
 next to a row to delete that condition.
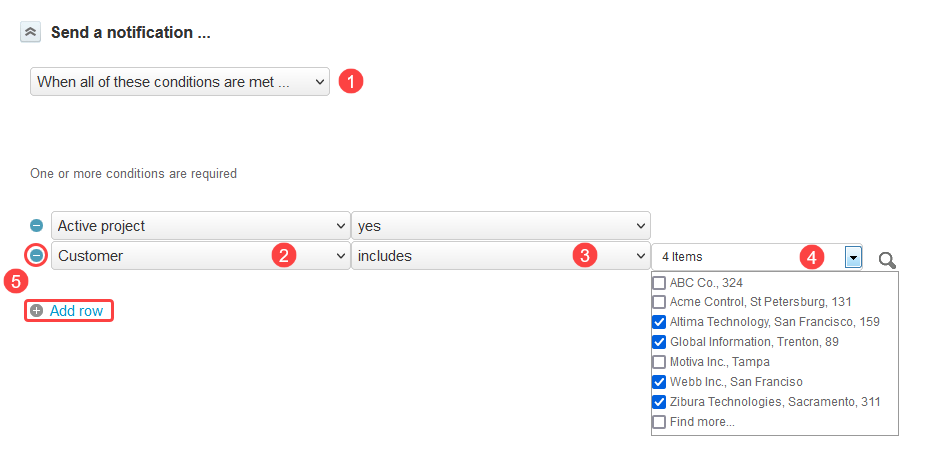
-
-
Under Notify, select who should receive the notifications. Do one of the following:
-
Select one or multiple named employees.
-
Select one or multiple dynamic values (metavalues) to send notifications to an employee determined automatically depending on the record information, or who created or modified the record. For example, if you select the metavalue
[Customer owner], notifications are sent to the employee who owns the customer associated with the record, or if you select the metavalue[Submitter's manager], notifications are sent to the manager of the employee who submitted the transaction record for approval. -
Enter one or multiple External email addresses, separated by a comma, to send notifications to recipients who do not have a user record in your company's SuiteProjects Pro account.
-
-
For email with multiple recipients, select whether to send one single email with all recipients in the
Toline, or send separate email messages to each recipient for the same notification. -
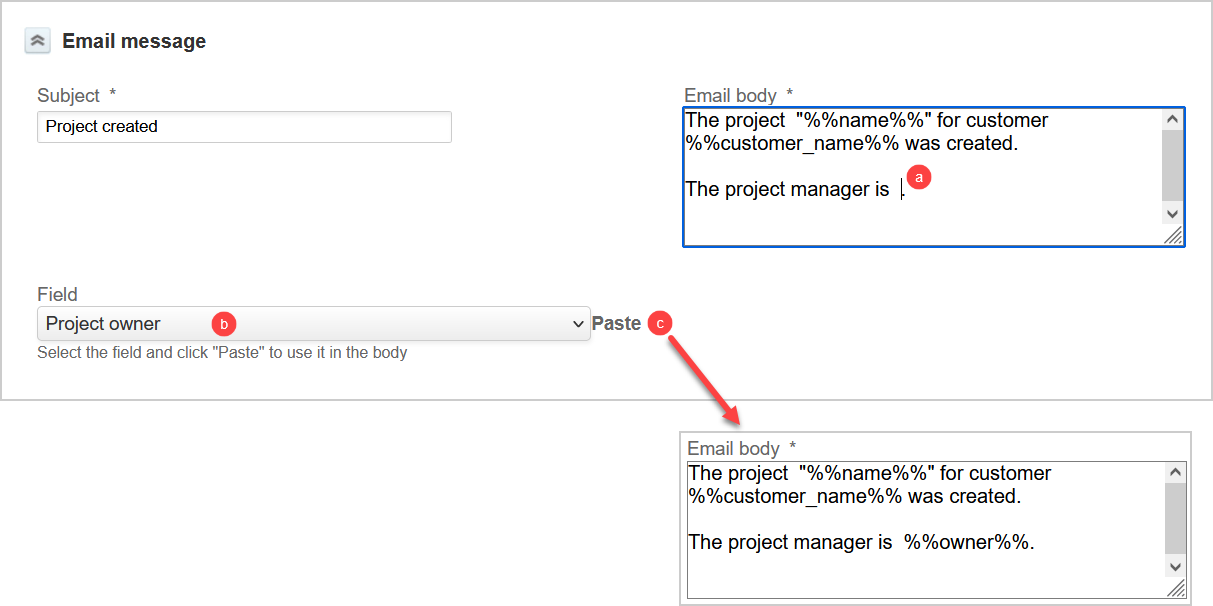
Under Email message, enter a Subject line.
-
Enter the text to include in the Email body.
You can insert field variables in the body of the notification email. Field variables will be replaced by current field values on the record when the notification email about that record is sent. To insert field variables:
-
Place your cursor where you want to insert the value in the Email body text.
-
Select the Field from the dropdown list.
-
Click Paste.
The field variable appears at the cursor location in the Email body text.
Note:The notation for field variables is the database name for the field between double percent characters. If you know the name of the field in the SuiteProjects Pro database (
<field_name>), you can enter field variables directly in the text using the following notation:%%<field_name>%%.
-
-
Under Other, check the Active notification box to enable the notification. SuiteProjects Pro sends the custom email notification only if this box is checked. You can clear this box at any time if you want to disable the custom email notification.
-
For approval requested notifications, check the Do not send if auto-approved box if you do not want to send approval requested email notification when the transaction is approved automatically. If the <Transaction > approved by is set to the metavalue
[Self approver], for example, you may not want to send approval requested notifications.