Resource Compare View
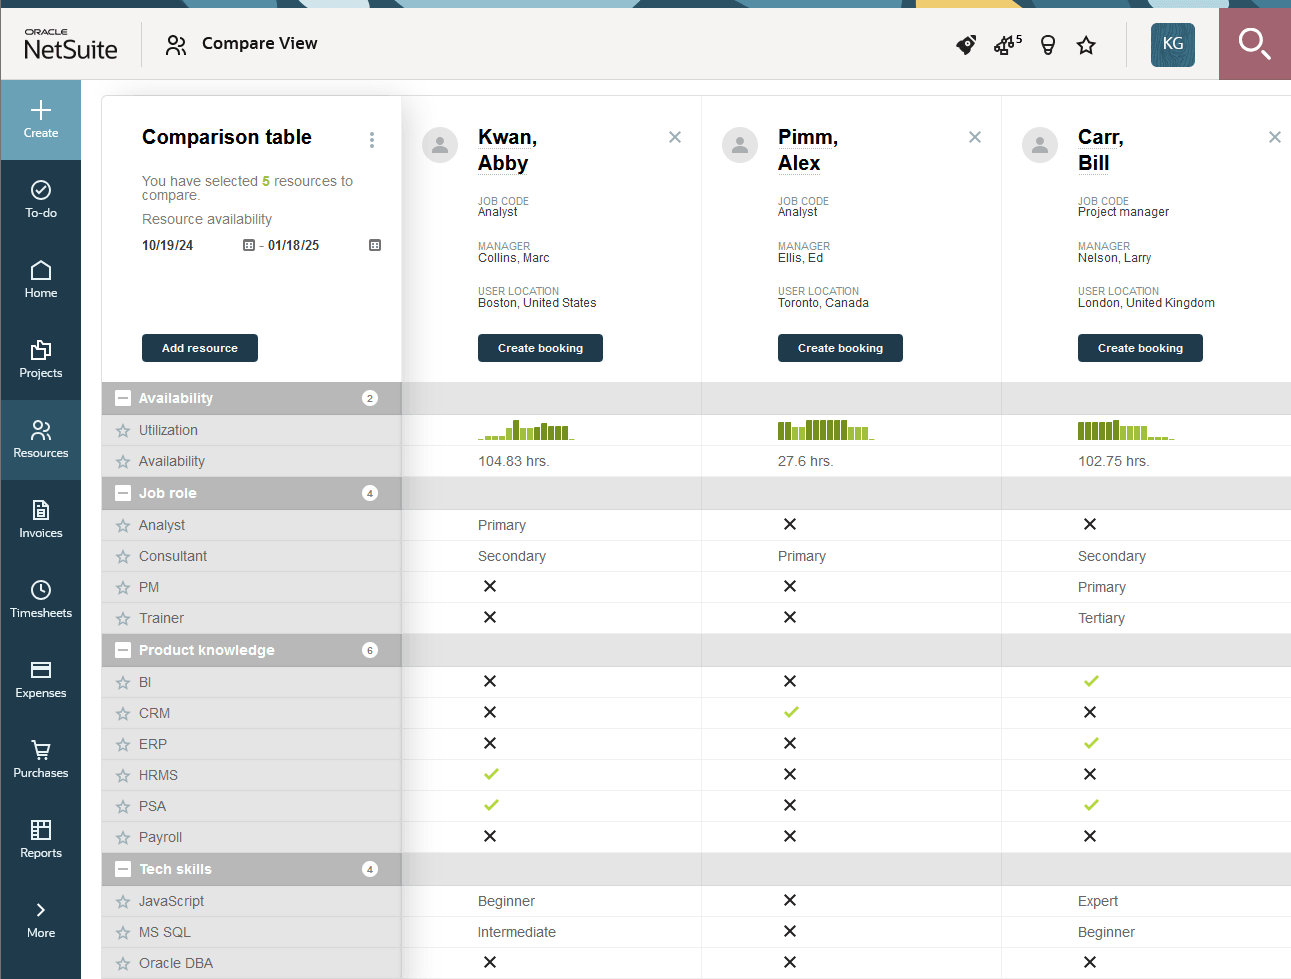
The Resource Compare View allows you to compare resources at a glance and better manage large pools of resources. Add resources to the view, and then compare them side by side. You can select favorite skills and demographics, and create bookings from within the view.
Click the links below to find out more about the Resource Compare View:
-
Setting favorite skills or attributes in the Resource Compare View
-
Filtering or Removing Inactive Resources from the Resource Compare View
To enable the Resource Compare View
-
Ensure that your account has access to the Resources module.
-
If the user is not an administrator, ensure that the user’s role has the “Enable Resource Compare View” role permission.
-
To add resources to compare from a resource QuickView, ensure that QuickViews are enabled for the user.
There are three ways to add resources to the Resource Compare View.
To add resources to the Resource Compare View
-
Point to any field which opens a resource QuickView, and click “Add to compare”.
-
In any list which shows resources, the Resource Request Queue “Search and Propose” page, or in Custom Search results, select the checkbox in the Bulk actions column next to each resource you want to compare, then click the “Bulk actions” or “Select...” dropdown list and click “Add to compare.”
-
In the Resource Compare View, click the “Add Resource” button.
As you add resources to compare, the counter on the left sidebar changes to indicate how many resources are in the Resource Compare View. Click this counter to open the “Resource Comparison” window, which shows the resources you will compare. To remove resources from this list (and from the Resource Compare View), click the  icon next to the resource’s name.
The Resource Compare View has a default limit of 50 resources which can be compared at one time. To increase this limit, go to Administration > Application Settings > Resources > Resource compare view options and enter a new maximum value in the "Maximum number of resources to display in Resource Compare View" text field. This text field accepts any number values up to 200.
To open the Resource Compare View
There are two ways to go to the Resource Compare View:
-
Click the “Compare View” button in the “Resource comparison” window.
-
Go to Resources > Compare view.
Using the Resource Compare View
While in the Resource Compare View, add resources to compare by clicking the "Add Resource" button and selecting them from a multi-select list. Left click on an un-selected resource name in the list, and they will be added to the Comparison table. Left click a selected resource to remove it from the comparison.
To filter resources based on their availability, click the icon next to the "Resource availability" field and enter or select start and end dates.
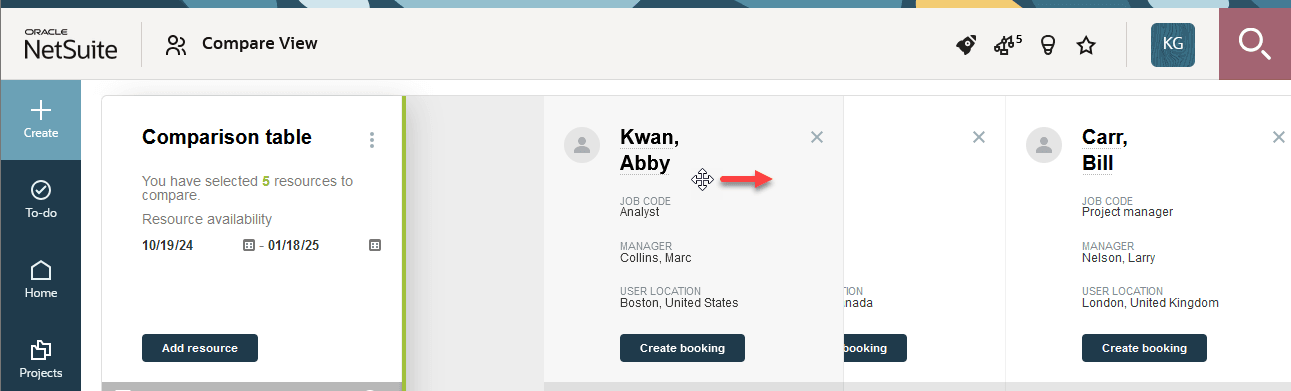
Compared resources are shown side-by-side in the Comparison table. Rearrange the resources in the Comparison table by dragging them to new positions on the table. To remove a resource from the Comparison table, click the  icon in the top right corner of that resource's card. To remove all resource from the comparison, click the
  icon and select "Remove all resources".
By default, resources' rates are hidden in the Resource Compare View. To display each resource's rates in the header of the resource cards, go to Administration > Application Settings > Resources > Resource compare view options and select the "Display employees’ rate" option under Header settings.
You can also set which three fields appear under each resource's name in the Resource Compare View header. Any user demographic or custom fields can be selected to appear in the heading. See Customizing Resource Compare View Headers.
To hide skills categories such as Product knowledge or Tech skills, click the  icon near the category title. Click the
  icon next to category title to expand that list of attributes. The numbers next to the category title indicate how many attributes are in that category.
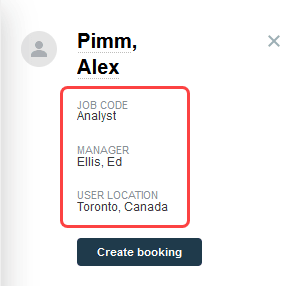
Point to a Resource name in the header to open a QuickView window with details for the resource and links to perform resource-related actions.
As you scroll down the category skills category list, the resource name headers remain in view.
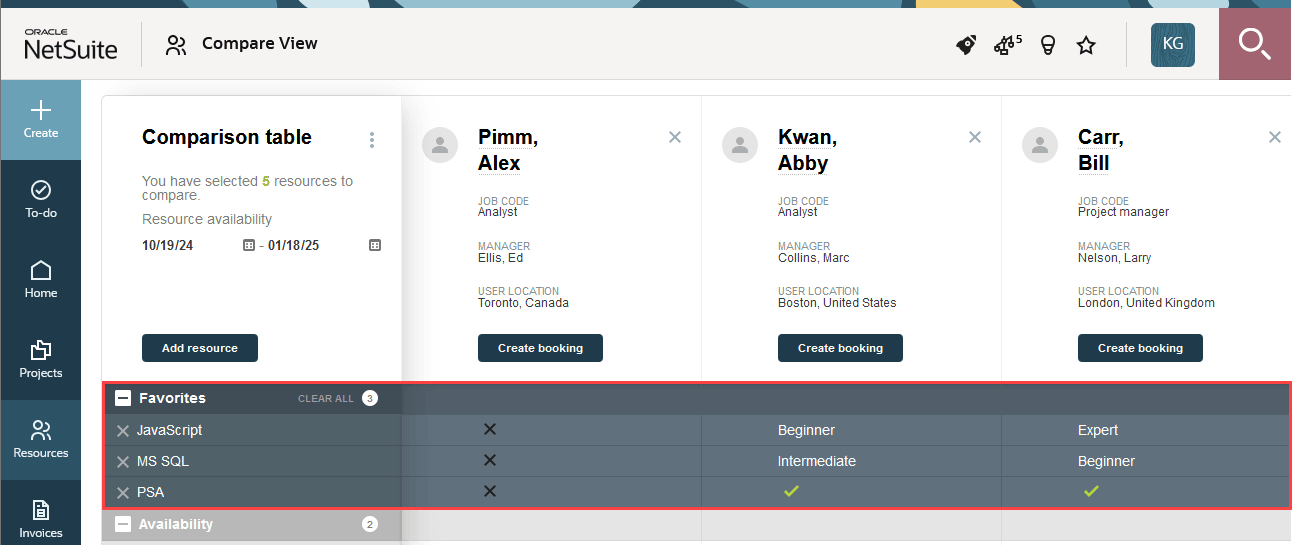
Setting favorite skills or attributes in the Resource Compare View
You can select favorite categories which are moved to their own “Favorite parameters” row near the top of the Comparison table. This category remains visible even if you add or remove resources from the table. To set a favorite skill or attribute, click the  icon next to the skill or attribute.
The Demographics category in the Resource Compare View
The Demographics category includes standard fields, and can be further customized in Administration > Application Settings > Resources > Resource compare view options. Here you can choose to include or exclude custom fields and some standard fields. To enable this feature, add the "Modify Resource Compare View options" role permission to all roles which you want to access it.
Booking Resources from the Resource Compare View
To book a resource from the resource compare view:
-
Click the "Create Booking" button in the Resource card header. A "New booking" form opens.
-
Enter the booking’s details in the “New booking” form.
Note:When the New booking form first opens, the booking dates are based on the “Resource availability” dates set in the Comparison Tool, but can be changed when entering the booking information in the form.
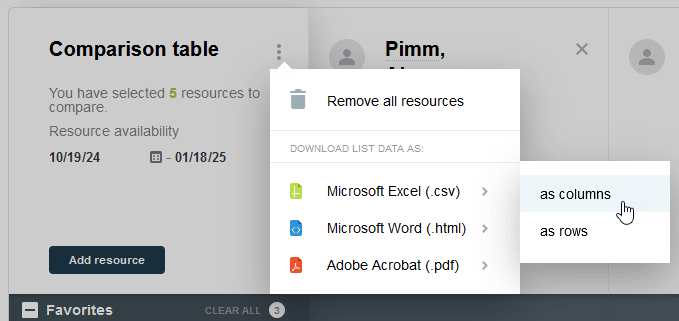
Downloading Resource Compare View Data
You can download resource compare view data in a variety of formats.
-
Go to the Resource Compare View’s Comparison table.
-
Click the
icon. A window opens with options to download the Resource Compare View’s list data. -
Point to the file format you would like to save the data as. A window opens where you can select to save the data as columns or rows.
-
Click “as columns” to save resource data vertically in your downloaded file. This format most closely replicates the data as it appears in the Resource Compare View’s Comparison table, with each column representing a resource.
-
Click “as rows” to save resource data horizontally in your downloaded file. In this format, each row represents one resource.
-
Filtering or Removing Inactive Resources from the Resource Compare View
To filter or remove Inactive resources from Resource Compare View selector:
-
Go to Administration > Application Settings > Resources > Resource Compare View Options and clear the Include inactive resources option.
Customizing Resource Compare View Headers
Set which three fields app ear under each resource's name in the Resource Compare View header. Any user demographic or custom fields can be selected to appear in the heading.
To select which fields appear in the Resource Compare View headers
-
Go to Administration > Application Settings > Resources > Resource compare view options.
-
Select the fields to display in the "Header settings" section of the Resource Compare View Options form.
If you try to set more than three fields in the header, you will receive an error message.