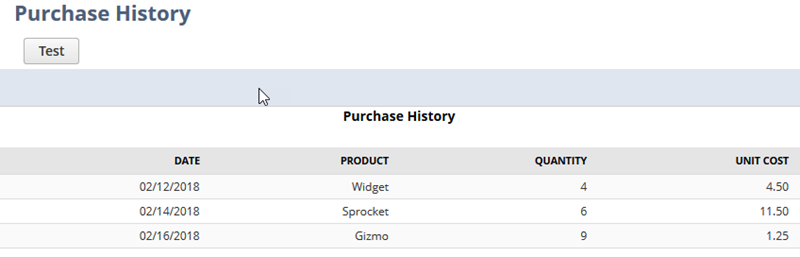
Sample Custom List Page Script
The following screenshot displays a list page created by a Suitelet. You can use the sample code provided below to create this list yourself.
Steps for Creating a Custom List Page with SuiteScript 2.1
Before proceeding, you must create a script file. To create this file, you can do one of the following:
-
If you want to copy and paste the completed script directly from this help topic, go to Complete Custom List Page Sample Script.
-
If you want to walk through the steps for creating the script, complete the following procedure.
Here's how to create a list page:
-
Create a Suitelet and add the necessary JSDoc tags.
/** *@NApiVersion 2.1 *@NScriptType Suitelet */ -
Add the define function to load the N/ui/serverWidget Module module.
/** *@NApiVersion 2.1 *@NScriptType Suitelet */ define(['N/ui/serverWidget'], function(serverWidget) { }; -
To enable a Submit button, create an onRequest function. In the onRequest function create an if statement for the context request method, and set it to 'GET'. After the if statement, create a return statement to support the GET request method.
Note:This sample is divided into two sections, as noted in the code comments. Each part shows where to add the corresponding sample code.
/** *@NApiVersion 2.1 *@NScriptType Suitelet */ define(['N/ui/serverWidget'], function(serverWidget) { function onRequest(context){ if(context.request.method === 'GET'){ // Section One - List - See 'Steps for Creating a List', Step Five // Section Two - Columns - See 'Steps for Creating a List', Step Seven context.response.writePage(list); }else{ } } return { onRequest: onRequest } }); -
In section one, create a list page using serverWidget.createList(options). You can use serverWidget.ListStyle to define the style of the list page.
var list = serverWidget.createList({ title: 'Purchase History' }); list.style = serverWidget.ListStyle.REPORT; -
In section one, below the declaration of the list, use List.addButton(options) to create a button on the list. Use the
functionNameproperty to call the function triggered when the button is clicked.list.addButton({ id : 'buttonid', label : 'Test', functionName: '' // the function called when the button is pressed }); -
In section two, use List.addColumn(options) to define the columns in the list. The column type is specified according to the serverWidget.FieldType enumeration.
Use the
alignproperty to justify the position of the column.Important:Note that not all field types are supported by List.addColumn(options), see serverWidget.FieldType.
var datecol = list.addColumn({ id : 'column1', type : serverWidget.FieldType.DATE, label : 'Date', align : serverWidget.LayoutJustification.RIGHT }); list.addColumn({ id : 'column2', type : serverWidget.FieldType.TEXT, label : 'Product', align : serverWidget.LayoutJustification.RIGHT }); list.addColumn({ id : 'column3', type : serverWidget.FieldType.INTEGER, label : 'Quantity', align : serverWidget.LayoutJustification.RIGHT }); list.addColumn({ id : 'column4', type : serverWidget.FieldType.CURRENCY, label : 'Unit Cost', align : serverWidget.LayoutJustification.RIGHT }); -
In section two, use List.addRow(options) to define a single row on the list. Or use List.addRows(options) to define multiple rows at one time.
              list.addRow({
    row : { column1 : '02/12/2018', column2 : 'Widget', column3: '4', column4:'4.50' }
});
list.addRows({ rows :[{column1 : '02/12/2018', column2 : 'Widget', column3: '4', column4:'4.50'}, {column1 : '02/14/2018', column2 : 'Sprocket', column3: '6', column4:'11.50'}, {column1 : '02/16/2018', column2 : 'Gizmo', column3: '9', column4:'1.25'}] });
Complete Custom List Page Sample Script
This script sample uses the define function, which is required for an entry point script (a script you attach to a script record and deploy). You must use the require function if you want to copy the script into the SuiteScript Debugger and test it. For more information, see SuiteScript Debugger.
The following code creates a Suitelet that generates a custom list page. For steps to create this script, see Steps for Creating a Custom List Page with SuiteScript 2.1.
            /**
 * @NApiVersion 2.1
 * @NScriptType Suitelet
 */
define(['N/ui/serverWidget'], function(serverWidget) {
    function onRequest(context){
        if(context.request.method === 'GET'){
            // Section One - List - See 'Steps for Creating a Custom List Page', Step Five
            var list = serverWidget.createList({
                title: 'Purchase History'
            });

            list.style = serverWidget.ListStyle.REPORT;

            list.addButton({
                id: 'buttonid',
                label: 'Test',
                functionName: '' // the function called when the button is pressed
            });

            // Section Two - Columns  - See 'Steps for Creating a Custom List Page', Step Seven
            var datecol = list.addColumn({
                id: 'column1',
                type: serverWidget.FieldType.DATE,
                label: 'Date',
                align: serverWidget.LayoutJustification.RIGHT
            });

            list.addColumn({
                id: 'column2',
                type: serverWidget.FieldType.TEXT,
                label: 'Product',
                align: serverWidget.LayoutJustification.RIGHT
            });

            list.addColumn({
                id: 'column3',
                type: serverWidget.FieldType.INTEGER,
                label: 'Quantity',
                align: serverWidget.LayoutJustification.RIGHT
            });

            list.addColumn({
                id: 'column4',
                type: serverWidget.FieldType.CURRENCY,
                label: 'Unit Cost',
                align: serverWidget.LayoutJustification.RIGHT
            });

            list.addRows({
                rows: [{column1: '05/30/2018', column2: 'Widget', column3: '4', column4: '4.50'},
                    {column1: '05/30/2018', column2: 'Sprocket', column3: '6', column4: '11.50'},
                    {column1: '05/30/2018', column2: 'Gizmo', column3: '9', column4: '1.25'}]
            });
            context.response.writePage(list);
        }
    }

    return {
        onRequest: onRequest
    }
});