Adding SuiteCloud IDE Plug-in to WebStorm
The WebStorm plug-in is installed to WebStorm as a custom plug-in. You need to download the IDE plug-in package from the SuiteCloud IDE update site. Here's what to do:
Add the SuiteCloud IDE Plug-in for WebStorm Update Site
When you add the SuiteCloud IDE update site to WebStorm, you can download the latest version of the IDE plug-in that is compatible with your NetSuite account as a custom plug-in. When installed, you'll have access to the IDE plug-in and SDF options in WebStorm.
To add the update site in SuiteCloud IDE Plug-in for WebStorm:
-
Launch WebStorm.
-
Depending on your operation system, do one of the following:
-
If you're on Windows, press Ctrl+Alt+S. You can also select File > Settings....
-
If you're on macOS, press Cmd+,. You can also select WebStorm > Preferences.
-
-
Select Plugins, and click
 .
. -
Select Manage Plugin Repositories....
-
In the Custom Plugin Repositories window, click
 and enter one of the following links based on your preference:
The latest version of SuiteCloud IDE Plug-in for WebStorm is 2025.2 and is compatible with NetSuite 2025.2. To get it, use the following link:
-
https://system.netsuite.com/download/suitecloud-sdk/ideplugin/webstorm/25.2/updatePlugins.xml
If you want to get the latest updates automatically, use:
-
https://system.netsuite.com/download/suitecloud-sdk/ideplugin/webstorm/latest/updatePlugins.xml
If you want to use the previous version of the plug-in, use this link:
-
Version 2025.1:
https://system.netsuite.com/download/suitecloud-sdk/ideplugin/webstorm/25.1/updatePlugins.xml
-
-
Click OK.
-
Click the SuiteCloud IDE Plug-in plug-in, and click Install.
-
Restart WebStorm.
Update SuiteCloud IDE Plug-in for WebStorm
If you already have the SuiteCloud IDE Plug-in installed, you can update it to the latest version right from WebStorm.
To update SuiteCloud IDE Plug-in for WebStorm:
-
Launch WebStorm.
-
Depending on your operation system, do one of the following:
-
If you're on Windows OS, press Ctrl+Alt+S. You can also select File > Settings....
-
If you're on macOS, press Cmd+,. You can also select WebStorm > Preferences.
-
-
Select Plugins.
-
Use the search bar to find the plug-in, or use the Show filter after clicking the three dots.
-
In the list, click SuiteCloud IDE Plug-in.
If there's an update available, you'll see the Update button.
-
Click Update, then restart WebStorm.
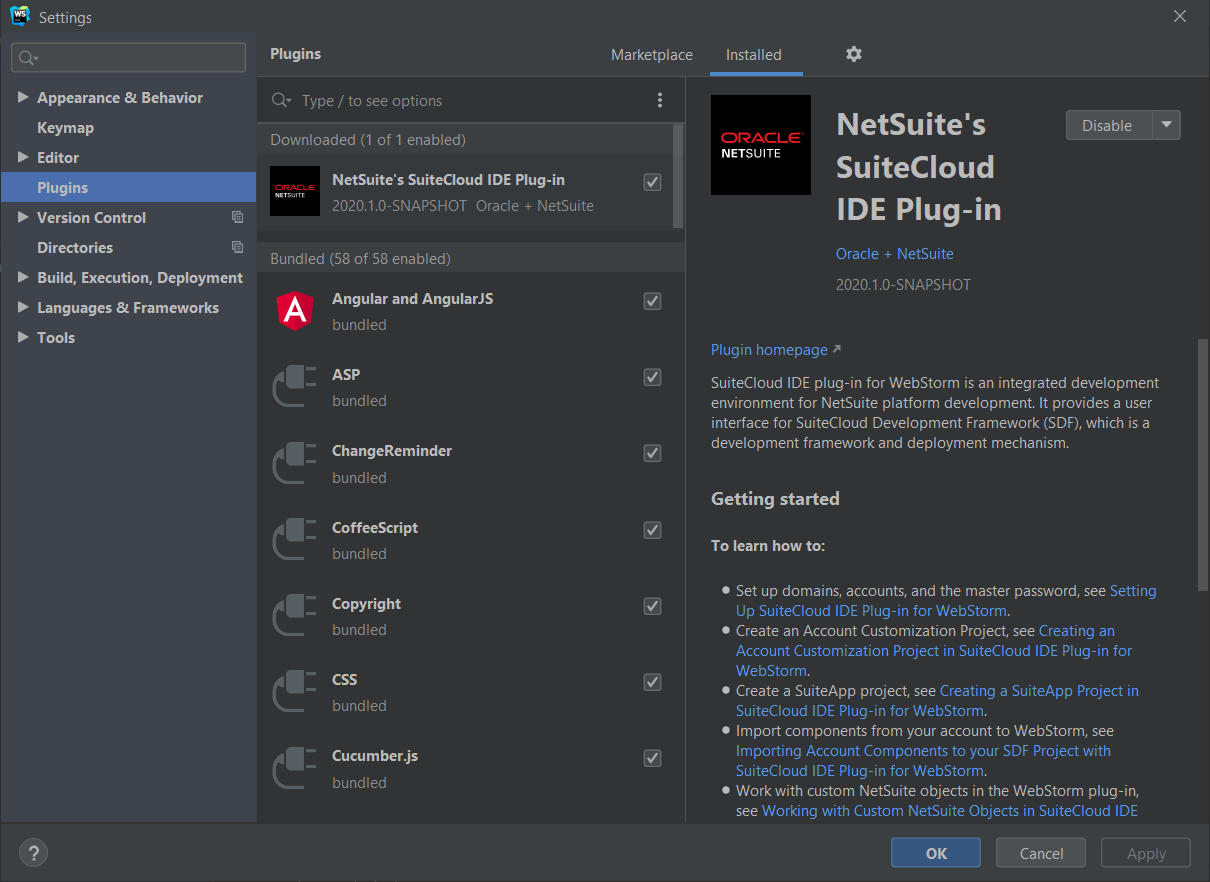
Verify the Installation of SuiteCloud IDE Plug-in for WebStorm
When you install SuiteCloud IDE plug-in for WeStorm, information about the SuiteCloud IDE version is added. You can check this information any time.
To verify the installation of SuiteCloud IDE plug-in for WebStorm:
-
Launch WebStorm.
-
Depending on your operation system, do one of the following:
-
If you're on Windows OS, press Ctrl+Alt+S. You can also select File > Settings....
-
If you're on macOS, press Cmd+,. You can also select WebStorm > Preferences.
-
-
Select Plugins.
-
In the list, click SuiteCloud IDE for WebStorm.
You'll see the WebStorm plug-in version information.