Configuring the WMS Printer Driver and Carrier Integrator Application
Before you begin this procedure, verify that the Show Internal ID preference is set on your NetSuite WMS account. Using the Administrator role, go to Home > Set Preferences > Defaults. On the General subtab, in the Defaults section, check the Show Internal IDs box, and then click Save.
You can update the default settings for the printer or carrier to suit your business requirements.
To configure the WMS Printer Driver and Carrier Integrator application:
-
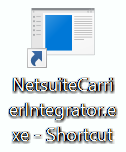
On your computer's desktop, double-click the NetsuiteCarrierIntegrator.exe - Shortcut icon.
-
From the application's menu, go to Settings > Configuration.
-
On the Configuration Settings window, select or enter values for the settings you want to configure in the following sections:
-
After completing your configurations, click Save.
Record Types
In the Record Types section, in the ID fields, enter the internal ID for each NetSuite WMS record.
To obtain the internal ID of a record, log in to your NetSuite WMS account using the Administrator role. Go to Customization > Lists, Records, & Fields > Record Types. From the list of records, view or copy the internal ID of the following NetSuite WMS records:
-
WMS Ship Manifest
-
WMS Label Printing
-
WMS Commodity Shipment
-
WMS Open Task
-
WMS External Labels
Flags
In the Flags section, check the box next to each of the features you want to enable for one or more carriers:
Features for UPS Only:
-
International Shipment - Shows the ship manifest data in the worldship.csv file for orders that you want to ship internationally.
-
Get Shipment Data - Generates the worldship.csv file that is used to communicate data from NetSuite WMS to the parcel carrier shipping software. The application pulls data from NetSuite WMS and writes it back to the worldship.csv file. It also pushes data from the worldship.csv file to the parcel carrier software.
-
Update UPS Tracking# - Reads the tracking number from the UPS Access database and writes it back to NetSuite records.
Other Features:
-
Update FedEx Tracking# - Reads the tracking number from the FedEx Access database and writes it back to NetSuite records.
-
BarTender Labels Generation - Generates a text file that the BarTender application uses to format and print labels.
-
Zebra Label Generation - Generates shipping labels for the Zebra printer.
If you check this setting, specify the name of the Zebra printer in the Printer Settings section.
Printer Settings
Before you configure printer settings, verify that you have configured a laser printer and a label printer as network printers and you know the name of both printers. If a printer is properly configured as a network printer, it will have an IP address identified as a port in its properties. For more information, see the help content available on your computer.
In the Printer Settings section, enter the name of the configured network printer you want to use in the following fields:
Be sure to enter the same printer names that are specified on your computer.
-
Zebra Printer - Name of the Zebra label printer
-
Laser Printer - Name of the printer for documents such as pick and pack reports
BarTender Labels Generation
You can set your preference in this section only if you have checked the BarTender Labels Generation box in the Flags section.
-
Static Printers - The default option that enables you to always use the printer configured in the BarTender Commander.
-
Dynamic Printers - Lets you select a printer on the NetSuite WMS user interface.
ODBC Connection
In each of the following fields, set the path for the folder in which you want to save files for one or more carriers. To set a path, click Upload, and then on the popup window, navigate to the appropriate folder. After you have located the folder, click OK to close the popup window and set the path in the field.
-
WorldShip Path - The folder in which you want to save the worldship.csv file. You can set this field only if you have checked the Get Shipment Data box in the Flags section.
-
Label Path - The folder in which you want to save the external label files and picking or packing reports.
-
Image Path - The folder in which you want to store the packing list logos.
-
UPS MDB Path - The UPS database location in which you want to store UPS tracking information. You can set this field only if you have checked the Update UPS Tracking# box in the Flags section.
-
FedEx MDB Path - The FedEx database location in which you want to store FedEx tracking information. You can set this field only if you have checked the Update FedEx Tracking# box in the Flags section.
Other Settings
In the Other Settings section, enter values for additional settings in the following fields:
-
Site ID - The internal ID for your warehouse location. If you have only one warehouse location configured in your NetSuite WMS account, or if you do not want to filter data by warehouse location, leave this field blank.
To view the internal ID for your warehouse location, log in to your NetSuite WMS account using the Administrator role. Then, go to Setup > Company > Classifications > Locations.
-
Interval - The time period, in milliseconds (1000 mS = 1 second), that you want to pass between each run of the shipping integration.
Based on the interval you define, the application runs a scheduled script that identifies orders that are packed and ready for shipping.