Creating a Bill of Distribution
After you set up categories and define distribution networks, you need to create bill of distribution records. A bill of distribution defines the relationship between locations within a network and determines how each location sources materials.
Distribution Resource Planning is part of Time-Phased Planning which is no longer supported. This functionality has been replaced by Planning Rules in Supply Planning (MRP).
For example, the network for Wolfe International includes the following:
-
Factory 1
-
Warehouse 1 (East Coast)
-
Warehouse 2 (Midwest)
-
Warehouse 3 (West Coast)
-
Wolfe sets up bill of distribution records to determine the way the East Coast warehouse will source its goods. For example, supply may be sourced from warehouse to warehouse, or factory to warehouse. Bills of distribution can be created to define the required scenarios.
For the preceding example, all three warehouses receive goods from Factory 1. Therefore, three bills of distribution need to be created. One for each warehouse that needs goods from the factory.
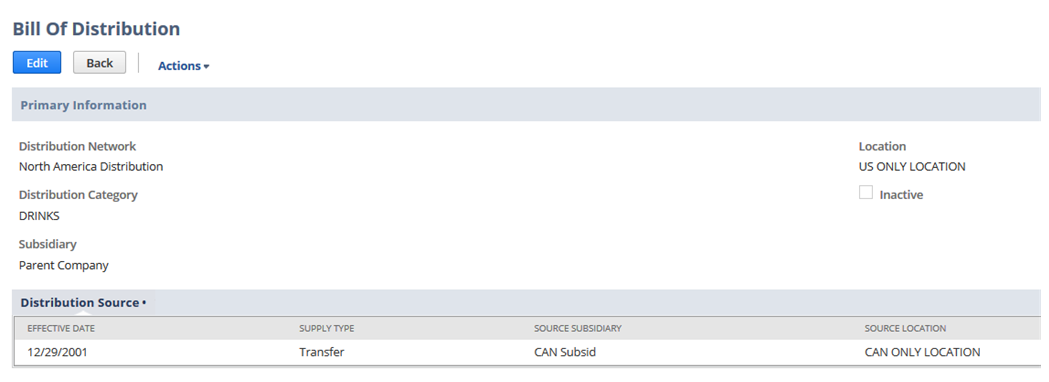
The bill of distribution defines the distribution network, category, subsidiary and location. This information defines where the goods will be received. Then, set up distribution sources that specify the source location and subsidiary, as well as lead time and safety time. This information defines where the goods will be supplied from.
The following screenshot shows a bill of distribution that defines when DRINKS are received into the US ONLY location of the Parent Company. Those drinks will arrive from the Canadian Subsidiary source in the form of a transfer.
To create a bill of distribution:
-
Go to Lists > Supply Chain > Bill Of Distribution > New (Administrator).
-
Select a distribution network. The source location and the receiving location must both be members of the network you select.
-
Select a distribution category.
-
Select the receiving subsidiary.
-
Select the receiving location.
-
Check the Inactive box if you do not want this bill of distribution to show in lists.
-
Select the source subsidiary.
-
Select the source location.
Each source location has an effective date defined.
-
Enter the appropriate lead time. This is the amount of time required to transfer the item from the source to the destination location.
-
Enter the appropriate safety time. This amount is the buffer time required for a transfer in addition to the lead time. For example, this buffer can account for transportation variations.
-
Click Save.