Setting Up File Drag and Drop
Set up the File Drag and Drop SuiteApp using the Setup Assistant.
The Setup Assistant puts commonly used File Drag and Drop preferences in one place to make setup easier for account administrators.
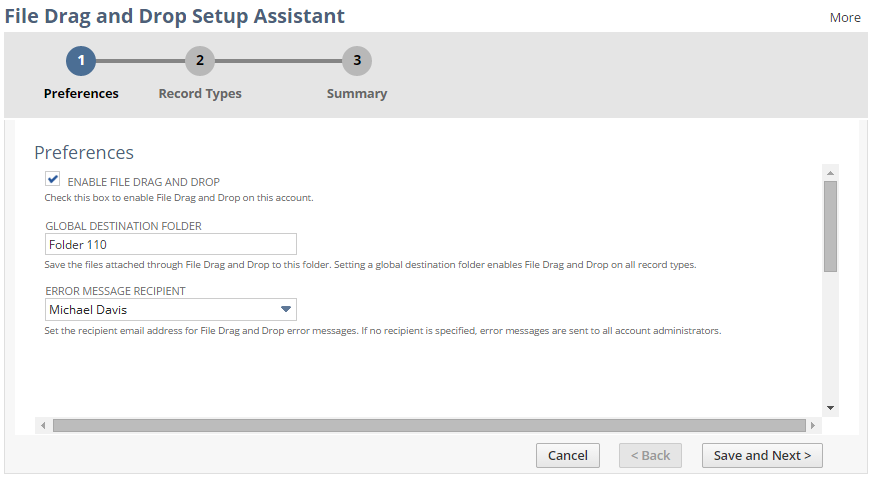
The following screenshot shows the File Drag and Drop Setup Assistant:
You don't have to do all the steps to finish the setup. You can click the number above each step to go to a specific configuration page.
To set up File Drag and Drop using the Setup Assistant:
-
Go to Setup > Customization > File Drag and Drop Setup.
-
Note:
This step covers the general preferences for File Drag and Drop. To set your custom preferences, see Setting File Drag and Drop User Preferences.
On the Preferences page:
-
Provide values for the following fields:
-
Enable File Drag and Drop - Check this box to enable File Drag and Drop on this account.
If you haven't set a destination folder, the drop zone will not show up on any record page. You must set a global or record-specific destination folder to see the drop zone on record pages.
-
Global Destination Folder - Save the files attached through File Drag and Drop to this folder.
Setting a global destination folder will enable File Drag and Drop on all record types.
-
Error Message Recipient - Set the recipient email address for File Drag and Drop error messages. If you don't set a recipient, error messages go to all account administrators.
-
-
Click Save and Next.
-
-
On the Records page:
-
Click New File Drag and Drop Record Type to enable File Drag and Drop on a specific record.
-
Provide values for the following fields:
-
Record Type - Choose the record type where you want to turn on File Drag and Drop.
-
Folder Name - Click the field to open the folder browser, then pick the default folder for files you add to the record.
-
Use Folder Pattern - Check this box if you want File Drag and Drop to create unique folders using the folder pattern and save uploaded files there.
-
Folder Pattern - Enter the folder path where you want to save files you upload.
You can use placeholders in curly braces with your folder name to create a folder pattern. Placeholders are not case sensitive.
-
subsidiaryId - Saves files to a folder using the current user's subsidiary ID.
-
departmentId - Saves files to a folder using the current user's department ID.
-
roleId - Saves files to a folder using the current user's role ID.
-
recordId -Saves files to a folder using the ID of the record where you attach the file.
If the folder pattern points to a destination folder that does not exist, the folder will be created when you drop a file in the drop zone.
Important:The record ID for a new record is not available until the record is saved. Therefore, File Drag and Drop creates a temporary folder name for files uploaded to new records.
Sub-records, such as shipment details, are not supported for the selected record types.
When you save the record, the system replaces the folder name with the permanent record ID.
The following table shows examples of folder patterns and the resulting system-generated folder paths:
Folder Pattern
Actual Folder Path
\HR Documents\Subsidiary
{subsidiaryId}\Department{departmentId}\Record{recordId} \HR Documents\
Subsidiary4\Department8\Record22 \HR Documents\Subsidiary
{subsidiaryId}-{departmentId}-{recordId} \HR Documents\Subsidiary4-8-22
\HR Documents\Employee{recordId}
\HR Documents\Employee22
-
-
-
Click Save and Next.
Note:If you have set a global destination folder, File Drag and Drop is enabled on all record types.
For record types you have specifically enabled for File Drag and Drop, attachments are saved in the folders you set on the Record Types page. Files attached to all other record types are saved in the global destination folder.
-
-
On the Summary page, verify that the preferences you have entered are correct, and then click Finish.