Select Supported Touch Points
An SSP application can contain customizations for one or more web store touch points. After you have uploaded SSP application files to the file cabinet, you can select the supported touch points on the SSP Application record and link them with the URL of the .ssp files that contain the customizations for each touch point. You can define parameters for each URL.
After selecting supported touch points on the SSP application record, you link your site or domain to one or more of the supported touch points by defining them on site and domain records.
Supported touch points include the following:
-
Log In
-
Log Out
-
Proceed to Checkout
-
Register
-
View Cart
-
View Customer Center
-
View Homepage
If you need to remove touch points from an SSP application or from a website, see Remove Touch Points.
To select supported touch points on an SSP application:
-
Go to Commerce > Hosting > SSP Applications.
-
Click Edit next to an SSP application.
-
Click the Supported Touch Points subtab.
-
Select each touch point in the Name column. The Entry Page column shows the URL that points to assets in the SSP application.
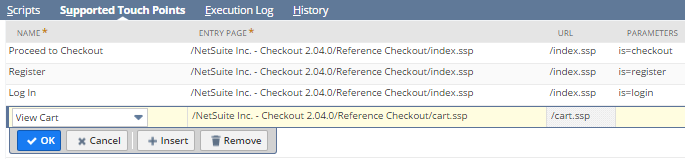
Note the following:
-
When installing a reference implementation, supported touch points are displayed by default.
-
If you use the website preference, Password Protect Entire Site, then the Log In touch point must be associated with an .ssp file. Other file types, such as HTML will not display in the website when used in this context.
-
-
In the Entry Page field, enter or select the page to be inserted at the selected entry point.
-
Enter any URL parameters to be used.
All available touch points are displayed in the list. Note that some SSP applications are not compatible with every touch point. For more information about touch points available for specific reference implementations, see Set Up SCA Developer Tools.
After you have selected touch points for the SSP application, you can link the SSP application to your website. For more information, see Link a Website or Domain to an SSP Application.
Related Topics
- Enable Required Features for SuiteScript 1.0 SSP Applications
- Create a SuiteScript 1.0 SSP Application Record
- Upload SSP Application Files
- Set Execute as Role Permissions for .ss and .ssp Files
- Change SSP Application Precedence
- Sample SSP Application Code (SuiteScript 1.0)
- SuiteScript 1.0 SSP Applications
- Debug a SuiteScript 1.0 SSP Application
- Create and Use SSP Applications