Custom Form Deployment Process (In Detail)
You begin the custom form deployment process by going to the Upgrade Checklist.
To access the Upgrade Checklist for custom transaction forms, go to Customization > Forms > Transaction Forms, and click the Upgrade Checklist link. To access the Upgrade Checklist for custom entry forms, go to Customization > Forms > Entry Forms, and click the Upgrade Checklist link. If you have already upgraded forms in your account, the link is called Return to Upgrade Checklist.

If you do not see this link in the upper right of the custom transaction forms or custom entry forms list, it means your account does not include any custom forms that require upgrading.
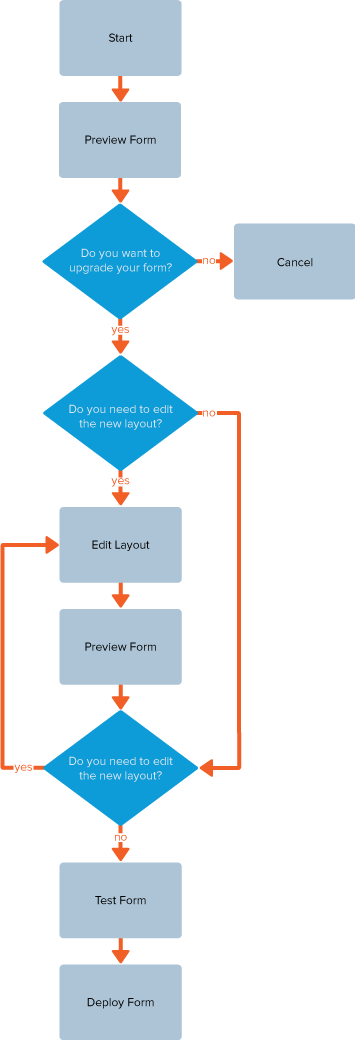
The following diagram shows the entire workflow for deploying upgraded forms.
To enlarge the diagram, press Ctrl+Plus Sign. To return your screen to its usual size, press Ctrl+Minus Sign.
As of 2012.2, the upgrade process has been simplified to remove the Skip Upgrade option.
The following steps outline the process for deploying upgraded forms.
-
Open the Upgrade Checklist. Go to Customization > Forms > Entry Forms [or Transaction Forms] [or Transaction Forms].
-
In the Preview Forms column, click the link for the custom form.
-
To edit the new layout of the form, click Edit Layout, make changes, and click Save. Preview the form by clicking the link for the form in the Preview Name column.
-
When you have finished editing the form layout, click Enable Test Mode. Test the form to ensure that you get the expected output.
-
When testing is complete, click Disable Test Mode.
-
To deploy the form, click the Deploy Form link next to the form
After reviewing the overall form deployment workflow, go to Deploying Upgraded Custom Forms to begin the form upgrade and deployment processes.