Dimension Definition
In the template workbook, create a new worksheet for each dimension in your application. You can use the worksheets provided in the templates, including the Sample application template, as your guide.
Follow this workflow for setting up a dimension worksheet in your application template workbook:
Define the Worksheet Name
Define the worksheet name in the Excel worksheet tab. For a dimension worksheet name, use the dimension name prefixed with "Dim.". For example, for the Scenario dimension, you would name the worksheet Dim.Scenario. For example:
Define the Worksheet Type
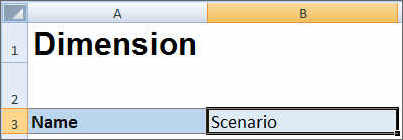
In cell A1 in the dimension worksheet, type Dimension for the worksheet type. In Figure E-3, cell A1 contains the worksheet type, Dimension.
Figure E-3 Worksheet Type and Dimension Name Shown in a Dimension Worksheet of Application Template

Define the Dimension Name
In the dimension worksheet, type the dimension name. In Figure E-3, cell B3 contains the dimension name, Scenario.
If the dimension name that you provide doesn't exist, then a new custom type dimension is automatically created when you create the application.
Define Dimension Properties
You can define dimension properties directly on the dimension worksheet. Using the Type property, you can specify user-defined names for the Account, Year, and Entity dimensions and then map them to the Accounts, Year, or Entity dimension types. You can also define any other custom dimensions as you require. The templates in the template zip file includes example Accounts, Year, and custom dimensions and their properties to guide you.
Note:
You can create the FreeForm app with no dimensions or any other application properties (such as attribute dimensions, security (access permissions), and substitution variables) in the workbook.
Table E-3 Dimension Properties
| Property | Required | Value Type | Default Value | Valid Values | Comments |
|---|---|---|---|---|---|
|
Name |
Yes |
Text |
Name of the dimension |
||
|
Type |
No |
Text |
Account Period Entity |
If this property is omitted, or no value is supplied, then this dimension is interpreted as a custom dimension. |
|
|
Description |
No |
Text |
An optional dimension description. |
||
|
Alias |
No |
Text |
None |
The alias for the dimension |
Aliases are alternate name for dimension members. |
|
Alias Table |
No |
Text |
No |
The alias table |
The default alias table for the application. |
|
Hierarchy Type |
No |
Text |
Not Set |
Not Set Stored Dynamic Multiple |
Available for dimensions bound to an aggregate storage cube. Aggregate storage dimensions are automatically enabled to support multiple hierarchies. The first hierarchy in a multiple hierarchy dimension must be Stored. |
|
Density |
No |
Boolean |
Sparse |
Dense | Sparse |
Sparse dimensions lack data values for the majority of member combinations. Dense dimensions have data values for the majority of member combinations. |
|
Two Pass Calculation |
No |
Boolean |
No |
Yes | No |
Recalculate values of members based on values of parent members or other members. Available for Account and Entity members with Dynamic Calc or Dynamic Calc and Store properties. |
|
Apply Security |
No |
Boolean |
No |
Yes | No |
Allow security to be set on the dimension members, per the security laid out in the Security worksheet in the application template. |
|
Partial Share |
No |
Boolean |
No |
Yes | No |
Alternate hierarchies are supported in the Entity dimension. One entity can have multiple parents, and contribute differently to each parent. These members are referred to as partially shared entities, where only a part of input data is shared across all instances of the entities. |
|
Data Storage |
No |
Text |
Store |
Dynamic Calc and Store Dynamic Calc Store Never Share Shared Label Only |
Data storage properties define where and when consolidations are stored. For example, by default, members are tagged as Store. |
|
Performance Order |
No |
Numeric |
None |
A positive or negative number; for example: 1 -1 |
Evaluation order of dimensions in the application. |
|
Evaluation Order |
No |
Numeric |
None |
A positive or negative number; for example: 1 -1 |
The order of your dimensions determines how your data calculations will perform. Evaluation Order enables you to specify which data type prevails when a data intersection has conflicting data types. |
|
Display Option |
No |
Text |
Member Name or Alias |
Member Name or Alias to display members or aliases. Member Name:Alias displays members on the left and aliases on the right. Alias:Member Name displays aliases on the left and members on the right. |
Set application default display option. |
Define Members
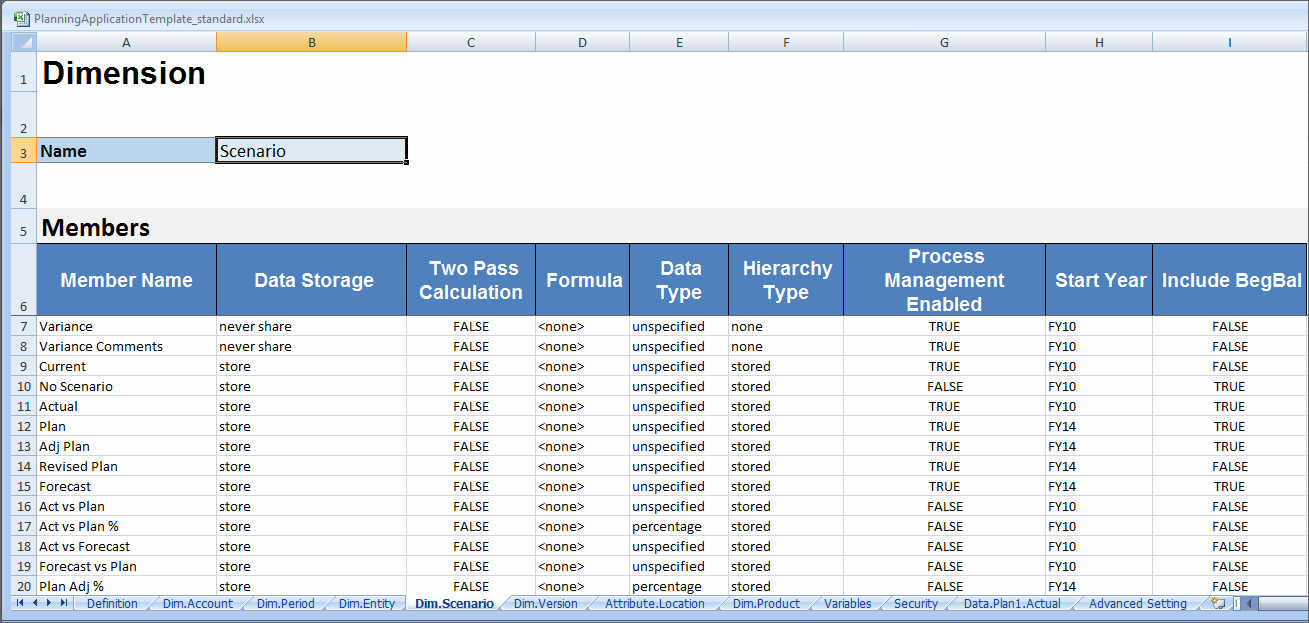
In the dimension worksheet, under the Members heading in (cell A5 in the Planning application template), add members and their properties. Your list of members should conform to the format described in Importing and Exporting Data and Metadata. You may add columns only for required properties. Any missing properties will be added based on application, cube, and dimension defaults.
Figure E-4 Example Dimension Worksheet for the Scenario Dimension in a Standard Planning Application
